As your website evolves, you may need to update your website monitors powered by DéjàClick scripts. This page explains how to download scripts from AlertSite so that you can edit them and upload the updated scripts back to AlertSite.
Download a script
From AlertSite UXM
-
Open the settings of your DéjàClick monitor.
-
Click Download Script and save the file on your computer.
-
Launch DéjàClick.
-
Upload the downloaded script to DéjàClick:
-
In Chrome: Click on the toolbar and and browse for the downloaded script (XML file).
-
In Firefox: Click
 Open a recorded script on the toolbar and browse for the downloaded script (XML file).
-
From DéjàClick
-
Log in to AlertSite. To do this:
-
In Chrome: Select > Sign In on the DéjàClick toolbar.
-
In Firefox: Click
 on the DéjàClick toolbar, and select AlertSite Login.
-
-
Enter your AlertSite login and password, and click OK.
-
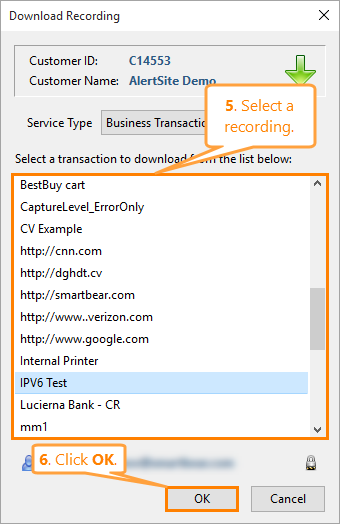
Download the recording:
-
In Chrome: Click on the DéjàClick toolbar.

-
In Firefox: Click
 and select Download Recording.
-
-
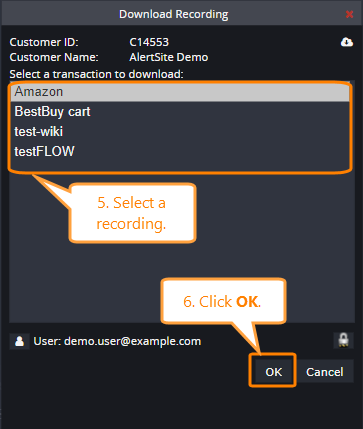
In the list, select the monitor, the script of which you want to download, and click OK.
Chrome Firefox -
If the script is password-protected, you will be prompted to enter the password.
Edit the script
After downloading a DéjàClick script from AlertSite, you can modify the script as required, for example, change the inputted text, add validations, change pause intervals, and so on. To learn more about editing DéjàClick scripts, see:
Upload the script
Before uploading a DéjàClick script back to AlertSite, you must replay it locally to make sure it runs correctly. To replay a script, click ![]() on the DéjàClick toolbar.
on the DéjàClick toolbar.
After a successful replay, you can upload the script as follows:
-
On the DéjàClick toolbar:
-
In Chrome: Click .

-
In Firefox: Click
 and select Upload Recording.
-
-
To update an existing monitor:
-
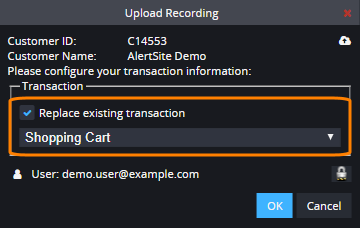
Select the Replace existing transaction check box.
-
In the list, select the monitor the script of which you want to replace, and click OK.
Chrome Firefox -
-
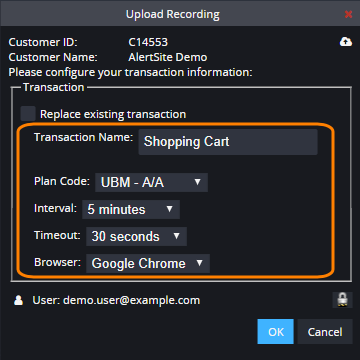
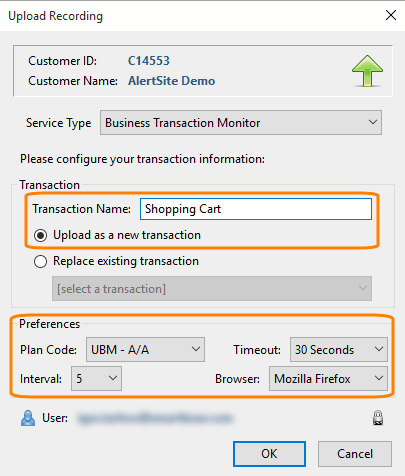
To create a new monitor, specify the monitor options:
-
If you are using Firefox, select Upload as a new transaction.
If you are using Chrome, continue with the monitor details. -
Transaction Name – Give this monitor a name.
-
Plan Code – Select a billing plan for this monitor.
Note: For internal websites monitored only from private locations, select the corresponding VM Node, InSite, or PrivateNode EndPoint plan. -
Interval – The monitoring interval.
-
Timeout – The timeout for network activities, such as a page load.
-
Browser – The browser that will be used to run the monitor at AlertSite locations.
Chrome Firefox -
-
Click OK.
See Also
Creating Transaction Monitors in Chrome
Creating Transaction Monitors in Firefox
Transaction Monitors


 Configuring Scripts in Chrome
