| Note: | To use this guide, you need to know how to use AlertSite DéjàClick transaction recording tool. If you do not have the DéjàClick toolbar in your Firefox browser, go to the DéjàClick Downloads page to download the DéjàClick add-on and additional modules (TrueScreen and ImageMagick). If you have never used DéjàClick before, please go to the DéjàClick Quick Start Guide. After you have become comfortable with recording DéjàClick transactions, you will be able to move on to this more advanced feature. |
Overview
To determine if Flash or other images on the page are displayed to your website visitors as expected, DéjàClick provides Image Validation. The simple-to-use interface, just like Keyword Validation, is accessed through the Validation Panel on the DéjàClick toolbar. Image comparison is done on the actual image in order to validate exactly what appears on the screen.
Prerequisites
-
Firefox V3.5 or later (released versions)
-
DéjàClick V2.4.1.0 or later
-
DéjàClick TrueScreen™ V1.2.0.0 or later
-
ImageMagick® Software Library
ImageMagick
ImageMagick is a software library that must be installed on the system where record/replay will be taking place in order to select images from your page. To install ImageMagick:
-
Go to DéjàClick Downloads.
-
Click the ImageMagick Binary Releases Download Page link.
-
Select the appropriate download link from the table of download in the Binary Release section.
-
Windows users: If you are not sure which version to use, choose the first one on the list, described as Win32 dynamic at 16 bits-per-pixel.
-
Linux users: Check through your system's Package Manager to see if it's already installed on the system, as it is included with many Linux distributions.
-
-
After installing ImageMagick, restart Firefox.
Image Selection during Recording
You can select any part of the page, such as .jpg, Flash, Java applet, and so on, and it will be validated as an image. DéjàClick will do an image comparison on that area of the page with the saved image to validate it when the script is replayed.
| Note: | Image Validation is not recommended for HTML text validation due to the variation in fonts among browsers. To validate HTML text (as opposed to text that is part of an image), use Keyword Validation. To verify that the area you want to validate is an image, right-click on the area. If the menu displayed contains View Image, Copy Image, About Adobe Flash Player, and so on, then you can use Image Validation here. |
While recording or replaying your transaction, the ![]() icon on the DéjàClick toolbar will be activated (colorized) after each step. Click the icon to open the Validation bar:
icon on the DéjàClick toolbar will be activated (colorized) after each step. Click the icon to open the Validation bar:

Click the Validation Type drop-down list to display the selections:
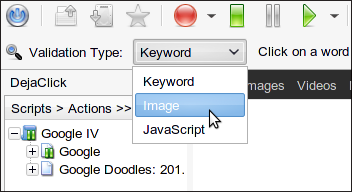
If DéjàClick TrueScreen and the ImageMagick library are not installed, the Validation Type drop-down list will not include Image.
To add an Image Validation:
-
Select Image from the Validation Type drop-down list.
-
The Validation bar will appear along the top, displaying the location as an X/Y axis (default
x:75, y:15) and selected area pixel size150px x 80px), along with the Add... and Help buttons. -
The window will be shaded in transparent dark gray with a "light-box" appearing on the screen, indicating Image Validation mode:
-
-
Click and drag the mouse to expand the box around a selected area.
-
Drag and re-size the box using the "handles" to outline just the image you want to validate.
-
The X/Y axis and selected area size values will change as the box size and location are changed.
-
-
Once you have outlined the area you want, click the Add... button in the Validation bar to display the Add Image Validation dialog.
-
Enter a name in the Label field and click OK.
-
Repeat the process from the click-and-drag step to the Add... step to add more Image Validations on the same page.
-
-
To continue to the next step in your recording, click
 to close the validation panel.
You can switch to adding other validations (Keyword or JavaScript) by selecting a different option from the Validation Type drop-down list at any time.
To edit or remove an Image Validation:
-
After the recording or replay is stopped, open the Properties sidebar.
-
Expand the Script section at the top, then click on the Action or Event where the Image Validation was added.
-
In the Action or Event property at the bottom, click Image Validation to open the property panel and list the added Image Validation
-
Click on the name to highlight it and activate the buttons.
-
Click Edit to display the Edit Image Validation dialog.
Replay Recording on the Desktop
Replay your script from the start to verify that the recording functions correctly and does not produce validation errors.
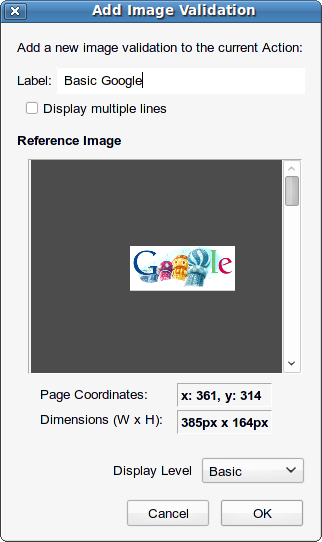
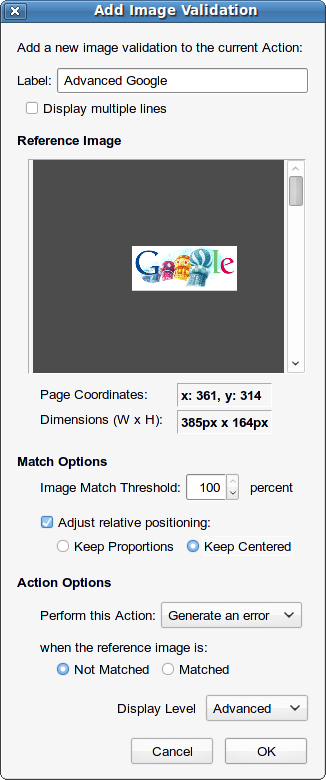
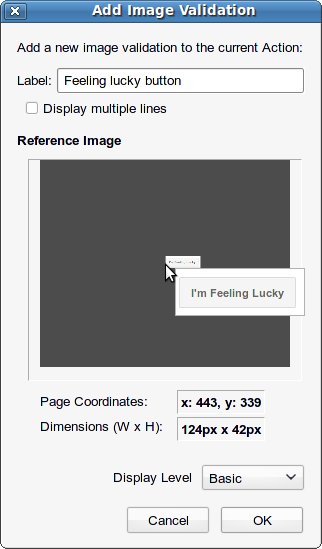
Note that the Add/Edit Image Validation dialog displayed will match the DéjàClick Display Level, Basic or Advanced, that you are currently operating in. You can change the Display Level from the Add/Edit Image Validation dialog. The Advanced dialog allows you to set additional options, depending on your requirements. You can view the reference image at actual size by clicking on it in the dialog:
|
Basic |
Advanced |
Actual size image |
Once your script has successfully replayed on your desktop, verify that it will also run remotely by clicking ![]() on the DéjàClick toolbar and selecting a location for the test. This will give you assurance that the script will function correctly on the monitoring servers after you upload it to your AlertSite account.
on the DéjàClick toolbar and selecting a location for the test. This will give you assurance that the script will function correctly on the monitoring servers after you upload it to your AlertSite account.
Upload to AlertSite Console
To upload a recorded transaction to your account, click ![]() on the DéjàClick toolbar and select AlertSite Login from the drop-down menu. Enter your login credentials, then click OK.
on the DéjàClick toolbar and select AlertSite Login from the drop-down menu. Enter your login credentials, then click OK.
Click ![]() again and select Upload Recording from the drop-down menu.
again and select Upload Recording from the drop-down menu.
In the Upload Dialog that is presented, enter a name for your transaction and click OK, and AlertSite will begin using this transaction script to monitor your web site from your default monitoring locations.
Troubleshooting
If replay produces validation errors, switch to Advanced Display Level and try adjusting the Match Options. After each change, make sure the script plays back successfully on your desktop. If it does, then verify that it runs at a remote location using Test On Demand by clicking the ![]() icon on the DéjàClick toolbar and selecting a location for the test.
icon on the DéjàClick toolbar and selecting a location for the test.
Match Options
By default, the relative positioning of the image is set to Keep Proportions. If you are getting image validation errors, try the following modifications, replaying locally after each change first. If replay is successful on your desktop, replay with Test On Demand:
-
Select the check box Adjust relative positioning and change the relative positioning of the image to Keep Centered.
–or–
-
Clear the Adjust relative positioning check box.
–or–
-
As a very last resort, decrease the Image Match Threshold percentage to no less than 96%.
Under normal circumstances, the default settings are recommended.
Action Options
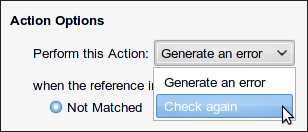
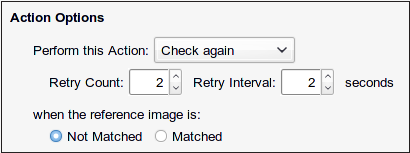
Advanced Display Level also provides Action Options that let you either Generate an error if the image is matched or not matched or to Check again with a Retry Count and Retry Interval if the image is matched or not matched. Check again is especially useful if your page has rotating images, slide show, and so on, that you want to validate.
 |
 |
Flash Options
If you are validating a Flash image and if, during recording, moving the mouse over the screen does not activate DéjàClick TrueScreen:
-
Switch to the Advanced Display Level.
-
Click on the script name in the DéjàClick Properties sidebar script tree.
-
Scroll down and click Flash Options to expand the Flash configuration panel. Select the Override Flash WMODE attributes check box. You should not need to change anything else in that panel.
-
Replay locally on your desktop, and if successful, replay from a remote location by using Test On Demand.
If your troubleshooting efforts have not been successful and you are an AlertSite customer, contact AlertSite Support.


