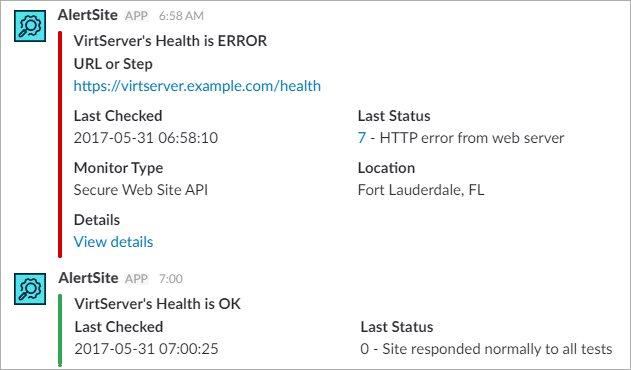
Slack is a team communication tool that provides real-time messaging. AlertSite can be integrated with Slack, so that you can receive updates in a Slack channel whenever a monitor alert is triggered in AlertSite.
Slack alerts are supported at all AlertSite global locations. Private locations can use Slack alerts starting from v. 2.1.2.
About Slack templates
The key point in getting Slack alerts to work is to create Slack-compatible alert templates in AlertSite. This is required because the default alert format used by AlertSite is not recognized by Slack. You will need two templates – one for “error” messages and another for “all clear”. Remember that custom templates apply only to recipient groups, so you will also need to create a recipient group for Slack and your custom templates. This guide will walk you through all those steps.
The alert templates must use the Slack message format. You can create simple text messages using the text field:
{
"username": "AlertSite",
"icon_url": "https://smartbear.com/SmartBear/media/images/icons/AlertSite-icon.png",
"text": "$DESCRIP is ERROR at $LOCDESC as of $DTSTATUS."
}
or add attachments and fields to create richly-formatted messages like those on the image at the top of this page.
{
"username": "AlertSite",
"icon_url": "https://smartbear.com/SmartBear/media/images/icons/AlertSite-icon.png",
"attachments": [
{
"color": "danger",
"title": "$DESCRIP is ERROR at $LOCDESC",
"fallback": "[PROBLEM] $DESCRIP is ERROR at $LOCDESC as of $DT_STATUS",
"fields": [
{
"title": "Last Checked",
"value": "$DT_STATUS",
"short": true
},
{
"title": "Last Status",
"value": "$STATUS - $MSG",
"short": true
}
]
}
]
}
| Note: | The actual templates used in this guide can be found in the Creating Alert Templates section below. |
If you want to create your own templates:
-
Read about Slack message formatting.
-
Use the Slack message builder to design and preview your template.
-
View the list of AlertSite template variables that can be used in alerts, such as
$STATUSor$DESCRIP.
Create a Slack webhook
First you need to set up an incoming webhook integration in Slack:
-
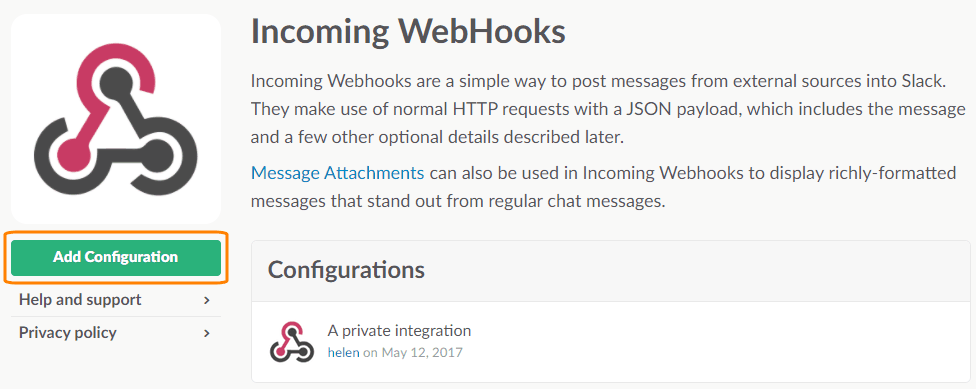
Open the Slack app page for Incoming WebHooks:
-
If you are signed in to multiple Slack workspaces, select the desired workspace in the top right corner of the page.
-
Click Add Configuration.
-
Select the Slack channel where you want to post alerts, then click Add Incoming WebHooks integration.
-
This will open the webhook configuration page. Scroll down and copy the Webhook URL. It looks like this:
https://hooks.slack.com/services/TXXXXXXXX/BXXXXXXXX/XXXXXXXXXXXXXXXXXXXXXXXX
Copy this URL somewhere – you will need to specify it later in AlertSite.
Configure AlertSite
Create alert templates
Next, create alert templates in the format recognized by Slack. Let’s start with an “error” template:
-
In AlertSite UXM, go to Alerts > Template Editor.
-
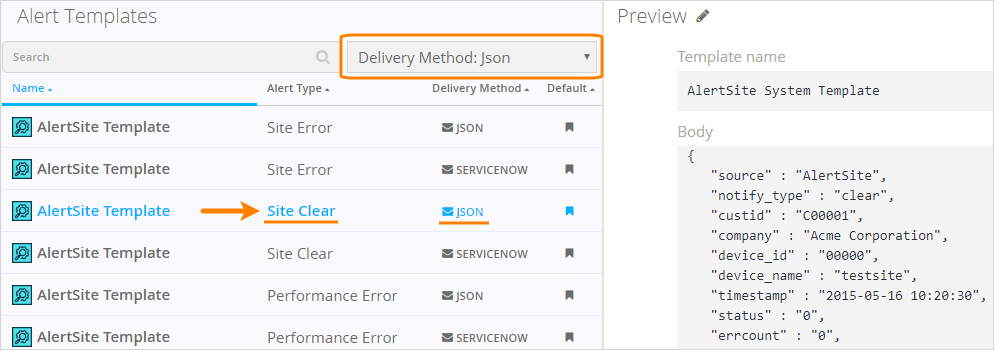
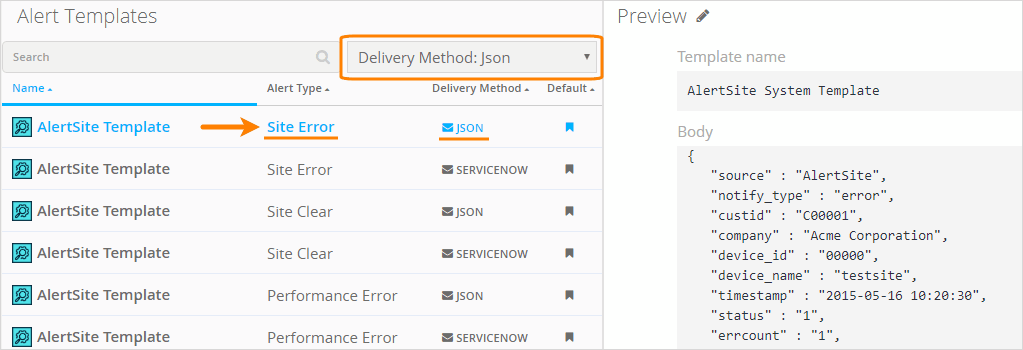
Filter the list by Delivery Method: Json.
-
Select an AlertSite Template for Site Error that is labeled as JSON in the Delivery Method column.
-
In the editor, click the template text to switch to the edit mode.
-
Change the template name to Slack - error.
-
In the Body field, paste the following template:
-
Click Save As.
Now, let’s add a “clear” template:
-
Select an AlertSite Template for Site Clear that is labeled as JSON in the Delivery Method column.
-
In the editor, click the template text to switch to the edit mode.
-
Change the template name to Slack - clear.
-
In the Body field, paste the following template:
-
Click Save As.
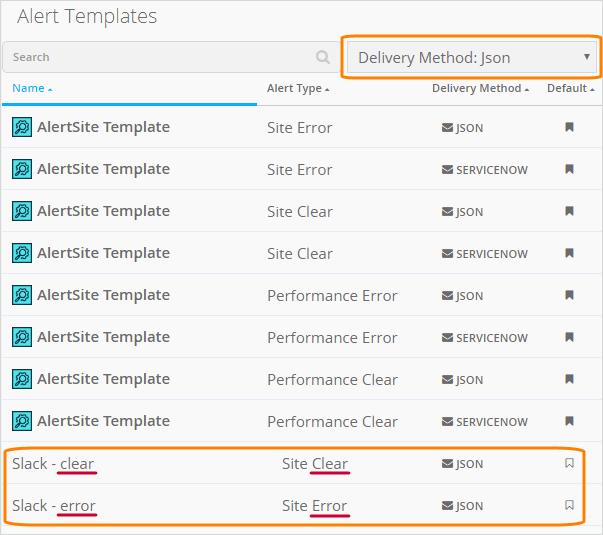
After completing these steps, you should have custom templates for errors and “clear” alerts:
| Note: | These templates are just examples. You can design your own templates as explained above. |
Add a Slack recipient
Once you set up alert templates, you can add Slack as an alert recipient in AlertSite:
-
In AlertSite UXM, go to Alerts > Alert Recipients and click New Recipient.
-
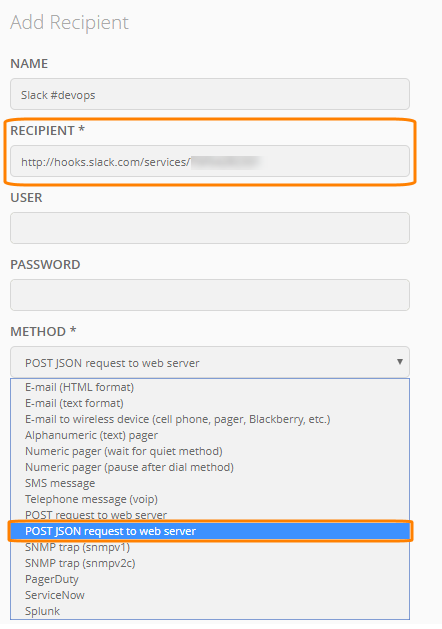
In the dialog, change Method to POST JSON request to web server and enter your Slack webhook URL in the Recipient field.
Note: There are two similar recipient types, POST request to web server and POST JSON request to web server. Make sure to use the POST JSON one. -
Click Add.
-
Click next to the created recipient.
-
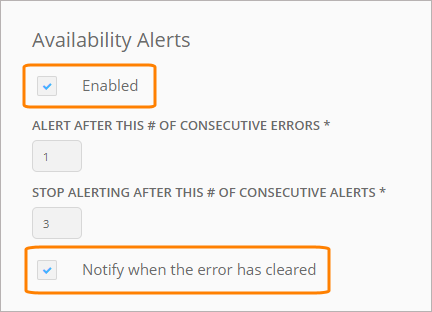
In the Availability Alerts column, enable availability alerts and also select the Notify when the error has cleared check box. Optionally, set the number of errors after which alerting should start or stop.
-
Click Save.
Create a recipient group
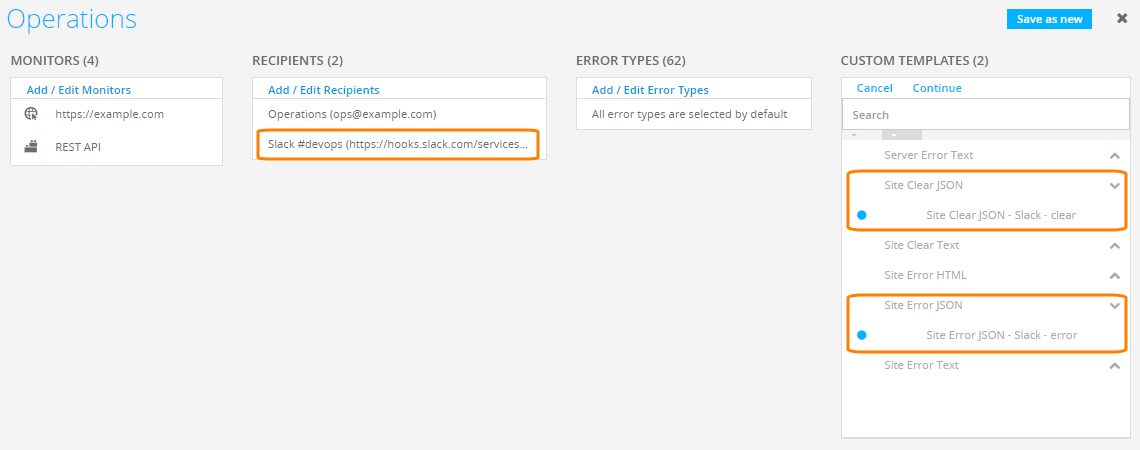
Finally, you need to associate the Slack alert templates with the Slack recipient. This is done by creating a recipient group that contains the Slack recipient, the custom templates, and the monitors whose alerts you want to send to Slack:
-
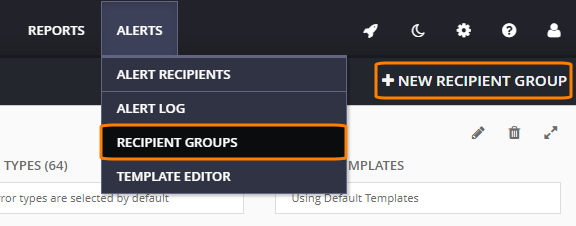
In AlertSite UXM, go to Alerts > Recipient Groups and click + New Recipient Group.
-
Enter a name for the group.
-
Under Monitors, add the monitors that should send alerts to Slack.
-
Under Recipients, add the Slack recipient.
-
Under Custom Templates, expand the Site Clear JSON and Site Error JSON categories and select the templates that you created earlier.
-
Click Save as new.
Now you will receive updates in Slack when the selected monitors trigger alerts.
Test Slack alerts
To send a test alert from AlertSite to Slack, do the following:
-
In AlertSite, go to Alerts > Template Editor.
-
Filter the list by Delivery Method: Json.
-
Select the Slack error template and click Send Test.
-
Enter your Slack webhook URL, select a location and click Send. You will receive a message in your Slack channel.
-
In a similar way, you can test the “all clear” template.
| Note: | If you get a 500 Internal Server Error when sending an alert, verify your template syntax in the Slack message builder and make sure the Slack webhook URL is correct. |
FAQ
How can I route alerts from different monitors to different Slack channels?
Configure webhooks and AlertSite recipients for each channel, then create separate recipient groups for each Slack channel and the corresponding monitors.


 Error template