
Since TestComplete 12.40, you can add arbitrary files to TestComplete projects. Typically, you may want to do this for the files that store test data for your tests, or for other files that your tests can use for some other purposes.
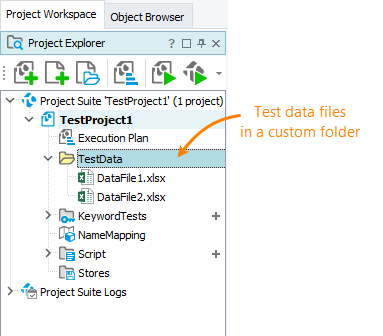
After you added such files to your project, you can see them in the Project Explorer panel along with other items that make up your project. In the image below, you can see arbitrary files organized into a folder:
Now, you can manage these helper files easier: at any time, you can easily see and open them, if needed.
To view or edit a file
Double-click the file in the Project Explorer – TestComplete will start the application associated with the file type in the operating system.
To add an arbitrary file
-
Simply drag a file from Windows Explorer to the Project Explorer panel.
– or –
-
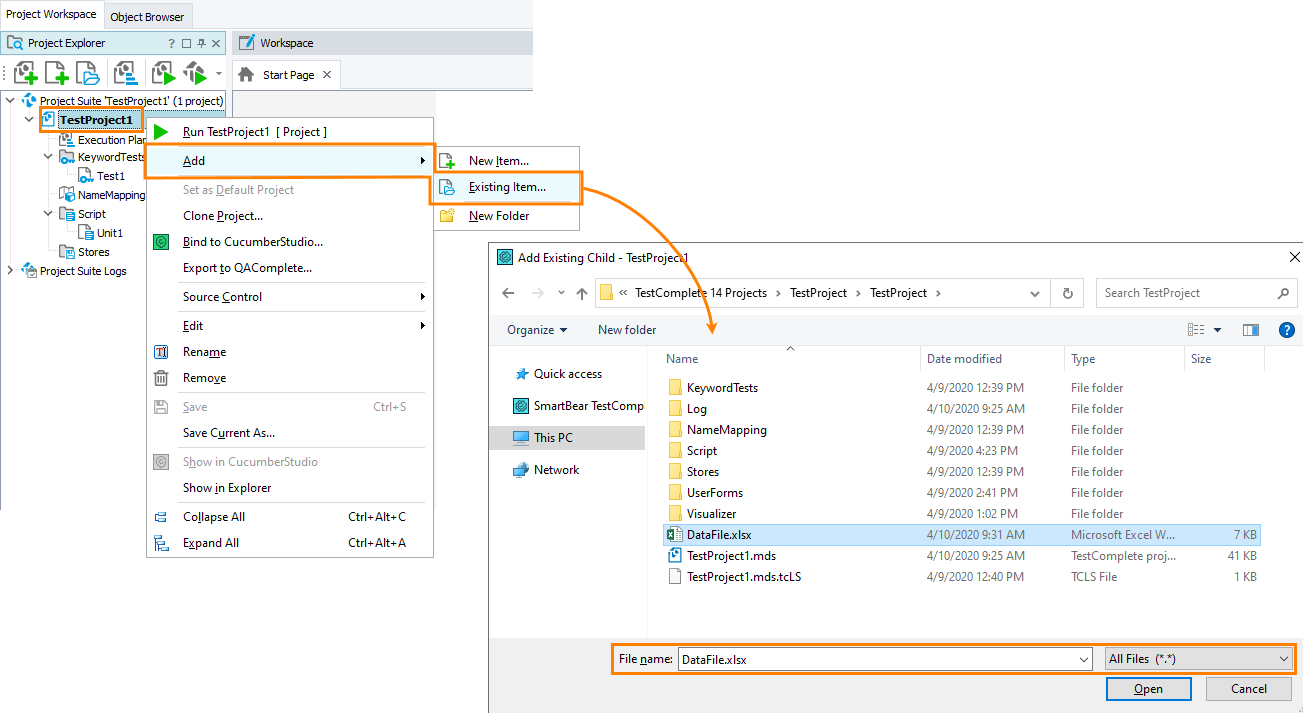
In the Project Explorer panel, right-click the project node or any folder node and select Add > Existing Item from the context menu.
-
In the subsequent Open File dialog, choose All Files in the File Filter box and then select the desired file.
Notes
-
After you added a file to your project, you work with this file in the same way as you would work with any other project item. You can organize these files into folders, or delete them.
-
The arbitrary files can be located in any folder on your computer. The path to a file on the hard drive does not affect the file location in the project tree.
If you are going to share your project, we recommend that you place these files into your project suite folder or some its subfolders, if possible. This way, sharing will be easier: your files will be copied along with the project suite folder.