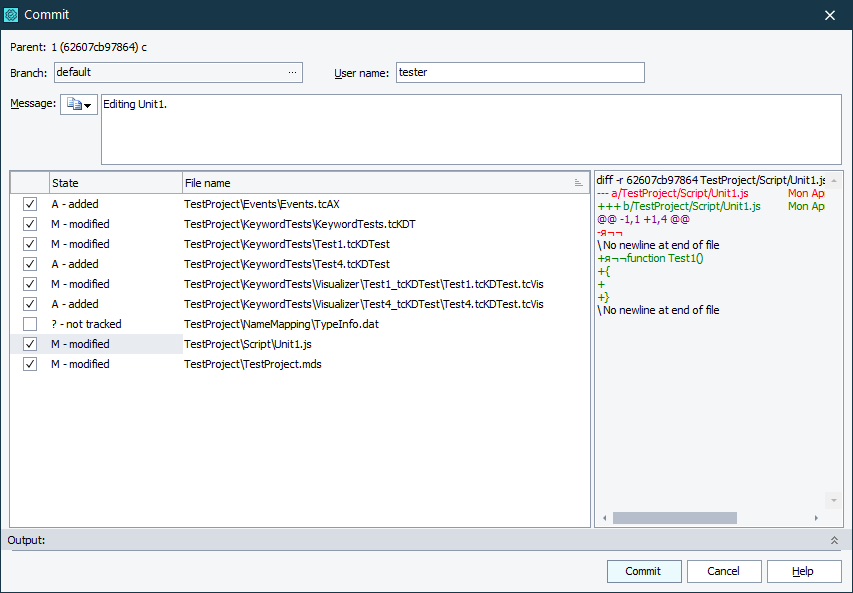
Use the Commit dialog to commit changes made to your project or project suite to your local Mercurial repository.
To call the dialog:
-
Select File > Source Control > Commit from the TestComplete main menu.
– or –
- Right-click your project suite in the Project Explorer and then click Source Control > Commit.
– or –
-
Click
 Commit Changes to Repository on the Source Control toolbar (if the toolbar is hidden, right-click the toolbar area and then click Source Control).
The dialog lists all changes made to your project or project suite. Select the check box next to the files, changes in which you want to commit. Clear the check box not to commit the changes.
To commit all changes, right-click the list and then click Check All Files.
To ignore an un-tracked file, right-click it in the list, and then click  Add to ignore list.
To view the differences between a project item’s current state and last committed state, select that item in the list. The dialog will show the difference in the right panel.
In the Message box, enter your commit message or click  and copy an existing commit message.
To create a new named branch and commit changes to it, click the ellipsis button in the Branch box and create a new branch in the Branch Operation dialog.
To close your current branch, click the ellipsis button in the Branch box, close your branch in the Branch Operation dialog and commit the changes.
Click Commit to commit selected changes to your local repository. Click Cancel to close the dialog without committing any changes.
See Also
Integration With Mercurial
Committing Changes to Repository
Working With Branches

