Video Tutorial
Requirements and prerequisites
-
Your team server must have the Test Manager extension installed and enabled.
-
In your team project, you must have a test plan specified and test cases added to the plan. To learn how to create a test plan and manage test cases, see docs.microsoft.com/en-us/azure/devops/test-plans.
-
Your test agents on which you will run tests must have TestComplete (or TestExecute) installed.
-
Your team project must have the TestComplete test adapter extension installed. See Install TestComplete Test Adapter Extension.
-
 Your TestComplete test project must have test cases specified in its Execution Plan.
 -
 Your TestComplete project’s test cases must be linked to test cases of your team project’s test plan. To learn how to do it, see Link TestComplete Test Cases to Azure DevOps Test Cases.
 -
Your TestComplete project must reside in your team project’s repository. Otherwise, your test agents will not be able to access it.
1. Prepare your TestComplete project
-
If your TestComplete project still does not have test cases specified, specify them. To learn how to specify test cases, see the description of the Execution Plan editor.
-
If your TestComplete project is not added to your team project’s repository, add it. We recommend that you do it directly from TestComplete IDE. This way, only the necessary project files will be added to the repository. See the instructions in the Integration With Source Control Systems section.
2. Link TestComplete test cases to test cases of a team project’s test plan
If your TestComplete test cases specified in the Execution Plan editor of the project are not linked to test cases of your team test plan, link them. For detailed instructions, see:
3. Create a build
Connect to your team project. If you still do not have a build for which you will run tests, create it. To learn how to create builds, see docs.microsoft.com/en-us/azure/devops/pipelines.
4. Create a release that will run your TestComplete tests
-
Open the web portal of your team project. You can navigate to it directly in your web browser, or you can open it from Team Explorer in Visual Studio.
-
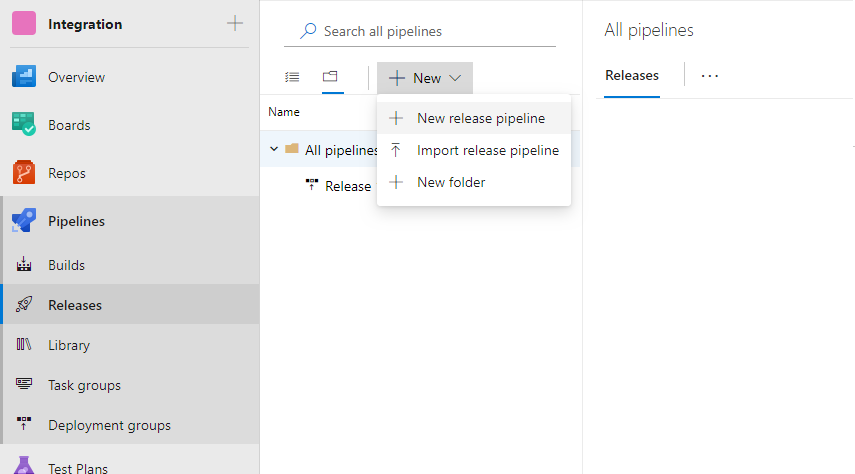
Navigate to the Pipelines > Releases page of your team project.
-
Select an existing pipeline and open it for editing or create a new pipeline:
-
Add an artifact that includes your TestComplete project files to the release:
-
Select a stage that will run your TestComplete tests or create a new stage.
-
Add an agent job to the pipeline. Specify agents on which your tests will run. Make sure that the agents meet all the requirements.
If needed, configure the job to distribute the tests among multiple agents. To learn how to do it, see Run tests in parallel using the Visual Studio Test task. Note: Your tests must be able to run independently from each other.
-
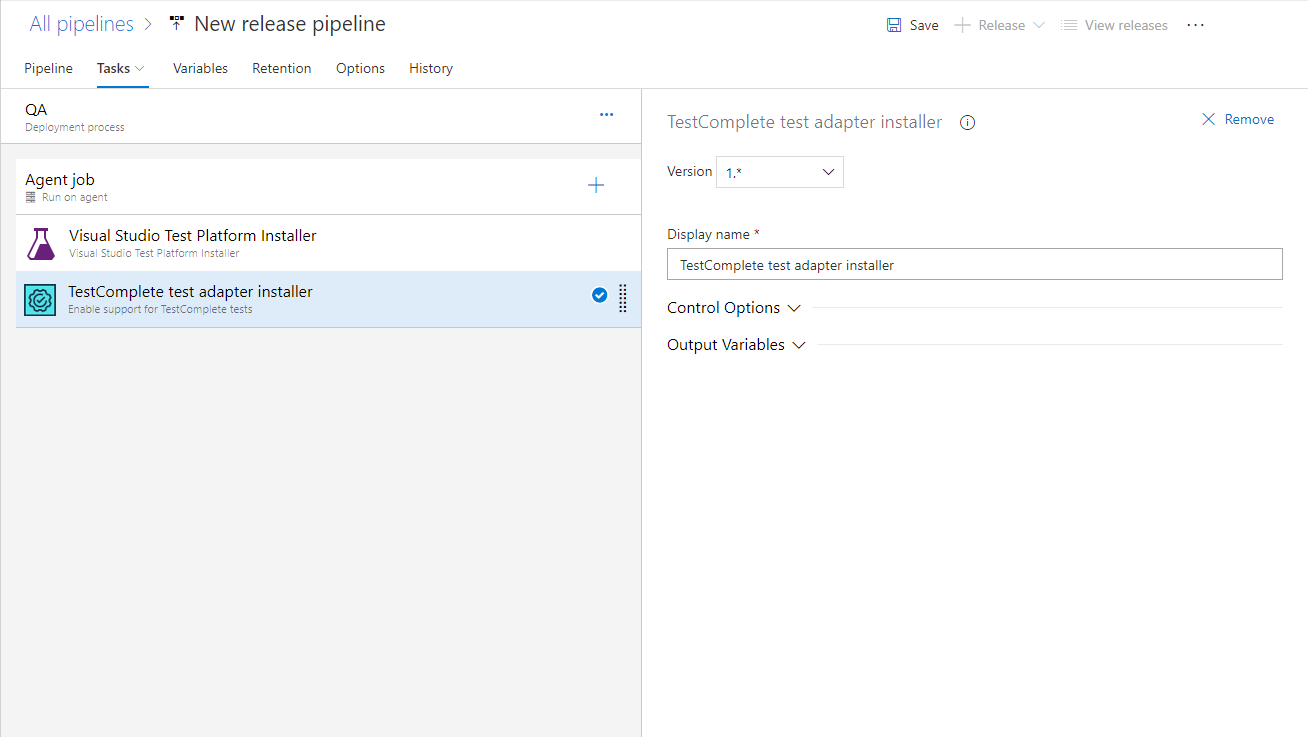
 Add the Enable support for TestComplete tests task. This task installs the TestComplete test adapter to your agent and enables the TestComplete test support:
The task is available only if you have the TestComplete Test Adapter extension installed on your server. To learn how to install it, see Install TestComplete Test Adapter Extension.
-
Select the application that you want to use to run tests: TestComplete or TestExecute.
Note: If the selected application is not installed on the agent, the one that is installed will be used instead.
-
Specify when you want to retrieve test logs: only for failed tests, for failed tests and for tests with warnings, or for all tests.
-
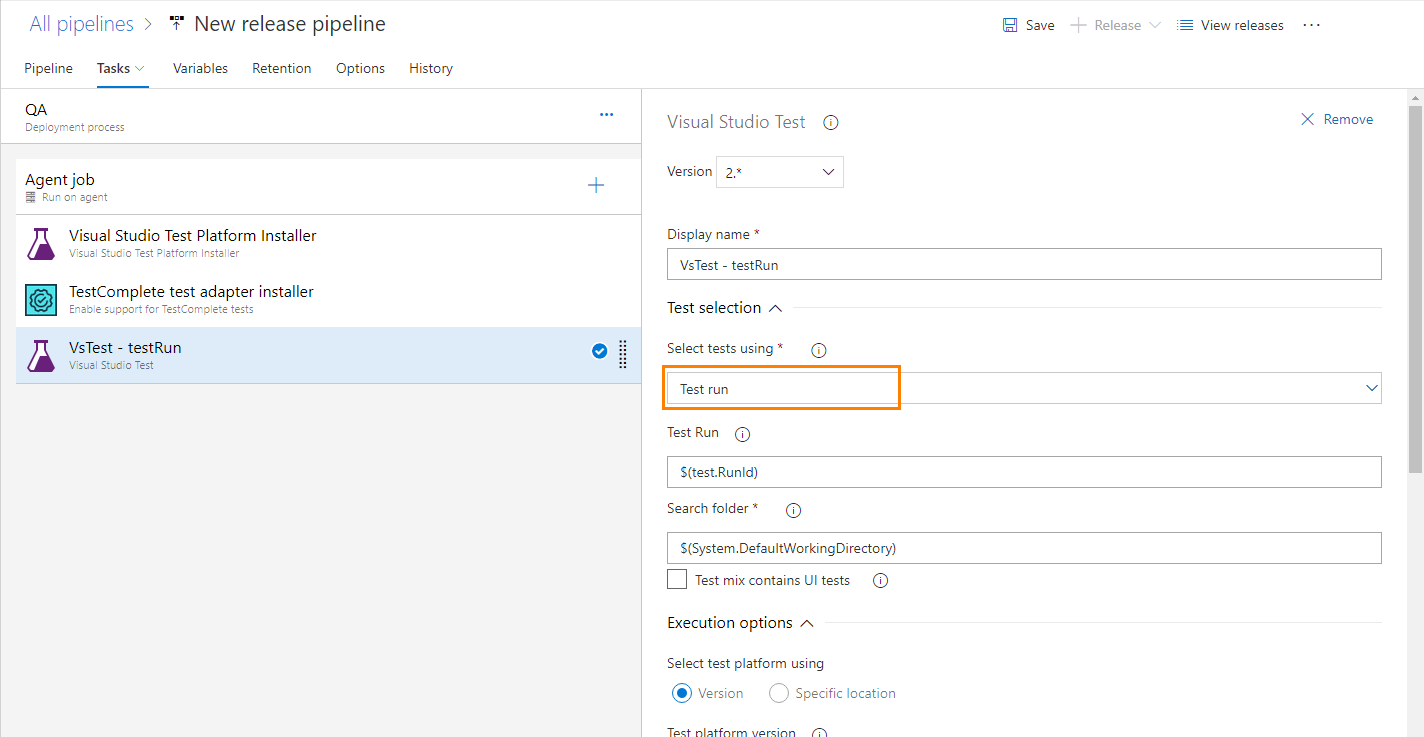
Add the Visual Studio Test task to the stage.
In the Select tests using drop-down box, select Test run.
-
Specify other release properties, if needed.
-
Save the changes.
5. Run test cases
-
Navigate to the Test Plans page of your team project.
-
Locate the test case that has a TestComplete test assigned to it as automation:
-
Click Run > Run with options.
-
In the Run with options dialog, do the following:
-
In the Test type and runner drop-down list, select Automated tests using release state.
-
In the Build text box, select a build for which you want to run tests.
-
In the Pipeline drop-down list, select the pipeline you have configured on step 4.
-
In the Stage drop-down list, select a stage that will run your TestComplete tests.
-
-
Click OK to save the changes and start the run.
-
To monitor the testing status, click View Test Run.
6. View test results
-
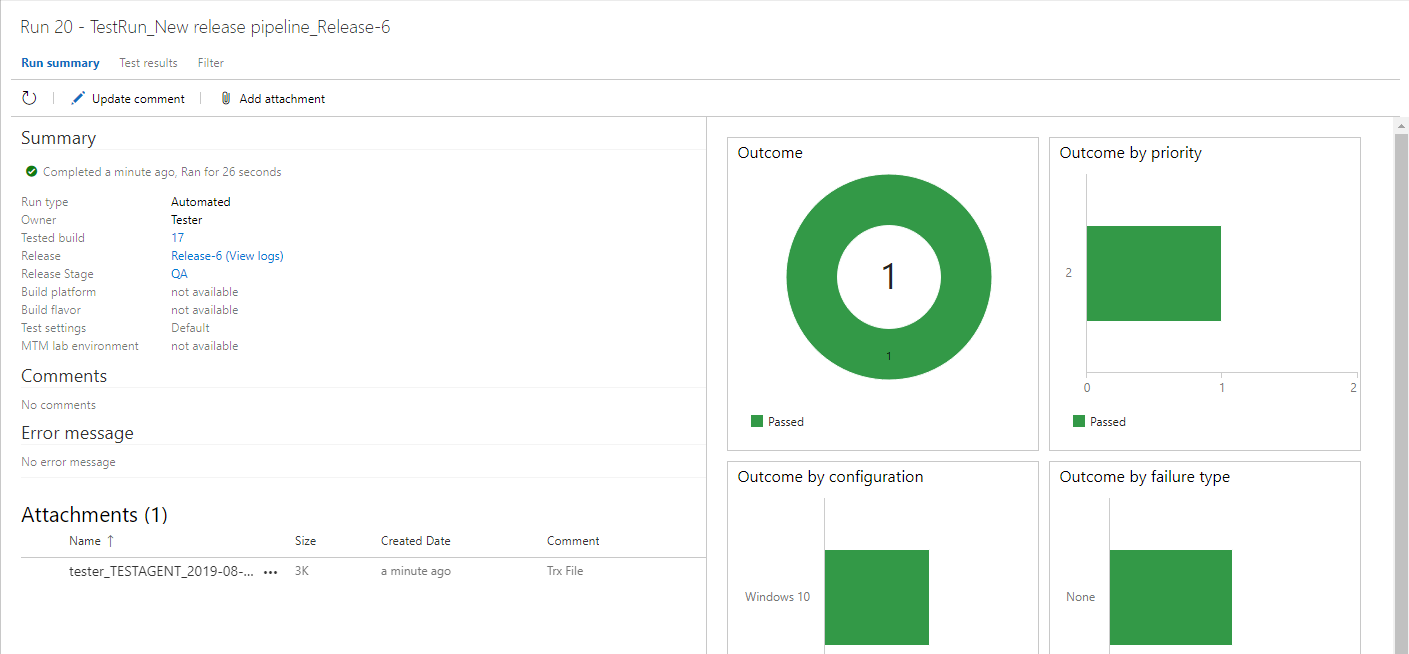
After a test run is over, you can view the test results:
-
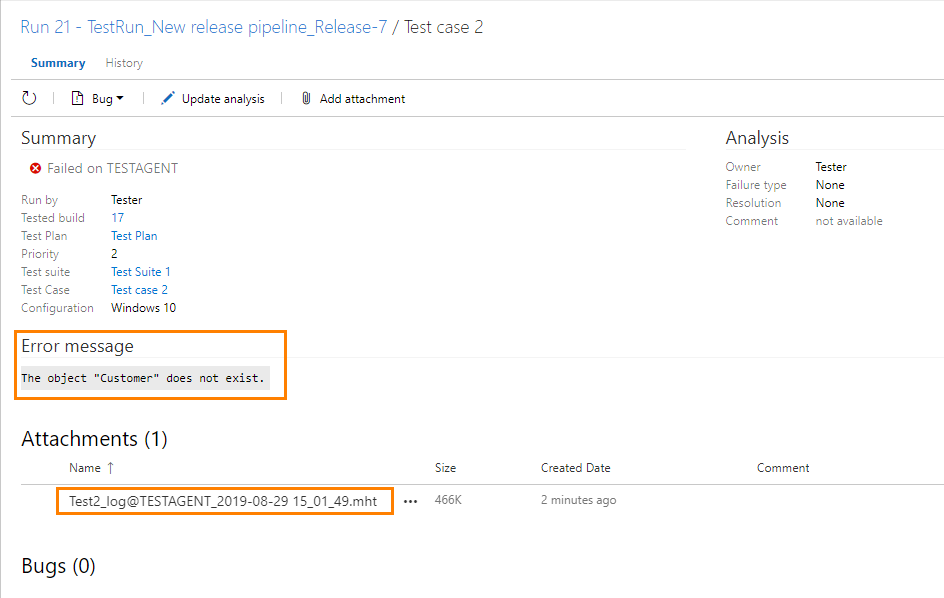
If a test has failed, you can double-click it to view the error message:
-
To get the test log, download the log in the .mht format from the Attachments section:
Depending on the Save logs for setting value, logs could be available only for failed tests, for failed tests and for tests with warnings, or for all tests.
See Also
Integration With Azure DevOps and Team Foundation Server via TestComplete Test Adapter
Link TestComplete Test Cases to Azure DevOps Test Cases
Install TestComplete Test Adapter Extension

 Link TestComplete Test Cases to Azure DevOps Test Cases