
Every script extension includes one or more JScript or VBScript units that contain the script code implementing the extension’s functionality. To create script units, you can use any tool or editor. However, it is convenient to use TestComplete to create them, because TestComplete offers a full-featured Code Editor with the Code Completion window that lets you quickly find the objects, methods and properties to be used in scripts. So, in this tutorial we will create script units with TestComplete.
Script extensions can use the JScript or VBScript languages, or both. The language of the script extension does not depend on the scripting language of the test projects. The extensions works well in any project. In this tutorial, we will use JScript.
Creating a Source Folder
First of all, we need to create a folder that will contain the script extension’s files. To do this:
-
Open Windows Explorer or any other file manager and create the folder that will contain the files. We will use the folder C:\My Extension Files\ActionsExtension.
Placing the script extension files into one folder will help you debug script code and pack the files into one .tcx module.
-
In the folder, create a new file and call it clcCode.js. This file will contain the extension’s script code. An extension may include several script units. In this tutorial, we will only use one unit.

It is important that the script file has the .js extension, since TestComplete uses the extension to determine the script language of the unit. For JScript units, the extension should be .js, for VBScript - .vbs.
Creating a TestComplete Project
Now let’s create a TestComplete project where we will keep and edit the source files of the script extension.
First, we will create a project suite:
-
Select File | New | New Project Suite from the TestComplete main menu. The Create Project Suite dialog will open.
-
In the dialog, specify the project suite's name and location and click OK.
TestComplete will create an empty project suite in the specified location.
Now let’s add a project to this suite:
-
Select File | New | New Item from the TestComplete main menu. The Create Project dialog will open.
-
Specify the desired project name and path in the Project name and Location text boxes.
-
Select JScript in the Language box.
-
Clear the Generate the default content check box.
-
Click OK.
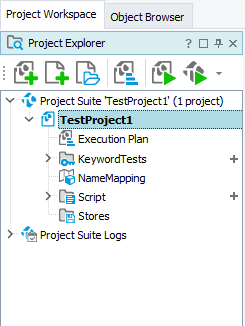
TestComplete will create an empty project.
Adding a Script
Earlier, we have created the clcCode.js file that will contain the source code of our custom keyword test operation. Let’s import this file to the project so that we can write the code in the TestComplete Code Editor. But before we do that, we need to add the Scripts collection to our project:
-
Right-click the project in the Project Explorer and select Add | New Item from the context menu. The Create Project Item dialog will open.
-
In the dialog, select the Script item.
-
Clear the Generate the default content check box.
-
Click OK.
TestComplete will add an empty Scripts collection to the project. Now we can import the clcCode.js file to this collection:
-
Right-click the Script project item and choose Add | Existing Item from the context menu. The Open File dialog will appear.
-
In the dialog, navigate to the C:\My Extension Files\ActionsExtension folder.
-
Select All Files (*.*) in the Files of type box.
-
Choose the clcCode.js file and click Open.
TestComplete will add the clcCode.js script unit to the project.
Make sure the clcCode unit is clean. Do not use //USEUNIT statements in it, because units of script extensions cannot refer to each other.
Script files in script extensions must use the ANSI or UTF-8 character encoding. So, we need to specify the desired encoding for script units included in the project:
-
Right-click the project node in the Project Explorer and select Edit | Properties from the context menu.
TestComplete will display the project editor in the Workspace panel and will activate the Properties page of the editor.
-
Select the General category in the tree on the left, and then specify the desired format -- ANSI or UTF-8 -- in the Units encoding box.
-
Close the project editor.
Adding a Form
Finally, we need to create a form that will be displayed by our design-time action:
-
Right-click the project in the Project Explorer and select Add | New Item from the context menu. The Create Project Item dialog will open.
-
In the dialog, select User Forms and click OK. TestComplete will add the UserForms collection to the project.
-
Right-click the UserForms collection in the Project Explorer and select Add | New Item from the context menu.
-
In the dialog, specify ctcForm in the Name box and click OK.
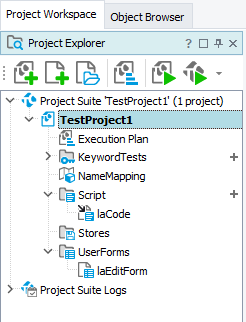
TestComplete will add a new form to the project.
Our project now looks like the following image:
 Prev
Prev
See Also
Creating Projects and Project Suites
Adding and Removing Project Items and Their Child Elements
User Forms