 |
The information below concerns legacy mobile tests that work with mobile devices connected to the local computer. For new mobile tests, we recommend using the newer cloud-compatible approach. |
-
Open the Mobile Screen window. TestComplete records only those actions over mobile applications that you perform in this window. To open the window, click Show Mobile Screen on the Test Engine toolbar:

-
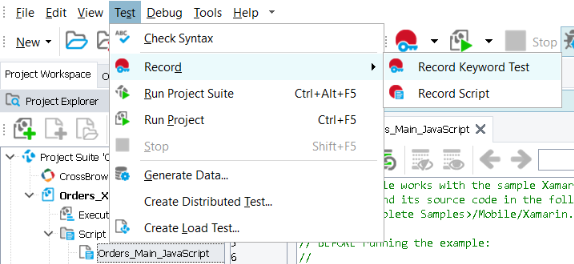
To start recording, from the TestComplete main menu, select Test > Record > Record Keyword Test:
After you start recording, TestComplete will automatically deploy the Orders application to the mobile device and start this application. This will happen because you enabled the Deploy to the device on start and Autorun options while creating the test project at the previous step.
-
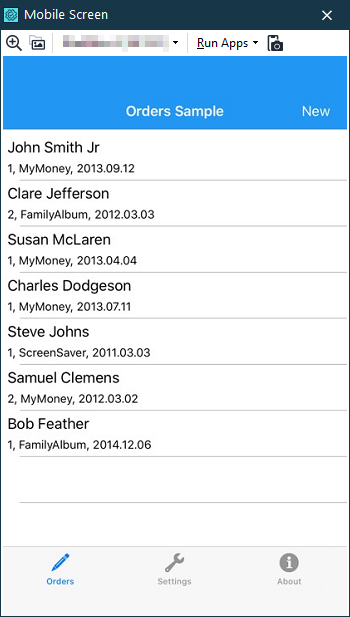
TestComplete will launch the tested application:
-
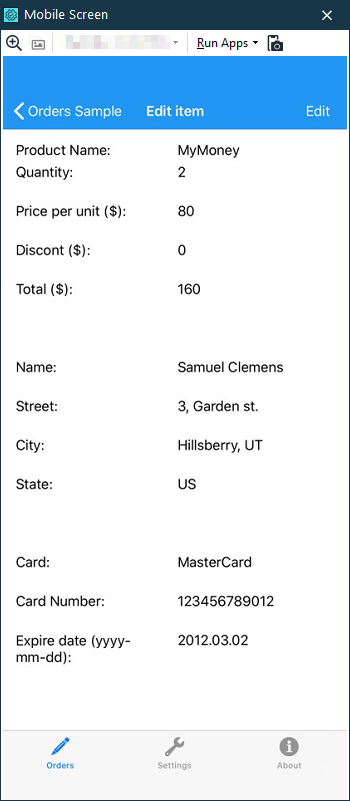
Click the order made by Samuel Clemens. This will display the Edit item panel:
-
Click Edit in the top right corner of the page.
-
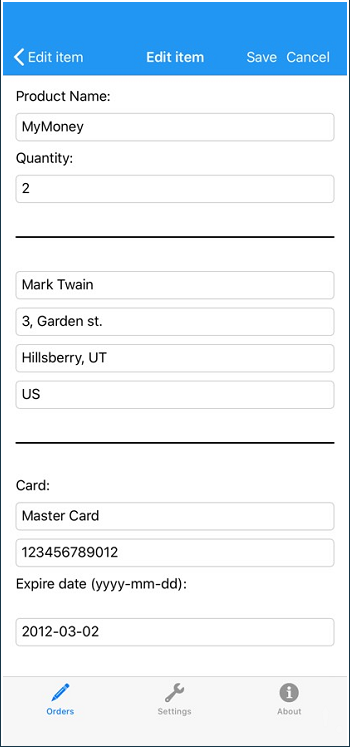
In the resulting Edit Order form, clear the text Samuel Clemens in the Name text box, type Mark Twain and press Enter. Use your desktop keyboard to input text in the Mobile Screen window.
-
Click the Save button in the Edit Item panel and confirm the changes.
-
Create a property checkpoint. It will verify that the customer list contains the new name - Mark Twain.
-
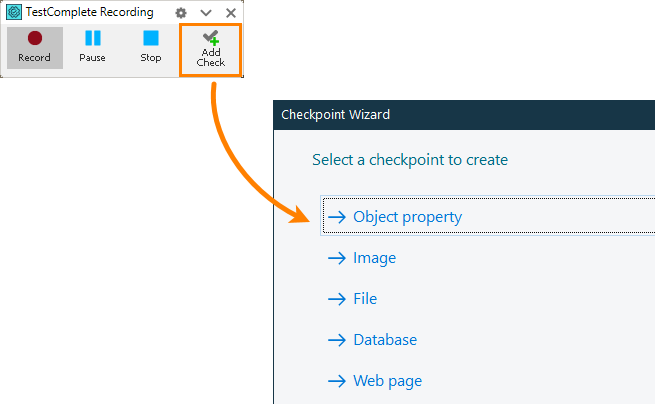
On the Recording toolbar, click
 Add Check. In the resulting Checkpoint wizard, click Object property:
 -
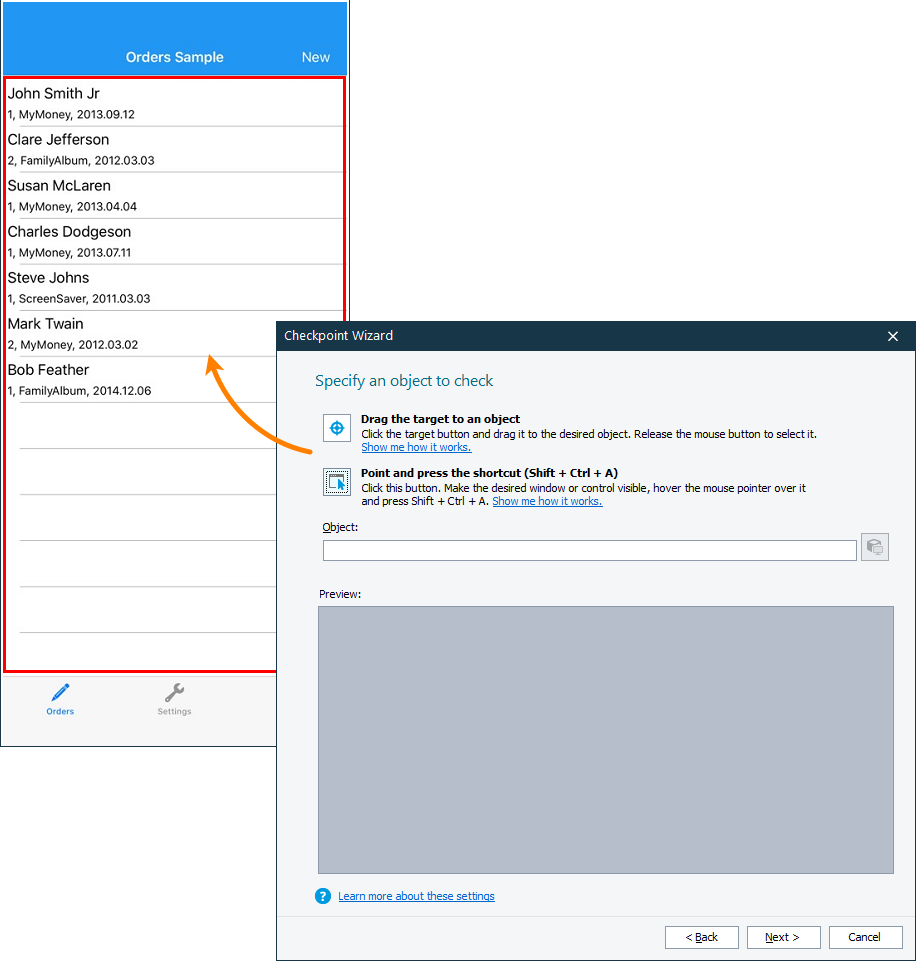
Select the Orders list on the main page. To select text, you can –
Press
 , drag the target glyph to the Orders list, and then release the mouse button.
Click
 , move the mouse pointer to the Orders list, and then press the Select object shortcut (by default, SHIFT+CTRL+A).
 -
Click Next to continue.
-
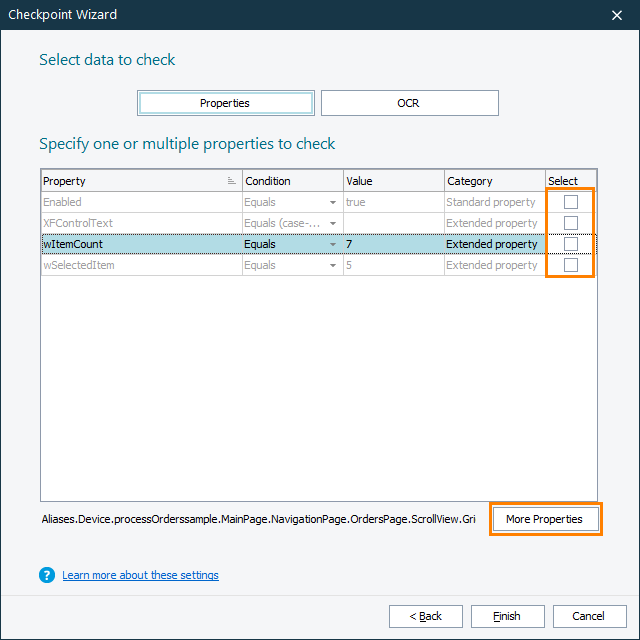
The next page of the wizard displays a list of the selected object properties. This list includes the properties provided by TestComplete and the properties defined by the tested application. Clear the property selected by default. To view all the available properties, click More Properties:
-
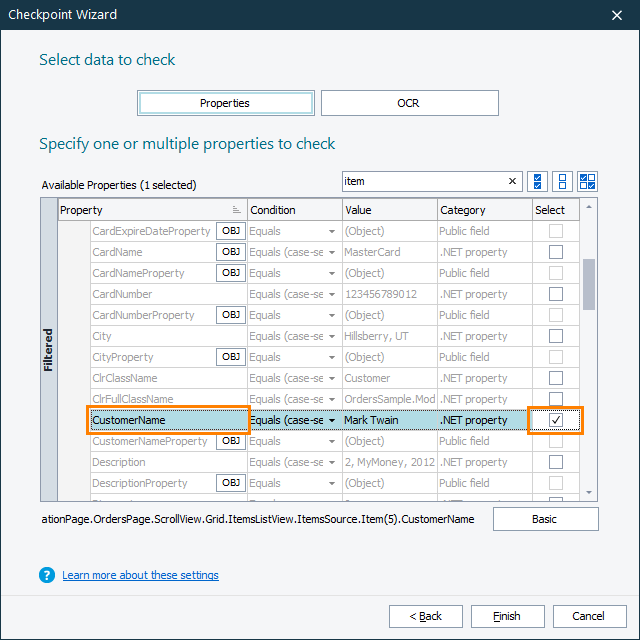
To verify the data, we will use the
ItemsSourceproperty. It provides access to individual items of tree view controls. To find this property quickly, you can use the Search text box. -
Click the OBJ button. The table cell will expand. Find the Item element and click PAR.
-
To specify the cell holding the Mark Twain string, enter 5 in the Value box (5 is the index of the Mark Twain item in the tree view. Indexes are zero-based). Then press Enter and click the OBJ button to access the retrieved object.
-
Select the CustomerName field of the resulting object.
-
Click Finish.
-
-
To stop recording, click
 Stop on the Recording toolbar.
TestComplete will stop recording and open the recorded test:

See Also
Testing Xamarin.Forms Applications - Tutorial (Legacy)
Recording Automated Tests

 Prev
Prev