 The information in this topic applies to web tests that implement the default approach (rely on Name Mapping and run in local environments).
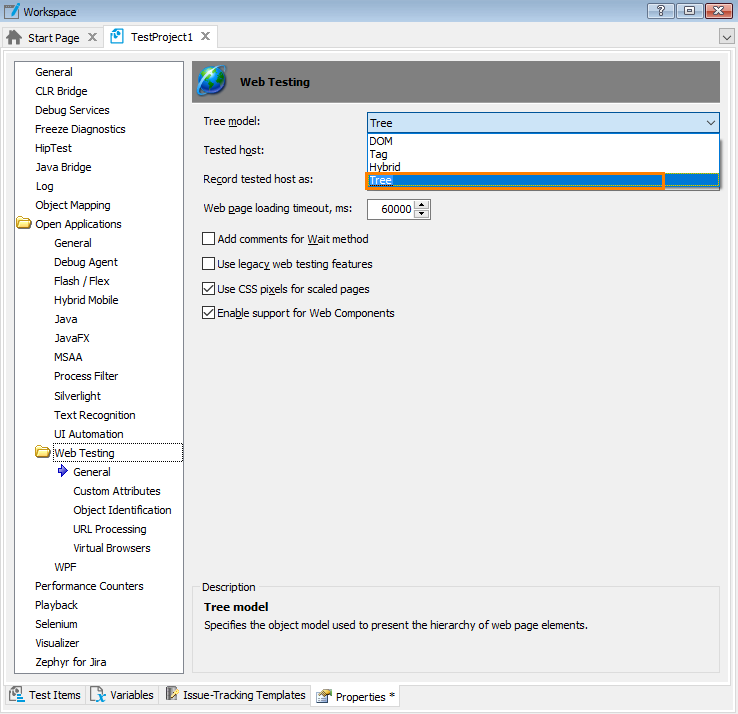
Before you start testing Flash and Flex applications, you need to configure your TestComplete project to use the Tree or Hybrid web object model. Below are detailed instructions on how you can do that:
-
Open the project’s Properties page by doing any of the following:
-
Double-click the project in the Project Explorer panel. In the ensuing project editor, switch to the Properties page.
– or –
-
Right-click your project in the Project Explorer and select Edit > Properties from the context menu.
– or –
-
Select your project in the Project Explorer and then select Tools > Current Project Properties from the main menu of TestComplete.
-
-
In the list on the left of the Properties page, select Open Applications > Web Testing.
-
In the Tree model list, select Tree (default value).

-
Select File > Save All from the main menu of TestComplete to apply the changes.
Tips:
-
Instead of configuring the above-mentioned settings in each project, you can set up the Default Project Properties in the same manner as described above. In this case, a new TestComplete project you will create will have these properties set by default.
-
The Tree model can be set from tests via the
Options.Web.TreeModelproperty. For example, you can activate the needed model at the beginning of your test. The following example demonstrates how you can activate the Tree model:JavaScript, JScript
Options.Web.TreeModel = "Tree";
Python
Options.Web.TreeModel = "Tree";
VBScript
Options.Web.TreeModel = "Tree"
DelphiScript
Options.Web.TreeModel := 'Tree';
C++Script, C#Script
Options["Web"]["TreeModel"] = "Tree";
See Also
Preparing Flash and Flex Applications for Testing with the Debug Version of Flash Player
