This topic describes how you can work with branches in your Mercurial repository from TestComplete.
Creating New Branches
-
Select File | Source Control | Commit from the TestComplete main menu.
— or —
Right-click your project suite in the Project Explorer and then click Source Control | Commit.
— or —
Click
 Commit Changes to Repository on the Source Control toolbar (if the toolbar is hidden, right-click the toolbar area and then click Source Control).
 -
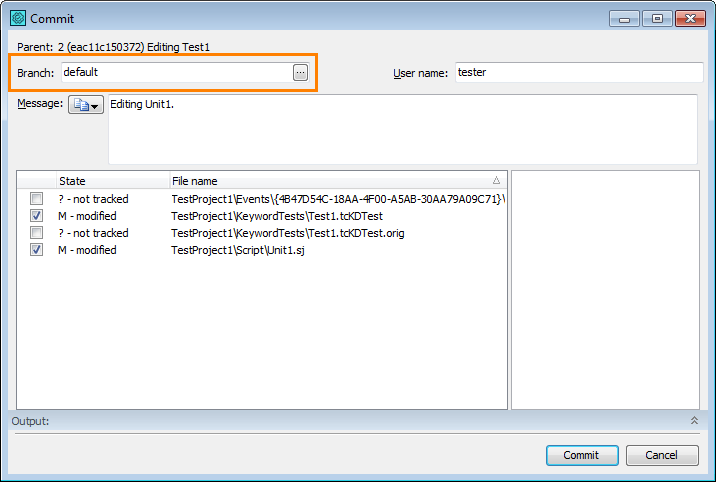
In the Commit dialog, click Branch:
Managing branches via the TestComplete Commit dialog
Managing branches via TortoiseHg’s Commit dialog
-
In the resulting Branch Operation dialog, select the Open a new named branch option, enter the name for your branch and click OK.
Creating branches via the TestComplete Branch Operation dialog
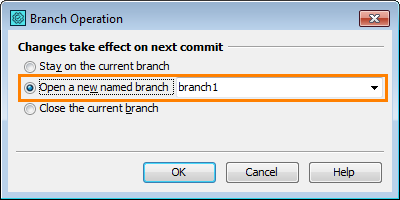
Creating branches via TortoiseHg’s Branch Operation dialog

-
Specify other commit options if needed and click Commit in the Commit dialog.
TestComplete will create a new named branch and commit your changes to that branch.
Pushing Local Branches
To push your local branch to your remote repository:
-
Select File | Source Control | Synchronize from the TestComplete main menu.
— or —
Right-click your project suite in the Project Explorer and then click Source Control | Synchronize.
— or —
Click
 Launch the Synchronize Dialog on the Source Control toolbar (if the toolbar is hidden, right-click the toolbar area and then click Source Control).
 -
TestComplete will open a dialog, where you can send changes from your local repository to a remote destination.
-
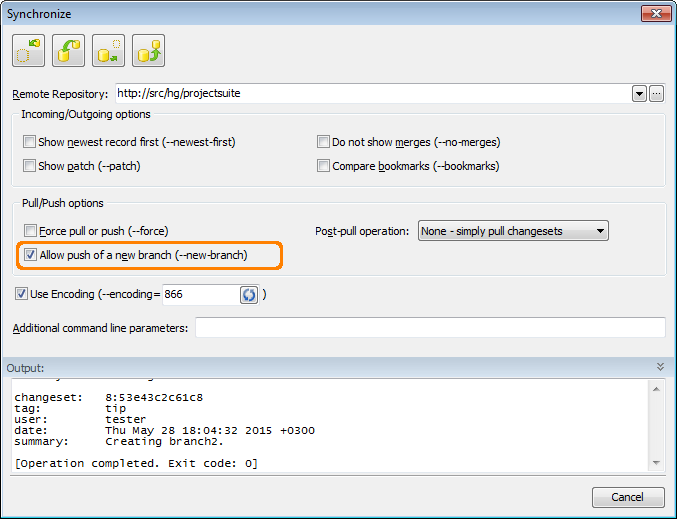
If you use TortoiseHg, click Options and select the Allow push of a new branch (--new-branch) option.
If you do not use TortoiseHg, select Allow push of a new branch (--new-branch) in the Synchronize dialog.
Pushing your local branch to your remote repository via the TestComplete Synchronize dialog
Pushing your local branch to your remote repository via the TestComplete Synchronize dialog
-
Specify other push options if needed and click
 .
.
Switching Branches
-
Select File | Source Control | Update from the TestComplete main menu.
— or —
Right-click your project suite in the Project Explorer and then click Source Control | Update.
— or —
Click
 Launch the Update/Checkout Dialog on the Source Control toolbar (if the toolbar is hidden, right-click the toolbar area and then click Source Control).
 -
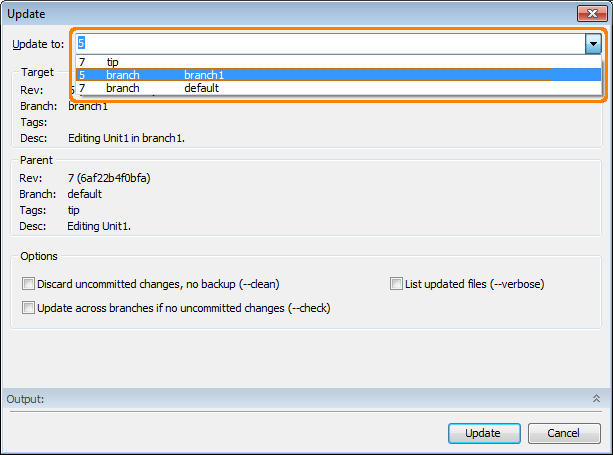
In the Update dialog, select the branch to which you want to update your project or project suite and click Update.
Switching between branches via the TestComplete Update dialog
Switching between branches via TortoiseHg’s Update dialog
TestComplete will update your project or project suite to the tip on the selected branch.
Closing Branches
-
Select File | Source Control | Commit from the TestComplete main menu.
— or —
Right-click your project suite in the Project Explorer and then click Source Control | Commit.
— or —
Click
 Commit Changes to Repository on the Source Control toolbar (if the toolbar is hidden, right-click the toolbar area and then click Source Control).
 -
In the Commit dialog, click Branch:
Managing branches via the TestComplete Commit dialog
Managing branches via TortoiseHg’s Commit dialog
-
In the resulting Branch Operation dialog, select the Close the current branch option and click OK.
Closing branches via the TestComplete Commit dialog
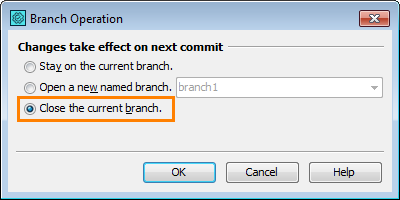
Closing branches via TortoiseHg’s Commit dialog

-
Specify other commit options if needed and click Commit in the Commit dialog.
TestComplete will close your current branch.
Related Tasks
See Also
Integration With Mercurial - Common Tasks
Integration With Mercurial
Committing Changes to Repository
Getting Changes from a Remote Repository to a Local Repository

 Creating New Branches