This topic describes how you can run TestComplete web tests in the CrossBrowserTesting cloud.
 1. Prepare TestComplete Tests for Running
 2. Add Tests to Environment Lists
Prerequisites
-
If you do not have a CrossBrowserTesting account with TestComplete support, create one. You can sign up for a free trial directly from TestComplete. TestComplete will suggest that you do this if it fails to find account data when starting a test. See –
-
Make sure the computer, from which you will run tests, has access to the CrossBrowserTesting cloud.
-
 Make sure the CrossBrowserTesting cloud has access to your tested web application. If the tested web application is located in your local network, create a tunnel for CrossBrowserTesting to your network. See –
 Configuring Connection to Tested Website From the CrossBrowserTesting Cloud
You may also need to update your tests so that they could access your tested web application or web page through the opened tunnel. See Preparing TestComplete Tests That Work With Local Network Resources.
1. Prepare TestComplete Tests for Running
-
Open the project suite with your tests in TestComplete. Make sure your tests meet the requirements described in Preparing TestComplete Tests for Running in CrossBrowserTesting Environments. If needed, modify the tests.
-
 Before running the test in the cloud, verify that it runs successfully on your computer.
2. Add Tests to Environment Lists
-
(Optional.) If you have several tests that you want to run in the same set of environments, create a group for those tests. This way, you will be able to assign all the needed environments to the tests at once.
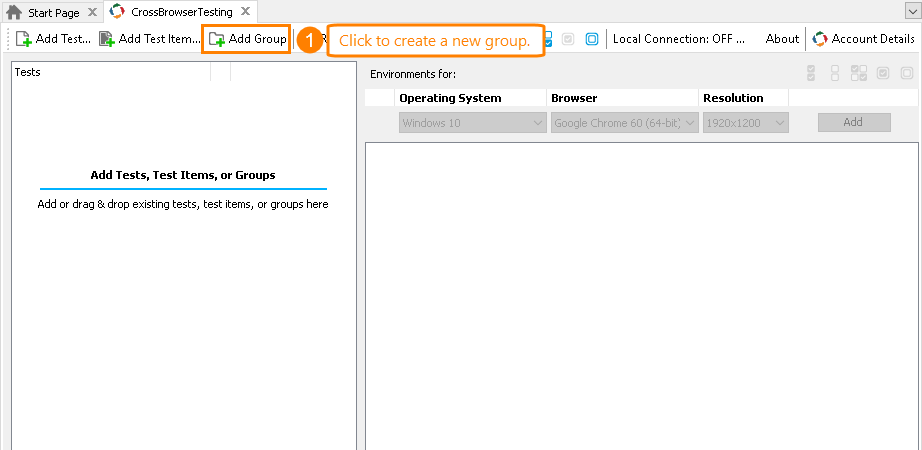
To create a group, click
 Add Group on the manager toolbar or right-click anywhere within the Test Assignment section of the manager, then click
  Add Group:
Select the created group.
-
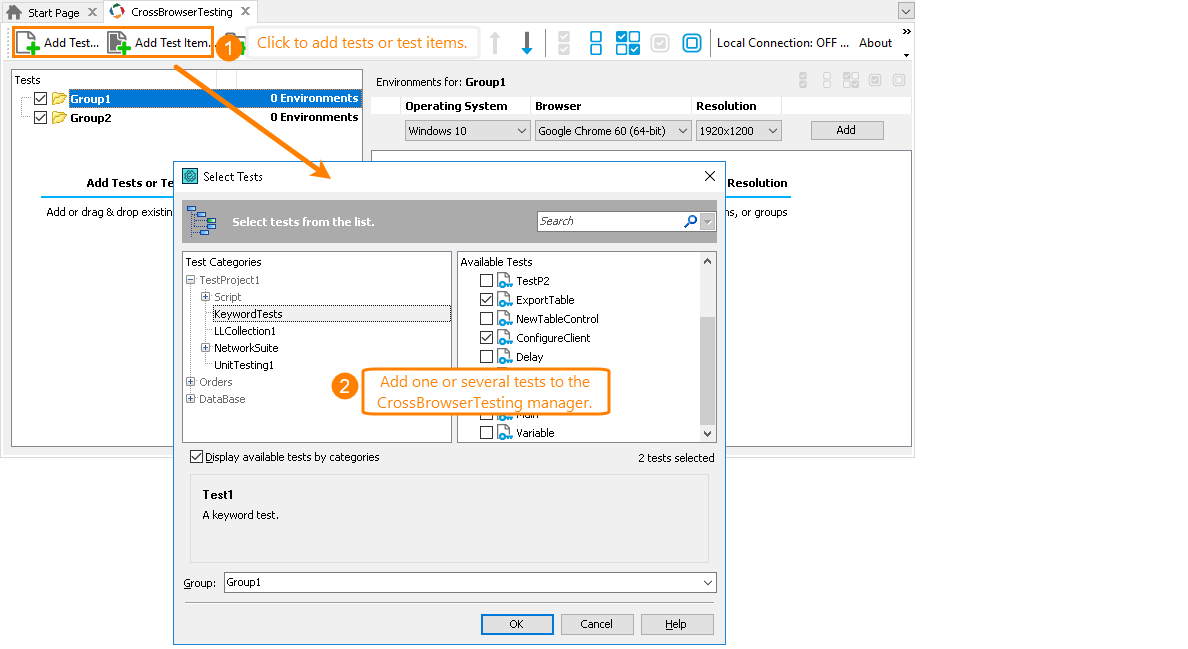
You can add a test or a project test item to the CrossBrowserTesting manager. Click
 Add Test or Add Test Item on the manager toolbar, or right-click anywhere within the manager and then click
  Add Test or Add Test Item respectively.
In the subsequent dialogs, select the tests or test items you want to run and click OK.
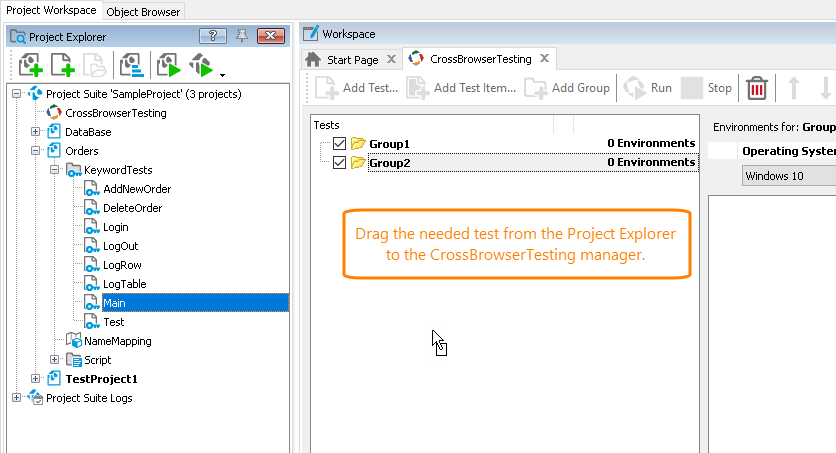
As an alternative, you can drag the needed test from the Project Explorer or Code Explorer to the CrossBrowserTesting manager:
If you drag a script unit, all tests in that unit will be added.
If you drag a project, all enabled top-level test items will be added.
Notes:
-
You can add tests and test items from all projects of the current project suite.
-
You cannot add tests or test items to the current group if they are already added to it (in the appropriate dialogs, these tests and test items will be disabled).
-
You cannot add tests that take parameters to the CrossBrowserTesting manager directly. To run such tests in CrossBrowserTesting environments, you can create test items that will run the tests with the needed parameters and then add those test items to the manager. See Preparing TestComplete Tests That Take Parameters for Running in CrossBrowserTesting Environments.
-
-
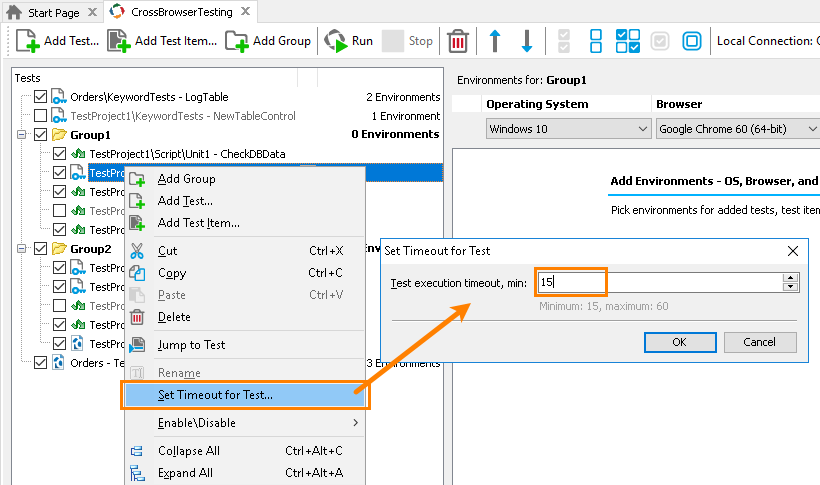
If needed, set a timeout for the test. To do this, select Set Timeout for Test from the context menu. In the resulting dialog, enter the needed timeout (in minutes):
3. Assign Environment to Tests
-
Select the needed test, test item or a group of tests in the Test Assignment section of the manager.
-
In the Environments section of the manager, specify the desired operating system, browser and screen resolutions and click Add:
-
The manager will assign the specified environment to the selected test, test item or group.
4. Run Tests
After you finish configuring your environments and tests, run the tests:
-
Make sure the environments where you want run tests are enabled (checked). TestComplete will not run tests in disabled environments.
Make sure the tests you want to run are enabled (checked) as well. TestComplete will not run disabled tests or tests that belong to disabled groups.
-
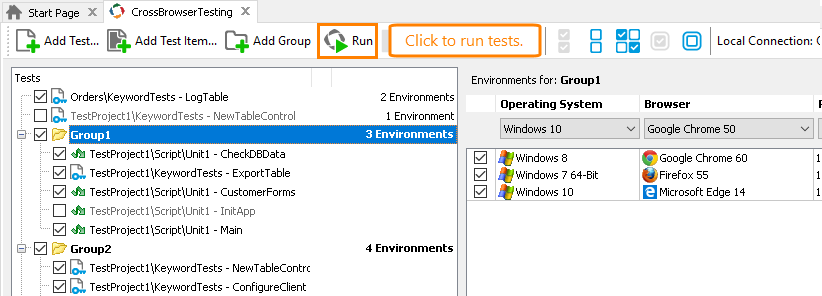
Click
 Run on the manager toolbar or right-click the CrossBrowserTesting item in the Project Explorer and then click
  Run CrossBrowserTesting Tests:
 -
TestComplete will check if you specified the credentials for connecting to the CrossBrowserTesting cloud.
If you have not provided any credentials, TestComplete will suggest that you provide your existing credentials or create a trial account.
If TestComplete cannot use the credentials you have provided, it will suggest that you specify other credentials or get another subscription plan for your CrossBrowserTesting account.
-
If your CrossBrowserTesting account is valid, TestComplete will launch all the specified environments in the CrossBrowserTesting cloud. Then, it will copy the entire project suite (including all external project items and third-party files added to the project suite) to each environment. It will also copy registered script extensions to environments.
-
Then, TestComplete will run the selected tests in the environments. TestComplete runs tests in parallel, each in a separate environment.
Note: The number of concurrent tests you can run in the CrossBrowserTesting cloud is set by your CrossBrowserTesting subscription. If the number of tests exceeds the limit, the redundant tests will wait until some of the test runs are over. -
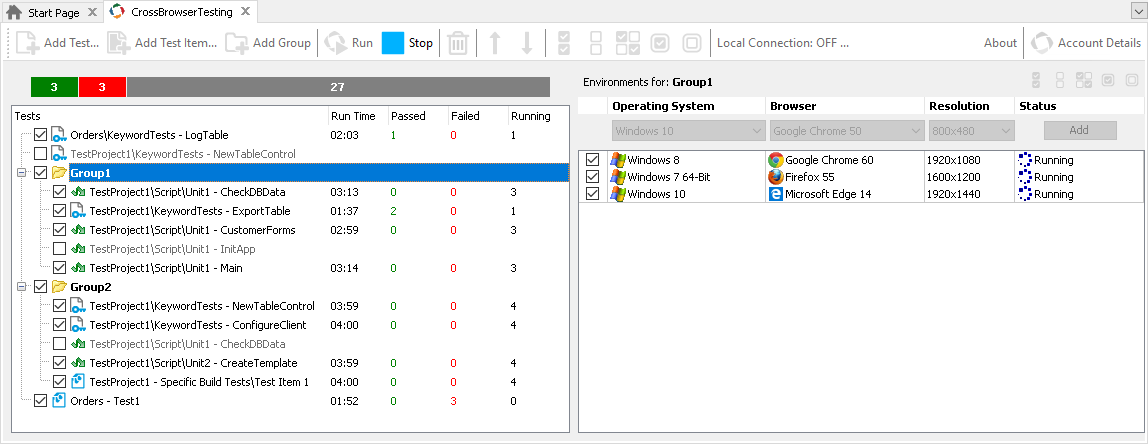
You can monitor the testing progress in the CrossBrowserTesting manager. For example, Waiting means the test engine is waiting for a test machine to start in the cloud; Running means the test is simulating user actions:
5. Viewing Results
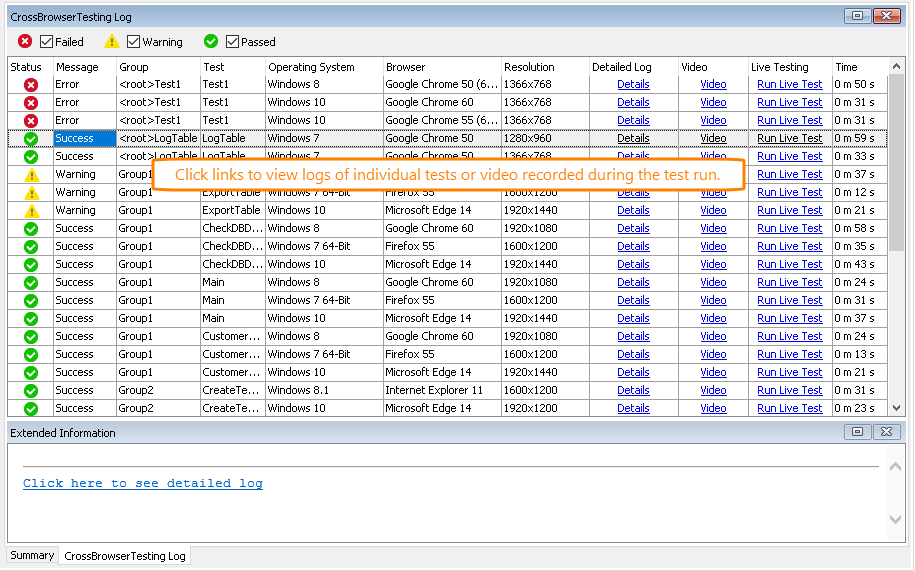
After the test run is over, TestComplete will display the test results. You can view a detailed test log generated for each test in each environment:
For more information, see Viewing Test Results (CrossBrowserTesting Logs).
Important Notes
-
By default, TestComplete uses a 15-minute timeout for individual tests. If a test runs for a longer time, it will be terminated automatically. If needed, you can increase the timeout for an individual test up to 60 minutes.
The timeout includes the startup time of the cloud test machines. So, we do not recommend running one long test. Plan your test operations and, if needed, reorganize them into several shorter tests.
-
The test machines on the CrossBrowserTesting side use preinstalled TestExecute instances to simulate user actions.
-
To automate TestComplete test runs, you can use TestExecute. However, it will not work for CrossBrowserTesting tests, because you can start these tests from TestComplete only.
-
On the cloud test machines, the tests run under a user account (not under the Administrator account).
-
The number of concurrent tests you can run in CrossBrowserTesting environments is specified by your CrossBrowserTesting subscription plan. If the number of tests you are going to run exceeds the maximum number, TestComplete will run the exceeding tests after the earlier tests are finished. If you use the same CrossBrowserTesting account to run tests in several TestComplete instances working on different computers, then the number of available concurrent tests is shared among all these computers.
You can view the number of concurrent tests you can run on the Account Details form in TestComplete. If you are logged in, click
 Account Details on the CrossBrowserTesting toolbar and TestComplete will show information on your account.
Find more information on CrossBrowserTesting subscriptions on the CrossBrowserTesting web site.
See Also
Integration With CrossBrowserTesting.com
Viewing Test Results (CrossBrowserTesting Logs)
CrossBrowserTesting Log Panel
Automating CrossBrowserTesting Runs

