
You can identify a mapped object in your Name Mapping repository easier by the object’s image:
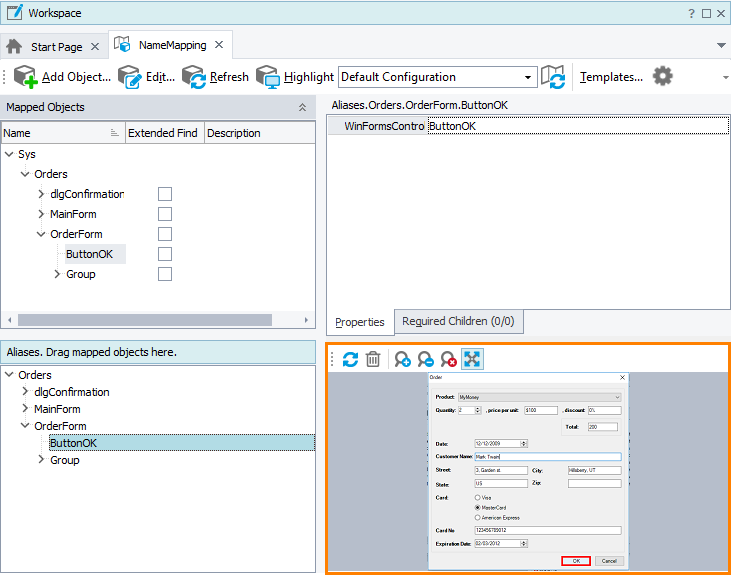
The image shows the user interface of your tested application with the selected mapped object highlighted with a red frame.
To store mapped object images
 Configure TestComplete to store images before adding your objects to the Name Mapping repository.
Storing images can increase the size of your Name Mapping repository significantly.
-
Open your Name Mapping repository.
-
Click
 Options on the toolbar. TestComplete will open the Store Name Mapping Data dialog.
 -
Click Store images > Automatically for all controls.
-
Click OK to save the changes and close the dialog.
TestComplete will capture images for all objects added to the Name Mapping repository. For objects that are already mapped, no images will be captured.
To delete an image
-
Select the needed object in the Name Mapping repository.
-
Click
 on the Image panel toolbar.
To delete all images
-
Open your Name Mapping repository.
-
Click
Options on the toolbar. TestComplete will open the Store Name Mapping Data dialog. -
Click Store images > Do not store and then click OK.
-
In the confirmation message, click Yes.
TestComplete will remove the stored images of all mapped objects and will not capture images for new objects. This will reduce the size of your Name Mapping file.
Remarks
If your project suite is bound to a Team Foundation Version Control repository, images captured for your mapped objects will not be included in check-ins by default. They will not be added to the repository when you check in your changes. You will have to include the images in the check-ins manually by using Microsoft Team Explorer.