
This topic describes how to create a manual checkpoint and insert it into script code. For information on how to insert manual checkpoints into keyword tests, see Manual Checkpoints in Keyword Tests.
To create a manual checkpoint:
-
To create a checkpoint during script recording, on the Recording toolbar, click the
 Script Ext menu, and then click Manual Checkpoint:
To create a checkpoint at design time, on the Tools toolbar, click the down arrow next to the Custom actions menu, and then click
 Manual Checkpoint:
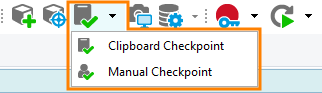
-
The Create Manual Checkpoint dialog will appear:
-
In the dialog:
-
Specify verification instructions.
-
Specify the name of the checkpoint that will be the name of the element to the added to the Stores > Files collection of your test project.
-
Press OK to close the dialog.
-
Upon closing the dialog, TestComplete will check whether your project contains the Stores project item, the Files collection and the file with the specified name. If the project does not have any of these items, TestComplete will display dialog boxes asking your permission to create them.
After the file is added to the Files collection, TestComplete generates the comparison code. If you create the checkpoint during script recording, the generate code will be inserted into the recorded script automatically. So, you can continue recording after the Create Manual Checkpoint dialog is hidden.
If you create the checkpoint at design time, TestComplete will invoke the Copy Text to Clipboard dialog with the generated code in it. You can then copy the generated code in the dialog and paste it in your script code.
See Also
Manual Checkpoints
About Manual Checkpoints
Manual Checkpoints in Keyword Tests
ManualCheck Object