TestComplete samples (both built-in and additional) are located in the <Users>\Public\Public Documents\TestComplete 15 Samples folder.
Some file managers display the Public Documents folder as Documents.
A file checkpoint is a test operation that verifies that the specified file contains expected data. This may be necessary if your application exports some data, for example, a customer list, to a file and you need to check whether the exporting procedure functions properly.
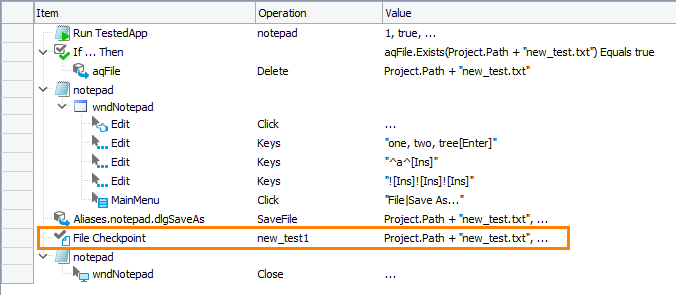
In keyword tests, file checkpoints are performed using the File Checkpoint operation:

In scripts, file checkpoints are performed using the Files.FileCheckpointName.Check method:
JavaScript, JScript
Python
Files.newFile.Check("C:\\Work\\File Checkpoints\\newFile.txt")VBScript
DelphiScript
C++Script, C#Script
How to Create File Checkpoints
You can add file checkpoints to your tests during test recording and at design time. TestComplete provides the File Checkpoint wizard that assists you in creating file checkpoints. For detailed instructions on how to use the wizard to insert checkpoints in your tests, see Creating File Checkpoints.
When you create a file checkpoint, TestComplete stores a copy of the file to be verified to the project’s Stores > Files collection. This copy will be used by the checkpoint as a baseline file during the test run.
How File Checkpoints Work
When you run your test, the file checkpoint obtains the actual contents of the file, checks them against the baseline file contents stored in your project’s Stores > Files collection and reports the results.
For detailed information on how file verification works, see How File Verification Works. For information on how to verify files that have variable parts, see Verifying Files With Variable Parts.
File Checkpoint Results
If the actual and the stored files are reported to be equal, the file checkpoint posts a ![]() success message to the test log.
success message to the test log.
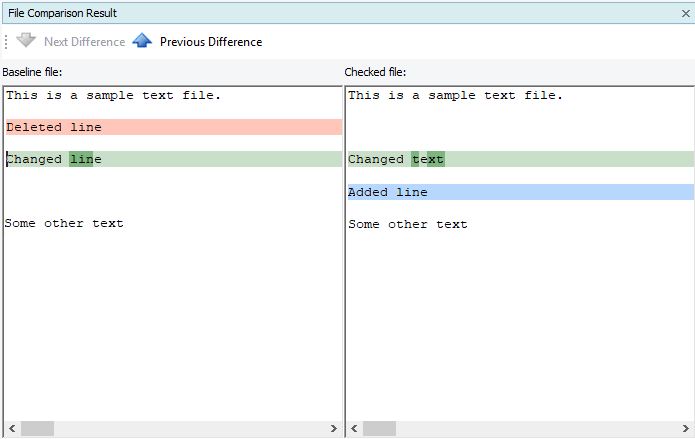
Otherwise, the checkpoint posts an ![]() error message to the test log and verification results to the Details panel. It also posts detailed file comparison results to the test log.
error message to the test log and verification results to the Details panel. It also posts detailed file comparison results to the test log.

If you use a third-party diff utility to verify files, the file comparison report generated by the utility is also posted to the test log.
For a detailed description of results generated by file checkpoints, see Analyzing File Verification Results.
| Note: | To change the type of the message posted to the test log on verification failure or customize the log message of the checkpoints, use one of the alternative approaches described below. |
File Checkpoints Alternatives
In addition to file checkpoints, to verify file contents, you can use the following approaches:
-
To compare files, use the Compare Files operation or the
Files.Comparescripting method. This method is similar to the file checkpoint, but allows you to specify what kind of message (an error, warning, informative message or no message at all) will be posted to the test log if the comparison fails. -
To compare files that have variable parts, use regular expressions. This way, you can implement custom verification logic and post custom success and failure messages to the test log. For information on how to do this, see Verifying Files With Variable Parts.
Updating File Checkpoints
If a file you want to verify in your test has been modified and now contains different data, your file checkpoint may fail. In order for the checkpoint to be passed successfully, update the baseline data used by the checkpoint. For information on how to do that, see Updating File Checkpoints.
Samples
TestComplete includes a sample project that demonstrates how to create file checkpoints:
 <TestComplete Samples>\Desktop\Checkpoints\File
| Note: | If you do not have the sample, download the TestComplete Samples installation package from the support.smartbear.com/testcomplete/downloads/samples page of our website and run it. |
