 |
The information below concerns legacy mobile tests that work with mobile devices connected to the local computer. For new mobile tests, we recommend using the newer cloud-compatible approach. |
Requirements
-
Mac computer with Xcode 9 - 12.3, Visual Studio for Mac (or Visual Studio 2015-2019) and an iOS development license.
-
Access to a Windows computer with TestComplete 12.50 or later installed.
General Procedure
To test a Xamarin.Forms application on an iOS device, you need to prepare both the application, the iOS device and the computer where the test will run:
-
Add your iOS device to the provisioning profile of your tested application. See details.
-
 Compile your Xamarin.Forms application for testing. See Compilation Steps below.
↑ This is different from preparing other iOS apps for testing.Depending on the way you compile your application, you may need to instrument your .ipa application file in TestComplete. See below.
-
Prepare your testing environment (the computer where TestComplete is installed and where you will create tests). See details.
-
Connect your iOS device to your TestComplete computer via a USB cable.
-
Deploy your application on the device. See details.
The described procedure is typical for all iOS applications. The key difference for Xamarin.Forms applications is the way you compile them for TestComplete. See below for details.
Compilation Steps
To prepare (or instrument) your application, follow the steps below:
-
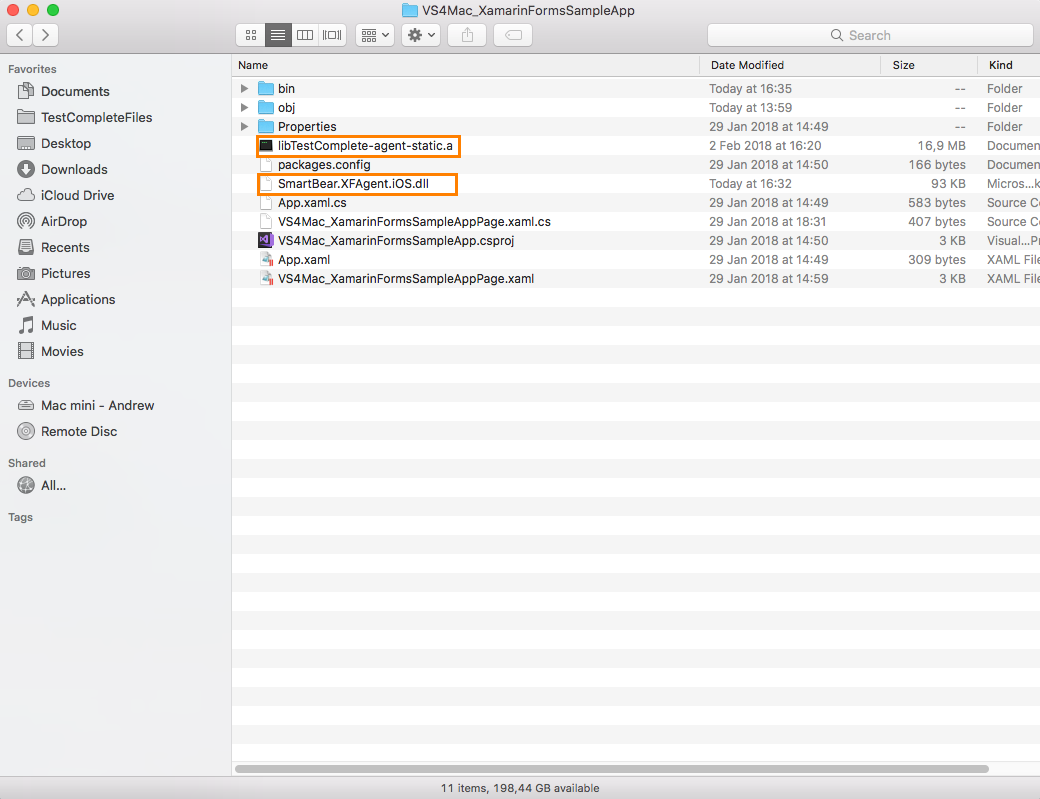
Copy the <TestComplete>\Bin\Extensions\Xamarin.Forms\iOS\SmartBear.XFAgent.iOS.dll file and, optionally, <TestComplete>\Bin\Extensions\iOS\libTestComplete-agent-static.a from your Windows computer where TestComplete is installed to the folder where your application project resides on the Mac computer.
Note: SmartBear.XFAgent.iOS.dll can be copied to any folder. -
Add a reference to the SmartBear.XFAgent.iOS.dll library to your application:
-
Open your Xamarin.Forms project in Visual Studio for Mac.
-
In the Solution panel, right-click the References item of your iOS app and select Edit References from the context menu.
-
Switch to the .Net Assembly tab, click Browse and choose the SmartBear.XFAgent.iOS.dll file you copied to the Mac computer.
-
-
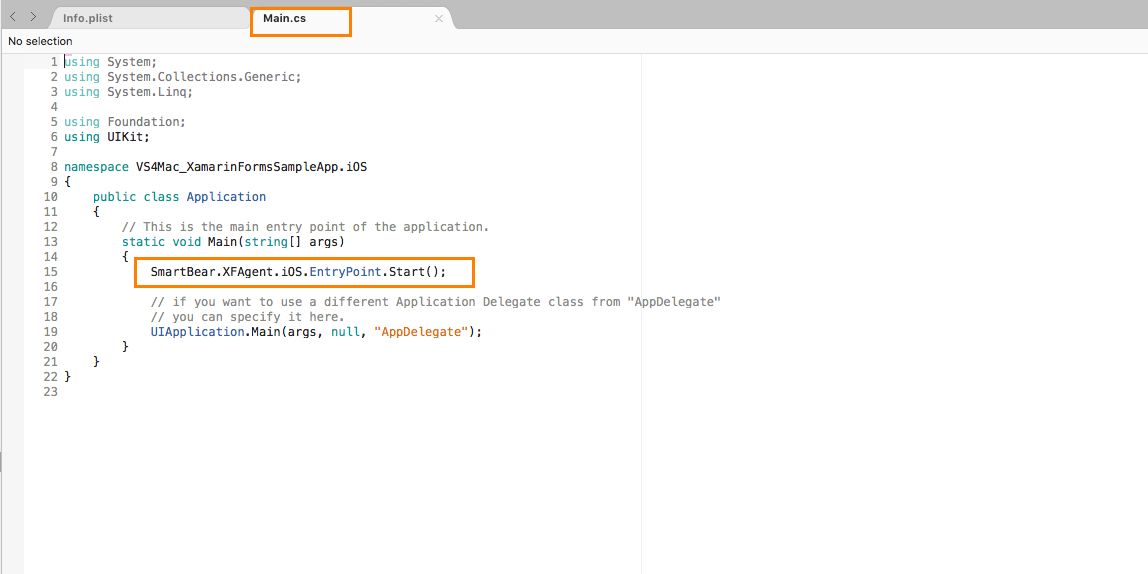
Insert the following code into the
Application.Main()method in your application code, and save the project. This code will initialize TestComplete Android Agent when your Xamarin.Forms application starts:SmartBear.XFAgent.iOS.EntryPoint.Start();
-
Optional. Add the libTestComplete-agent-static.a library to your application.
Note: You can add this library now, or skip this step and instrument your iOS application in TestComplete later. During instrumentation, TestComplete will include and configure the library automatically.
If you decided to include the library now, follow these steps:
-
Add the libTestComplete-agent-static.a file to your iOS application:
-
In the Solution panel, right-click your application node and select Add > Add Files from the context menu.
-
Click Browse and choose the libTestComplete-agent-static.a file you copied to the Mac computer.
-
-
Configure the libTestComplete-agent-static.a library:
-
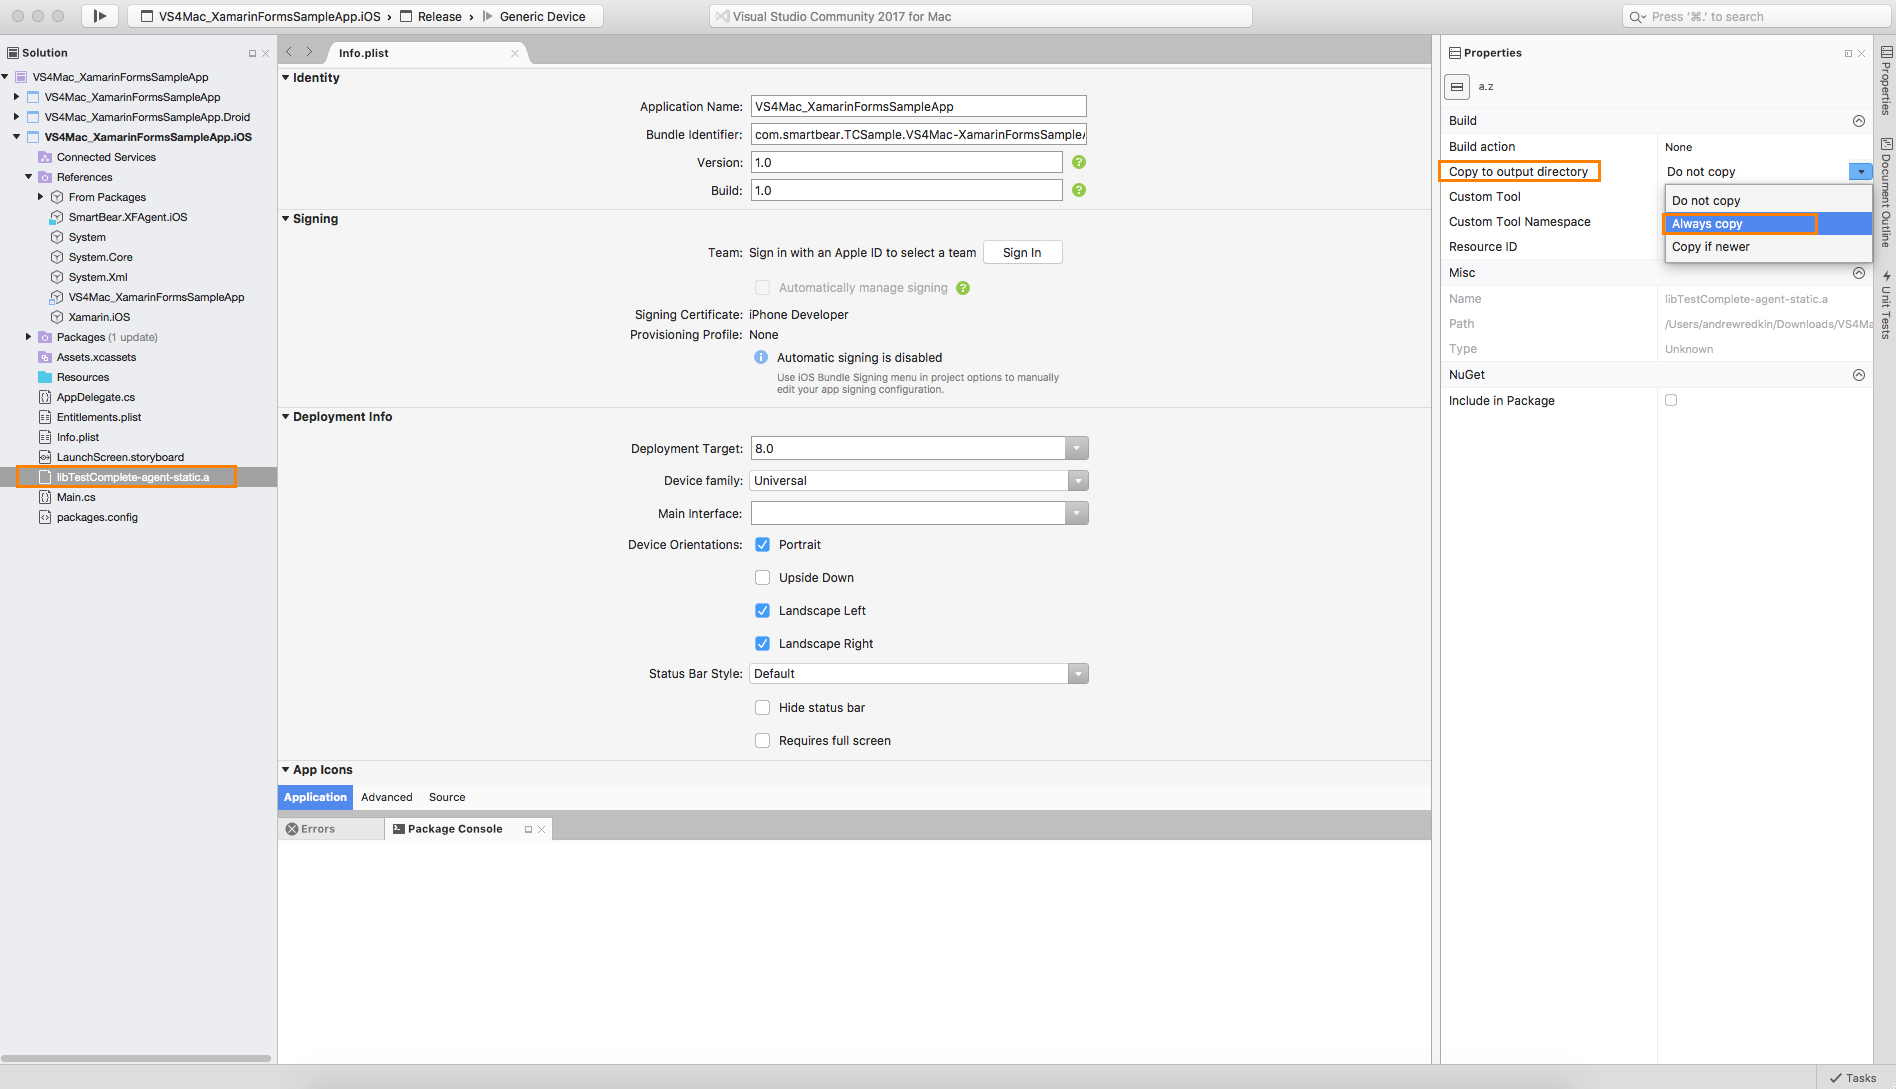
In the Solution panel, right-click the libTestComplete-agent-static.a file and select Properties from the context menu.
-
In the Properties panel, select Always copy in the Copy to output directory drop-down list:
-
-
Add the
mtoucharguments to your application project:-
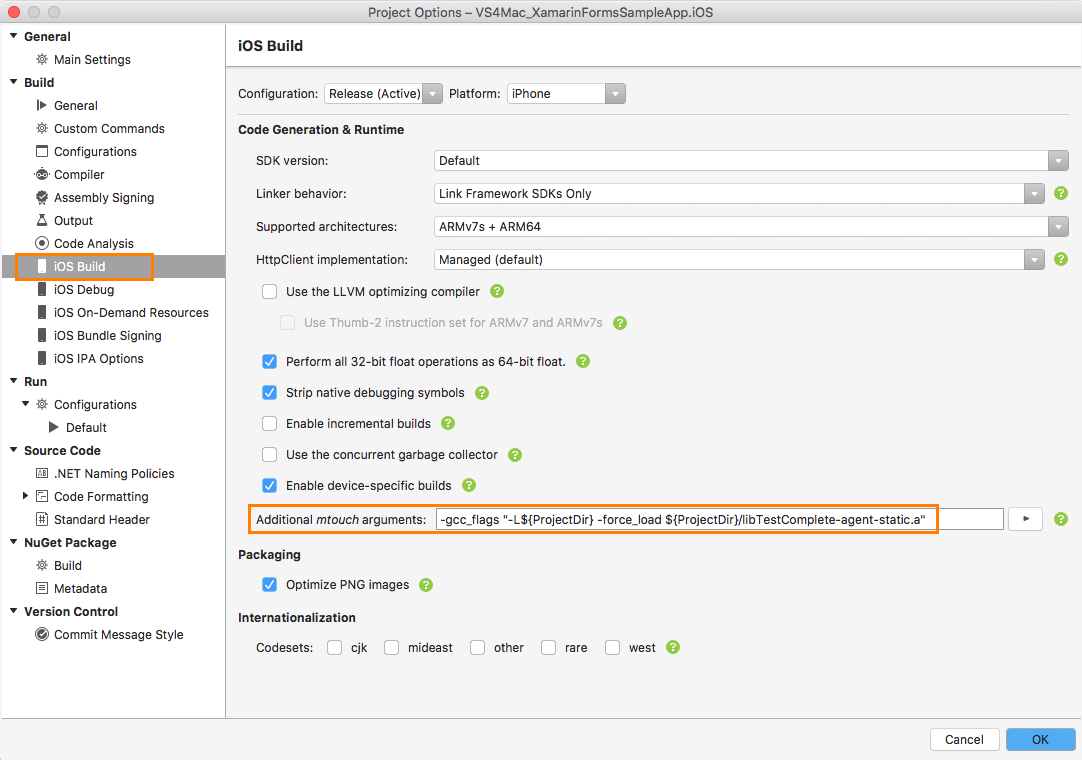
In the Solution panel, right-click your application node and select Options from the context menu.
-
In the subsequent dialog, select Build > iOS Build and specify the following string in the Additional mtouch arguments text box:
Compiler Settings
 Copy Code
-gcc_flags "-L${ProjectDir} -force_load ${ProjectDir}/libTestComplete-agent-static.a"
-
-
-
Archive your Xamarin.Forms iOS application. To do this, right-click your project in the Solution panel and select Archive for Publishing from the context menu.
-
Create an IPA file for your application:
-
From the Xcode main menu, select Window > Organizer.
-
Select the created archive and click Export.
-
In the subsequent dialog, select one of the following options:
- Save for Development Deployment or
- Save for Enterprise Deployment
The option to choose depends on the developer program you have:
-
If you have the iOS Developer Program (not the iOS Developer Enterprise Program), select Save for Development Deployment. This way you will be able to run your iOS application from TestComplete.
To use the Enterprise option, you need to have the iOS Developer Enterprise Program.
-
If you have the iOS Developer Enterprise Program, you can select any of these options. We recommend that you choose Save for Development Deployment.
Click Next to continue.
-
Xcode will display the production provisioning profile it chose for your .ipa file. Click Export to complete the file creation.
If Xcode chose an incorrect profile, cancel the file creation and modify your certificates and provisioning profile settings in Apple’s Member Center, in the Keychain Access application on your Mac and in Xcode’s Preferences > Accounts dialog.
-
-
Now, if you compiled the libTestComplete-agent-static.a library into your application at Step 4, you are done. Your application is ready for testing with TestComplete.
If you did not compile the library into your application, then —
-
Start TestComplete, open your test project in it and add your .ipa file to the list of Tested Applications of your project.
-
When adding the .ipa file to the list, choose to instrument the application. For information on how to instrument iOS applications, see Instrumenting iOS Applications in TestComplete UI (Legacy). After that, your iOS application will be ready for testing.
-
 Do not submit instrumented applications to the App Store. Instrumented applications use private APIs and will be rejected. Create a separate build configuration for test builds.
See Also
Preparing Applications, Devices, and Test Computers for iOS Testing (Legacy)
Testing Mobile Applications
Testing Xamarin.Forms Applications (Legacy)


