 |
The information below concerns legacy mobile tests that work with mobile devices connected to the local computer. For new mobile tests, we recommend using the newer cloud-compatible approach. |
Requirements
-
Windows computer with Visual Studio 2015-2019 (or Visual Studio for Mac) installed.
-
TestComplete 12.50 or later installed on the computer.
General Procedure
To test a Xamarin.Forms application on an Android device, you need to prepare both the application, the Android device and the computer where the test will run:
-
 Prepare your Xamarin.Forms application for testing. See Compilation Steps below.
↑ This is different from preparing other Android apps for testing. -
Prepare your Android device (it can be a physical device, emulator, or a virtual machine). See details.
-
Prepare your testing environment (the computer where TestComplete is installed and where you will create tests). See details.
-
Connect your Android device to your TestComplete computer. See details.
-
Deploy your application on the device. See details.
The described procedure is typical for all Android applications. The key difference for Xamarin.Forms applications is the way you compile them for TestComplete. See below for details.
Compilation Steps
To prepare (or instrument) your application, follow the steps below:
-
Open your Xamarin.Forms project in Visual Studio.
Note: Make sure the project path and the file name are not too long (the fully qualified file name must be less than 260 characters, and the directory name must not exceed 248 characters). -
Add the required references to your project:
-
In Solution Explorer, right-click your Android-specific project.
-
Select Add > Reference from the context menu.
-
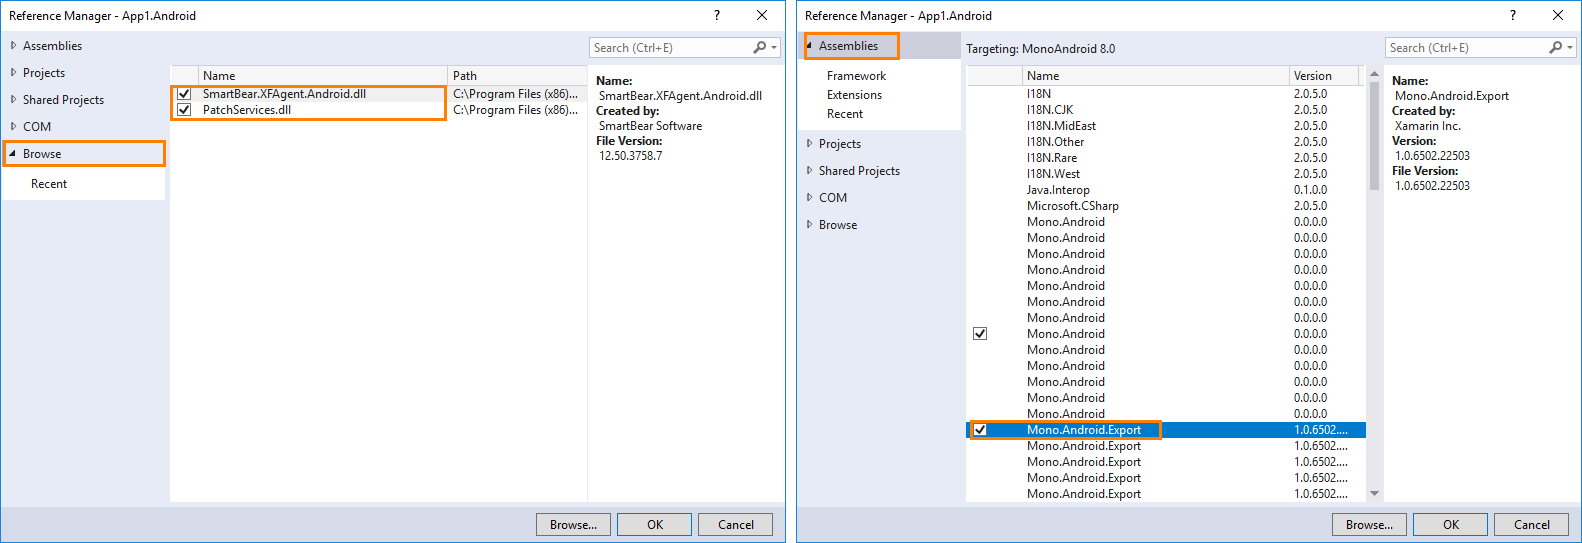
In the appeared Reference Manager dialog, add references to the SmartBear.XFAgent.Android.dll, PatchServices.dll and Mono.Android.Export.dll files:
-
Switch to the Browse tab, click Browse and specify the path <TestComplete>\Bin\Extensions\Xamarin.Forms\Android, then select the SmartBear.XFAgent.Android.dll and PatchServices.dll files, and click Add.
-
Switch to the Assemblies tab and check the Mono.Android.Export.dll file.
-
-
Click OK to close the Reference Manager dialog and apply the changes.
-
-
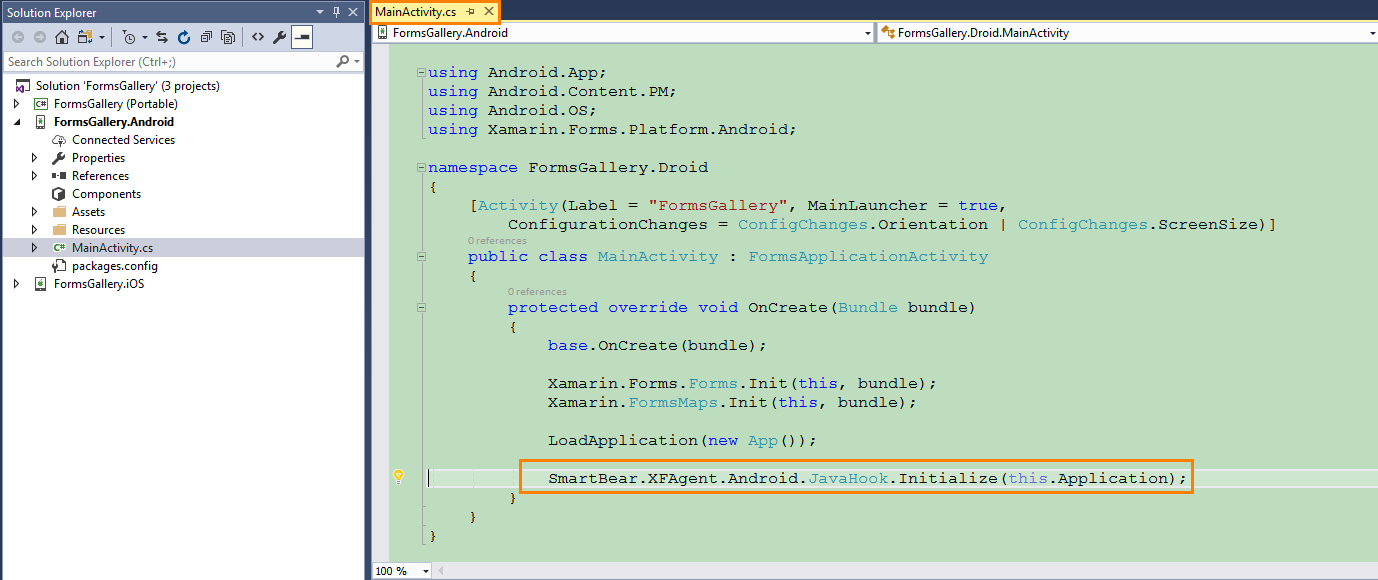
Initialize the PatchServices library during the application startup.
Add the initializing line to the
OnCreate()method of the Android activity:SmartBear.XFAgent.Android.JavaHook.Initialize(this.Application);
-
Build and run your application.
-
Select the Release configuration from the Solution Configurations drop-down list.
 Do not use the Debug configuration to build Xamarin.Forms Android applications. Otherwise, you may face issues with opening and testing such applications with TestComplete.
 -
Build and run your application on the selected Android device.
Note: If you experience issues during application building, try to clean the current solution before building and running your application. To do this, right-click your project in the Solution Explorer and select Clean Solution from the context menu. -
Now your application is ready for testing with TestComplete.
 Do not submit instrumented applications to the Google Play. Instrumented applications use private APIs and will be rejected. Create a separate build configuration for test builds.
See Also
Preparing for Testing Android Applications (Legacy)
Testing Mobile Applications
Testing Xamarin.Forms Applications (Legacy)


 Copy Code
