On the Shared Documents screen, you can use folders to organize and group your uploaded files.
The folder structure is similar to the structure on other QAComplete screens, but it slightly differs:
-
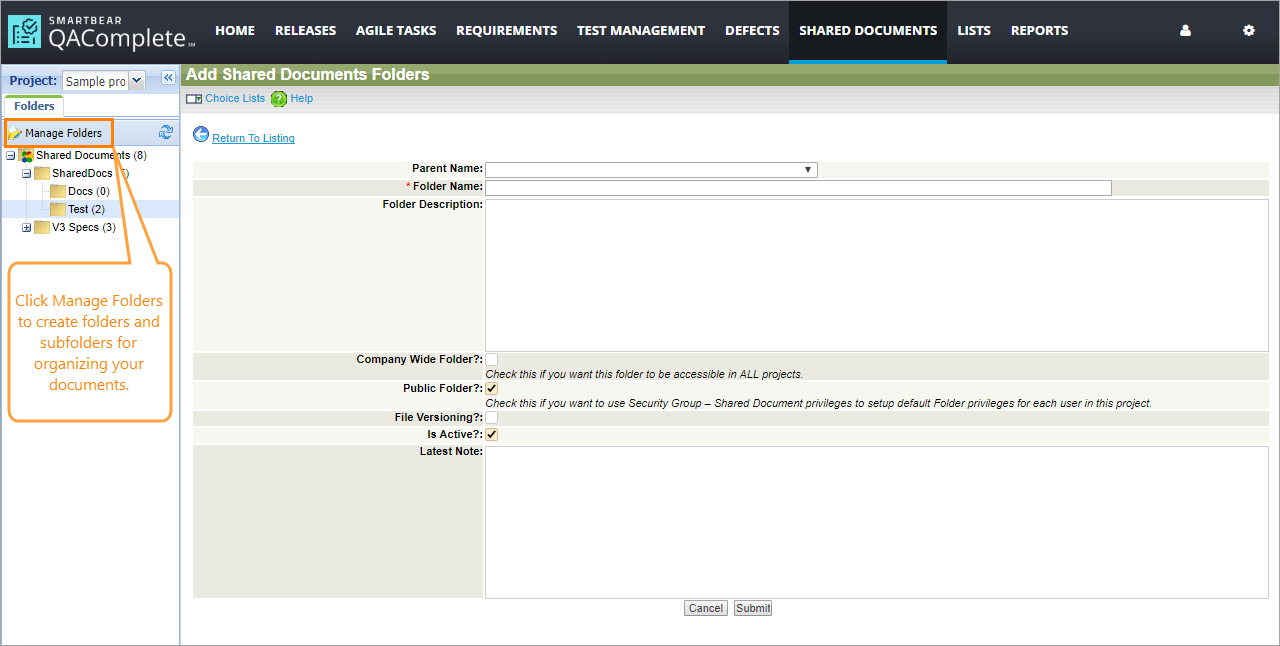
To work with Shared Documents folders, you use the Manage Folders screen.
-
Shared Documents folders can be either public or private.
Create a shared document folder
To create a new folder:
-
On the Shared Documents screen, click Manage Folders.
-
On the Shared Documents toolbar, click Add New.
When you are creating a folder, the following options are available:
-
Company Wide Folder – Make the folder available across all projects.
-
Public Folder – Make the folder public or private.
-
File Versioning – Store the versions of documents in the folder.
-
Is Active – Specify whether the folder is active or archived.
Folder security
Folders can be created as public or private:
-
Public folders can be accessed by any user who has permissions to access Shared Documents.
Suppose, you have two groups. One of them has full access to Shared Documents, and the other has only a read-only permission. When you create a public folder, all the users of the first group will get full access to Shared Documents. The members of the second group will get read-only access. The new users you add to QAComplete will automatically get access to the existing public Shared Document folders if they belong to a group that has access to Shared Documents.
-
Private folders can be accessed only by the creator of the folders. The new users you add to QAComplete do not get access to private folders, however, the creator of the folders can grant a permission to access them to certain users.
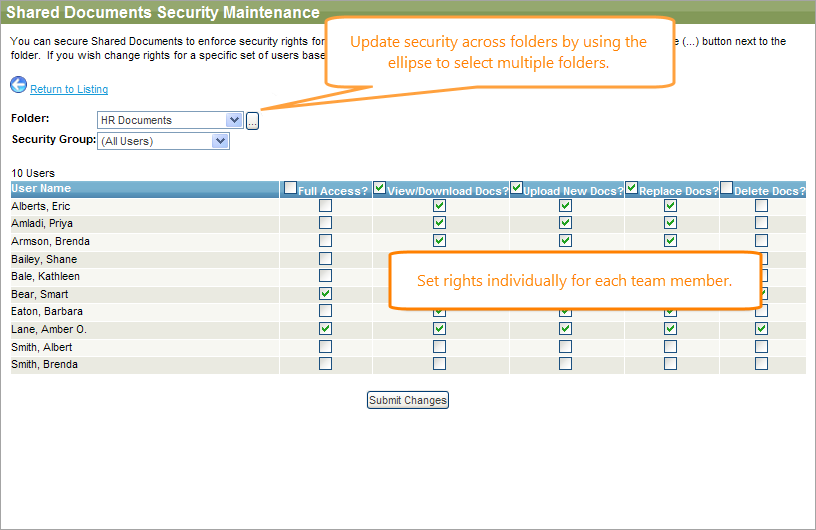
Once you create a folder, you, as the folder creator, can change the security permissions. To do that, click Shared Documents > Manage Folders, then click the Manage Security Rights button for the folder you want to modify. You can allow users to read, upload, replace and delete files.
See Also
About Shared Documents
Upload and Download Documents
Delete Documents


