After configuring the QAComplete application in Azure Active Directory, you need to assign users to this application so that they can use it. Depending on the type of your Azure membership, you can grant access directly to specific users or configure multiple groups with different permissions. For more information, see the Assign users and groups to your SAML application section in the Azure Active Directory documentation.
To provide access to a specific user or several users:
-
Log in to Azure Portal using an administrator account.
-
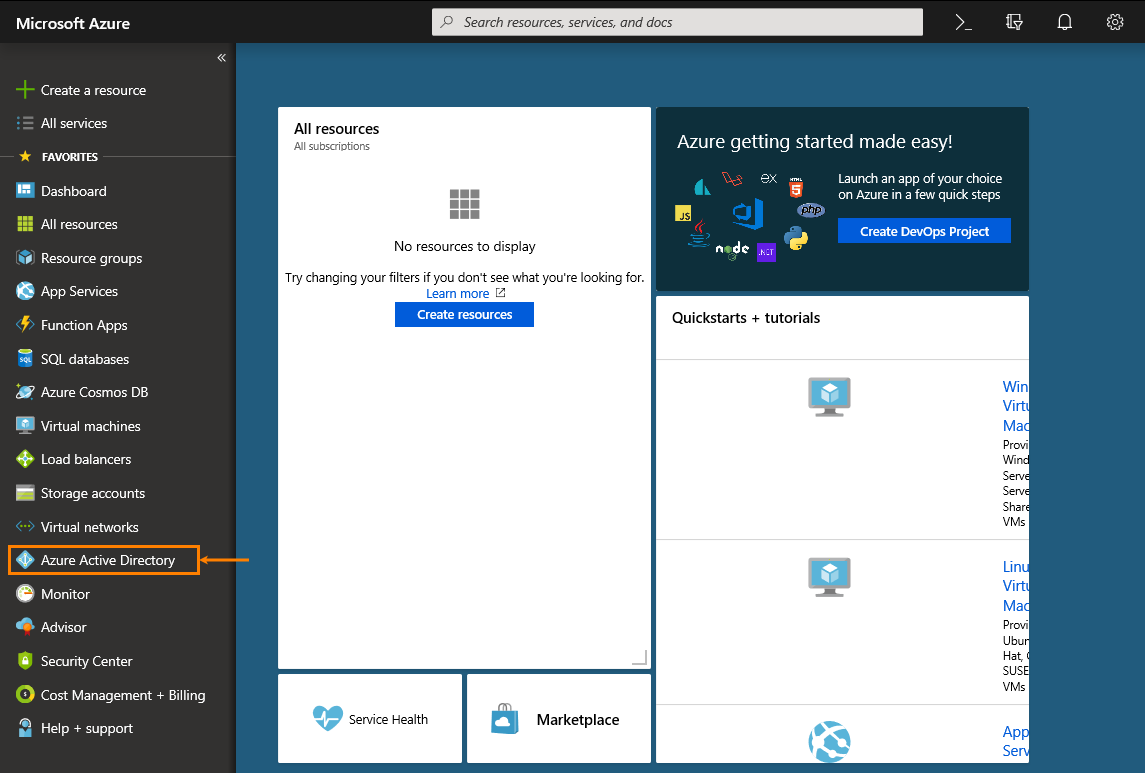
On the menu bar on the left, select Azure Active Directory:
-
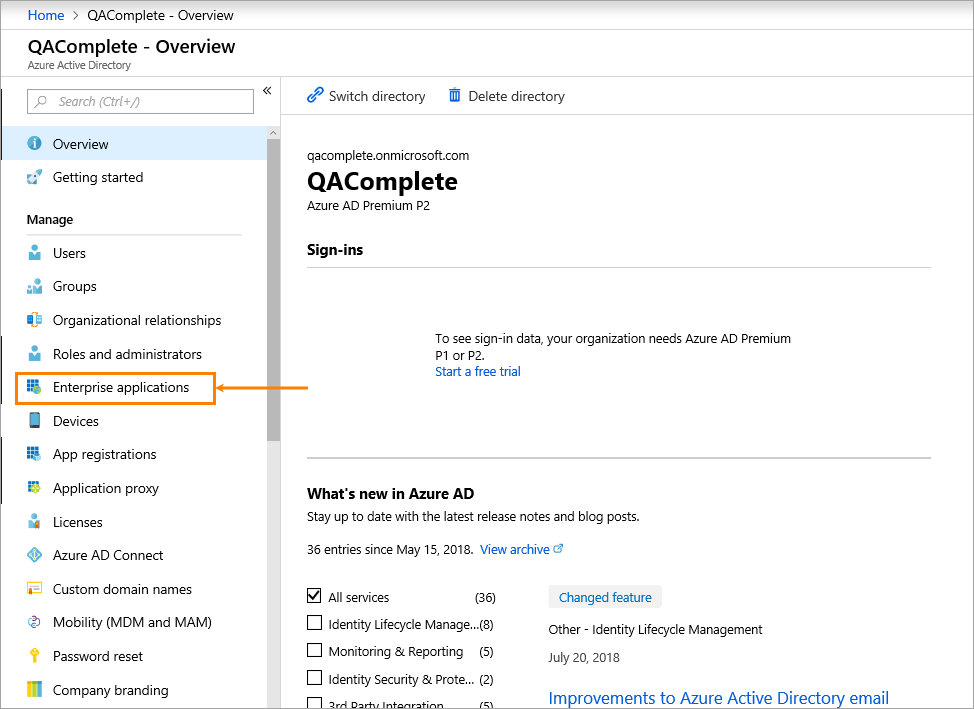
The page of your company will appear in Azure Active Directory.
In the Manage section on the left, select Enterprise applications:
-
Locate your QAComplete application in the list, then double-click it.
-
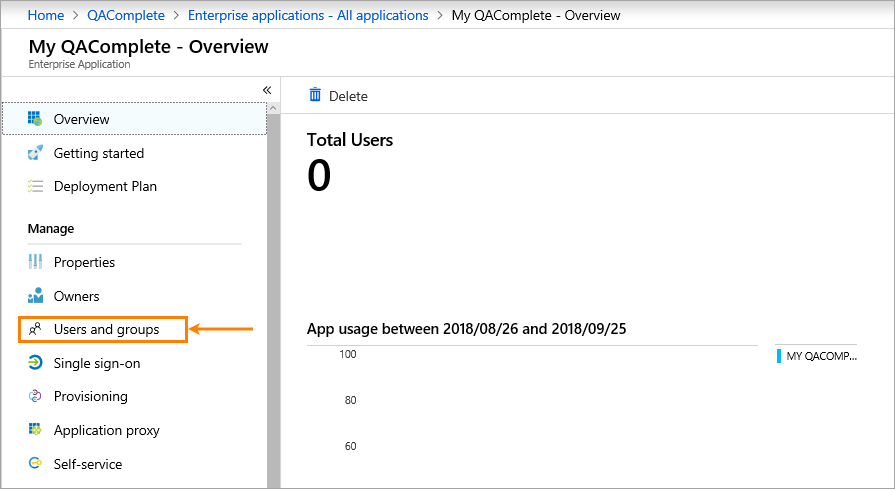
The Overview screen will appear. In the Manage section on the left, select Users and Groups:
-
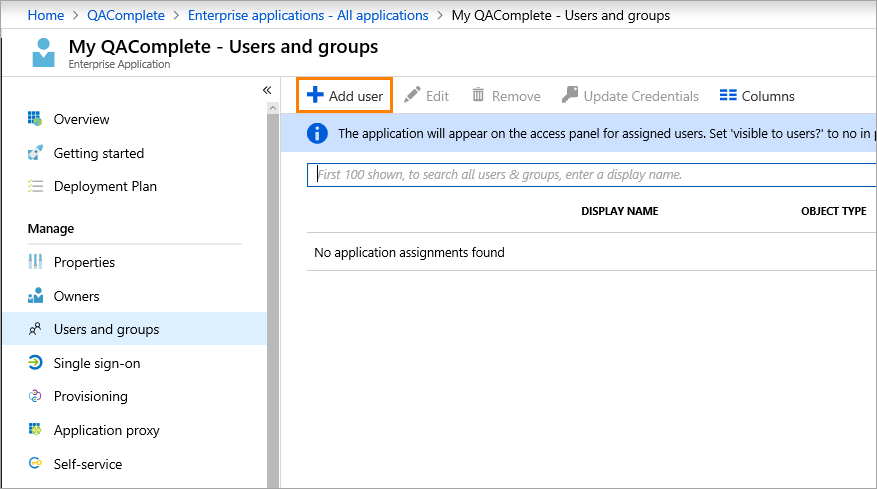
Click Add user:
-
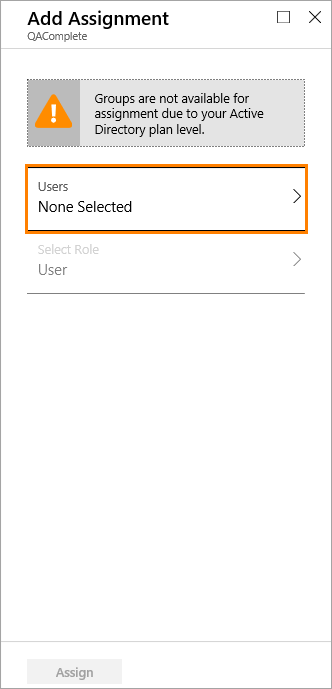
The Add Assignment form will appear. Double-click Users:
-
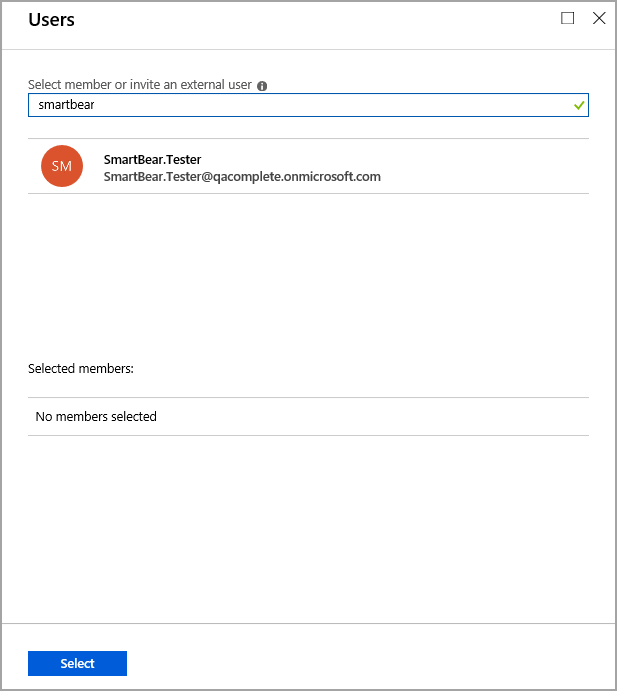
A list of Azure instance users will appear. Select the users you want to assign to the QAComplete application. Use the edit box at the top of the form to search for a specific user:
You can also invite users who have no access to your Azure instance. To do that, specify their email address in the edit box at the top of the form and click Enter. After that, type a personal message, if needed, and double-click Invite:
The user who will receive the invitation will be able to use their Microsoft account to authenticate in QAComplete or create a new account if they do not have it.
-
Once you add all the users you need, click Select at the bottom of the form.
-
Click Assign to apply the changes you have made.
-
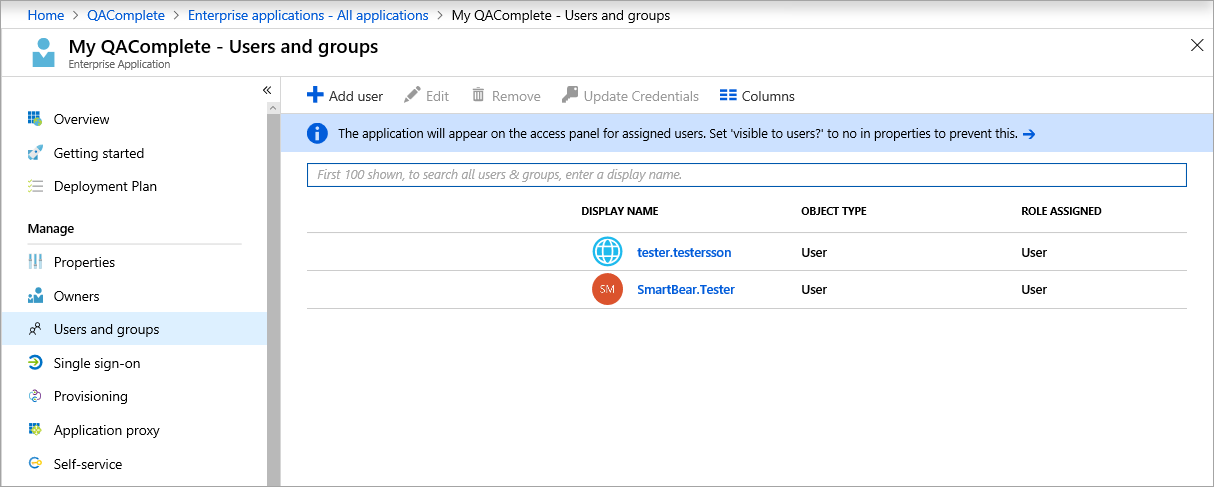
After that, you can close the Add Assignment form. The list of the application users will be updated:
Next step
After assigning users to QAComplete in Azure Active Directory, configure your QAComplete instance for using single sign-on:
See Also
Configure Application
Configure QAComplete
Azure Active Directory


 Configure QAComplete