On-Premises clients can create a filtered selection by creating the Choice List (List with Sublist based on SQL) custom field.
This function allows you to give your users a shortcut, which can be used to locate the value for a field. It can be helpful, when you have a lengthy list of items for validation. You can use this function to split all items from the list into custom categories for easier selection.
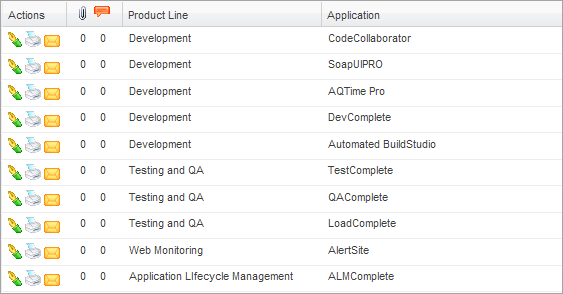
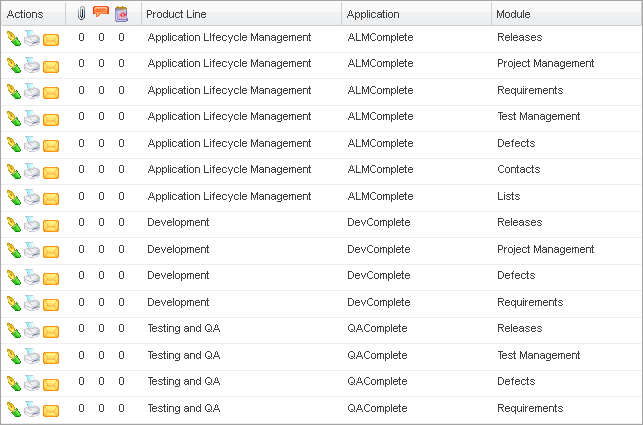
For example, you have several product lines specified for your applications. You have created the custom Applications list, which is organized into Product Lines:
All values in the Application column must be unique. They are categorized by the product line only to simplify selection of application. Only the selected Application value is actually stored in the record.
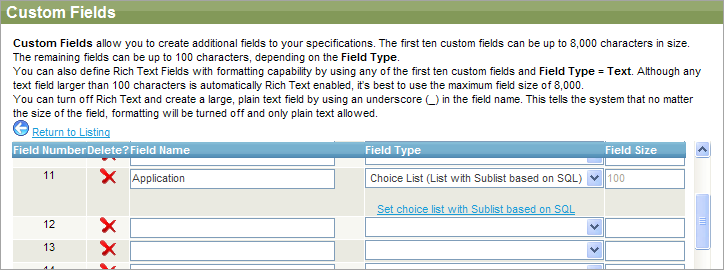
To create a custom field, define it in Requirements:
Click Save when asked.
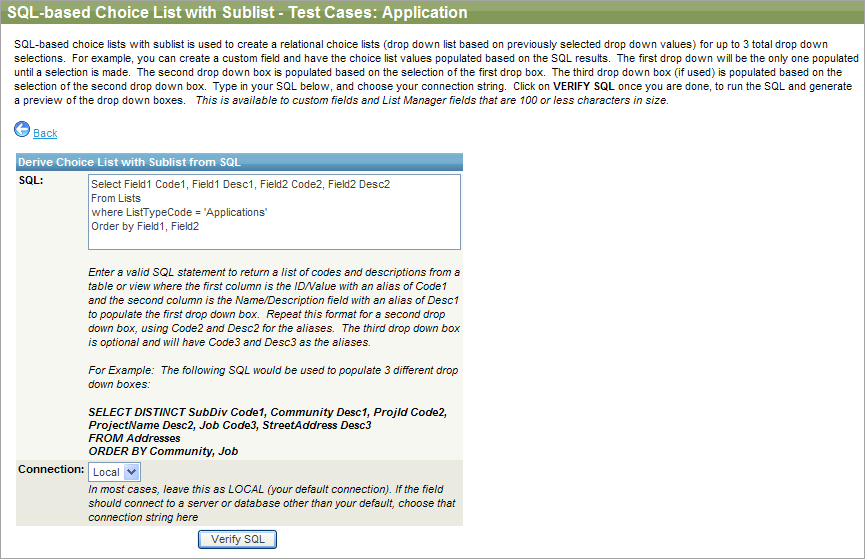
The Select statement on the preceding screenshot refers to the Field1 and Field2 fields. These field names come directly from the Lists table. They are not the labels from your field definitions.
Please use these syntax rules to properly build relationships between the fields:
-
Every first field must be followed by
Code1andDesc1. -
Every second field must be followed by
Code2andDesc2. -
Every third field, if used, must be followed by
Code3andDesc3, and so on.
The name of your list becomes the ListTypeCode value. Our example list is called Applications. If you are referencing a table other than a list, use actual table and field names from that table.
Check the syntax once again and click Verify SQL.
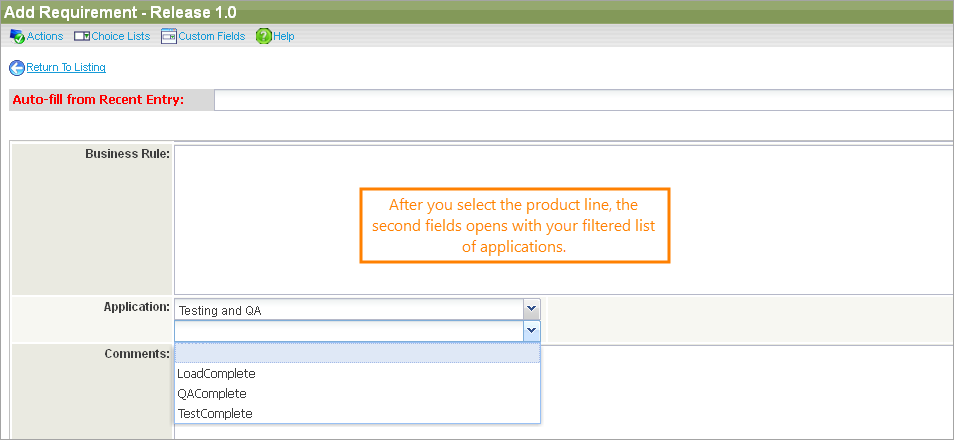
When you select Testing and QA in the first field, the second field lists the applications in the Testing and QA product line. Click Submit.
Back in Requirements, you will see your custom field for applications on the Create and Edit forms.
Open the drop-down list to see your list of product lines. After you select a product line, a second field opens up.
In the second drop-down list, there is the list of applications filtered by product line. Make your choice and click Submit.
Another example: you have product lines, applications, and modules specified in another list. If you like to combine this information into the choice list with the sublist, you can actually concatenate the fields from your list (or other table) into the new custom field.
Here is the sample list:
The custom field is called Product, App and Module. Its definition looks like this:
Field1 Code1, Field1 Desc1,
Field1 + ' | ' +Field2 Code2, Field2 Desc2,
Field1 + ' | ' + Field2 + ' | ' + Field3 Code3, Field3 Desc3
From Lists
where ListTypeCode = 'FunctionalArea'
Order by Field1, Field2, Field3
You will find the result output on the Edit form:
You can configure your newly created field to appear on the items list screen:
| Note: | This is a single custom field, not a logical relationship between multiple fields. |

