
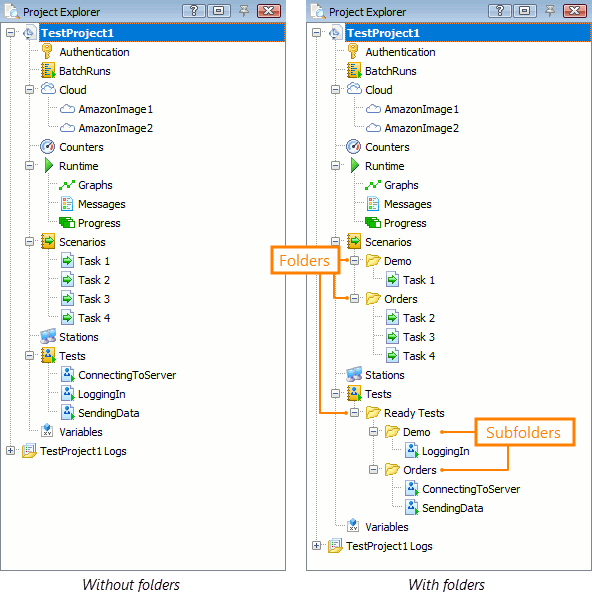
In large projects, you can group items into folders and subfolders for easier management.
To create a folder or subfolder
You can create folders under the Cloud, Scenarios, and Tests collections.
To create a folder, right-click the parent item in the Project Explorer and select Create Folder.
| Note: | Folders are virtual (logical) and used for presentational purposes only. The corresponding folders on the disk are not created. |
To add items to a folder (or subfolder)
To move an existing item into a folder, drag and drop it onto that folder.
To add a new item to a folder, right-click the folder and select Add New Item.
You can also drag and drop folders within the same collection to change the folder hierarchy.
| Note: | Folders can only contain items of the same type as the parent collection. For example, a folder in Scenarios can contain only scenarios. |
To rename a folder
-
Right-click the folder in the Project Explorer, select
 Rename from the context menu.
 -
Enter the new name and press Enter.
To delete a folder
-
Right-click the folder in the Project Explorer panel and select
 Remove from the context menu.
 -
To delete the files from the project but keep them on the disk, click Remove.
To delete the files completely (both from the project and from the disk), click Delete.