About the CucumberStudio add-on
It is considered good practice to create bug reports for issues found during test runs. With CucumberStudio, you can easily add these reports to your Jira projects.
To integrate with Jira, you use the CucumberStudio add-on. It enables you to link your scenarios, tests, and test results with Jira issues of any kind in real time.
The add-on is free. You can find it in the Atlassian Marketplace:
 CucumberStudio add-on in the Marketplace
 Install the add-on to your Jira instance, and then configure it and your CucumberStudio projects. See below for details.
Get started
Watch this video to learn the basics of the Jira integration:
| Note: | This video was recorded for an earlier version of the add-on that used the previous product name — HipTest. The latest version is even better and uses the new name —CucumberStudio. |
Supported project type
Currently, the integration with Jira is available only for the projects of the Test Management type.
Set up your project
Before going any further, if you are using CucumberStudio Enterprise with Jira Server, you first need to configure the CucumberStudio add-on.
 Important note for Jira Server users
If you are using CucumberStudio Cloud with Jira Server (not Jira Cloud), then, on your Jira server, you need to allow incoming traffic from the following server that CucumberStudio uses:
egress.osc-fr1.scalingo.com |
171.33.105.206(at the moment of writing) |
We’d recommend specifying the server URL (FQDN) rather than its IP, because the IP address can change.
You can check the IP address matching the specified FQDN at any time by running a command like nslookup egress.osc-fr1.scalingo.com.
Step 1: Link your project to your Jira instance
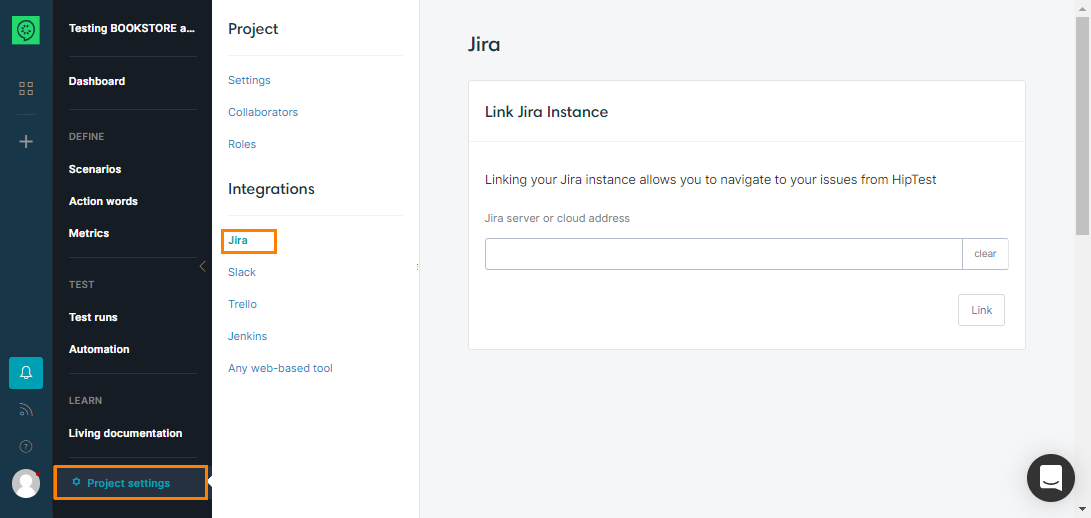
In your project settings, you can add your Jira Server or Cloud address. This will give you the ability to create links between CucumberStudio and Jira issues.
Please note that this setting is available only in the projects of the Test Management type.
Step 2: Select a list of Jira projects
In order to create Jira issues directly from CucumberStudio, you have to setup your current CucumberStudio project and link it with your Jira project. If you have multiple Jira projets, link your CucumberStudio with all the needed Jira projects.
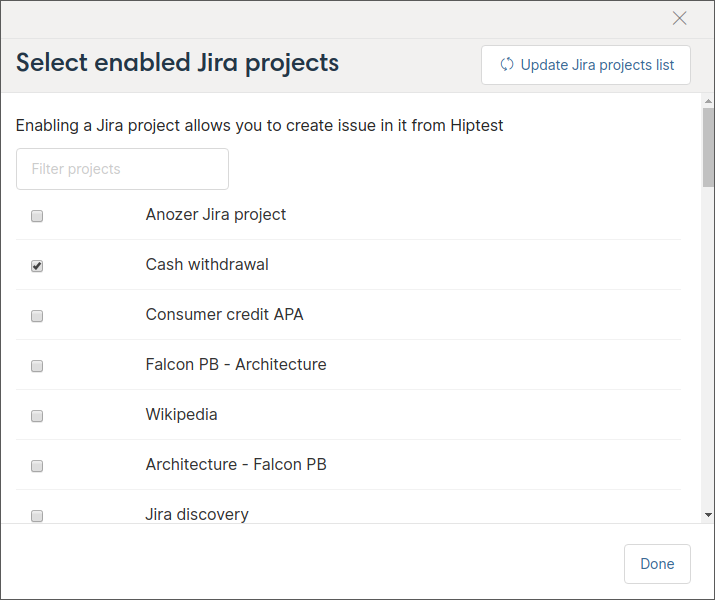
To update the Jira projects list, click on Update enabled Jira projects.
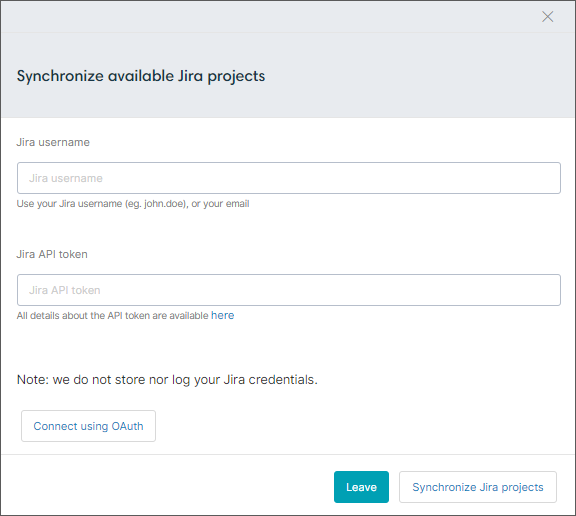
Synchronize the available Jira projects using your Jira credentials.
When using Jira cloud, the authentication needs an API token. All details about how to generate the API token are available here.
If you are using Jira server, use the Jira username and password.
Then select the projects you want to link and create issues in. It’s done!
You can now create Jira issues in the selected projects directly from CucumberStudio:
Mandatory fields and troubleshooting
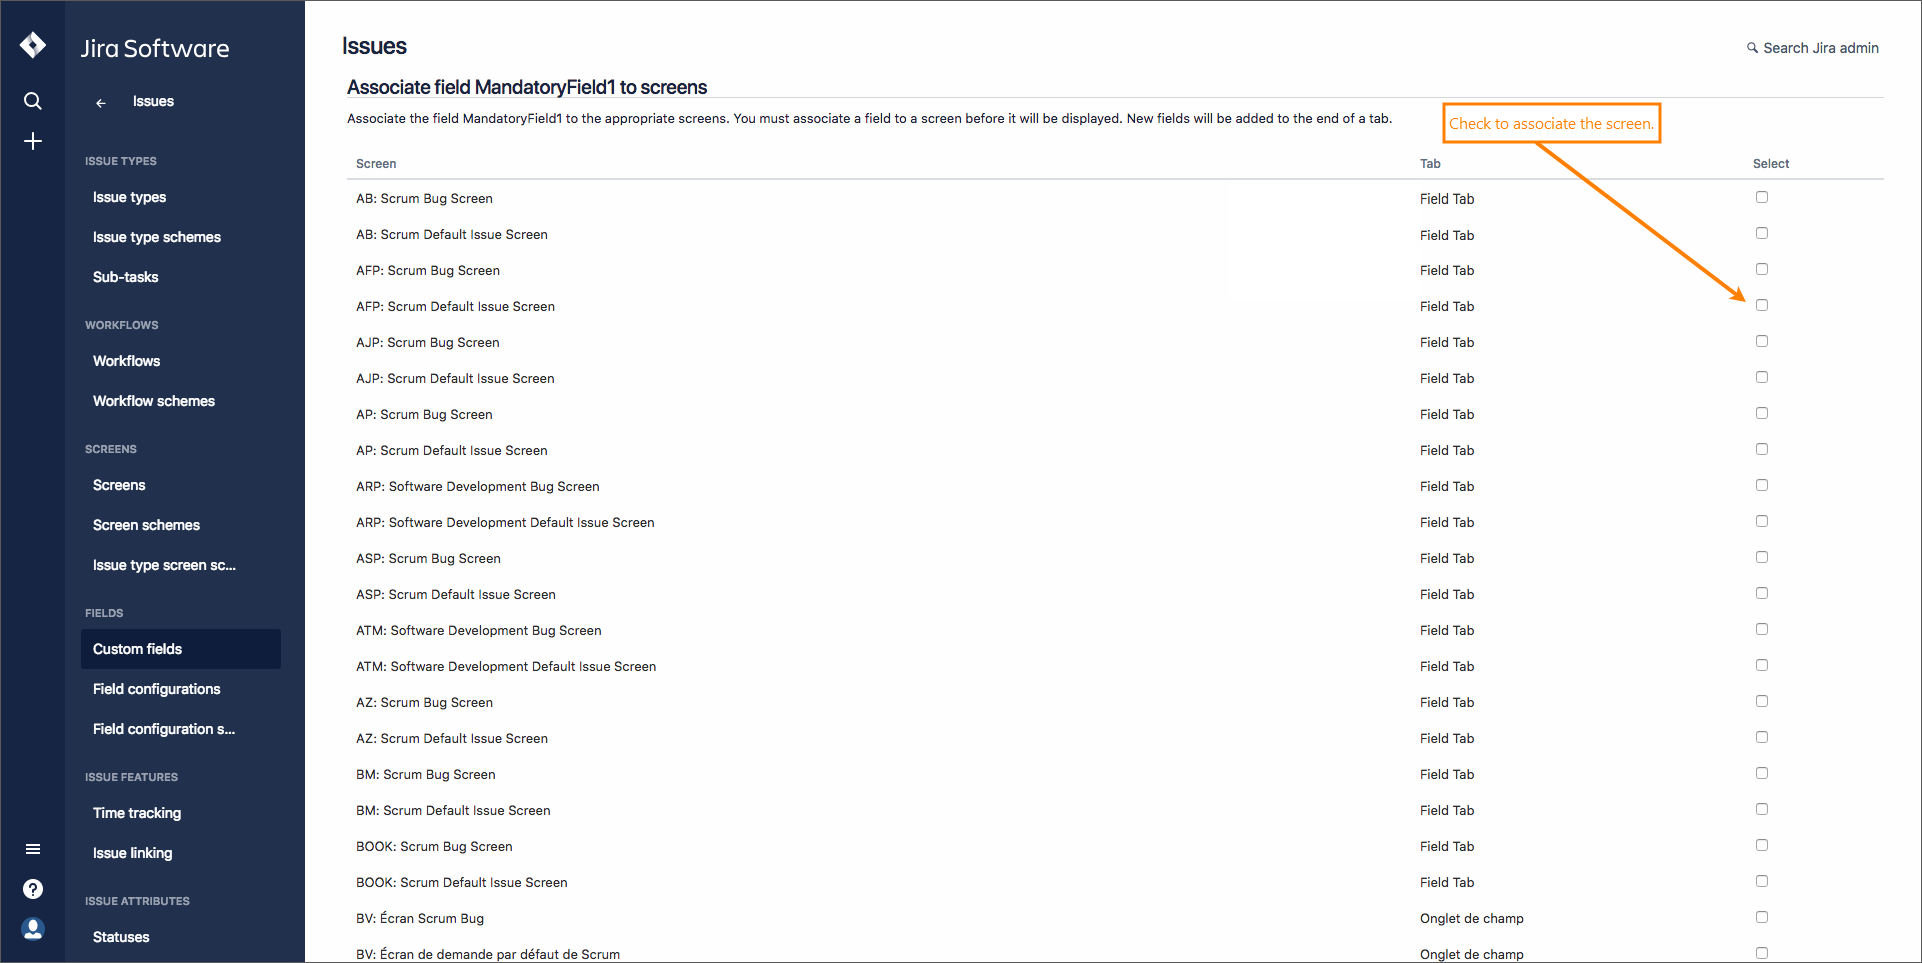
If your Jira issue type has custom mandatory fields, CucumberStudio will allow you to fill them in. Currently most of the issue types are supported. If your issue types are unsupported, don’t hesitate to contact us.
CucumberStudio can only display custom mandatory fields that are associated to the Jira Default Issue Screen of your project. If the creation of an issue fails, don’t hesitate to check the Screens configuration of your custom mandatory fields:
Let’s look at a simple workflow
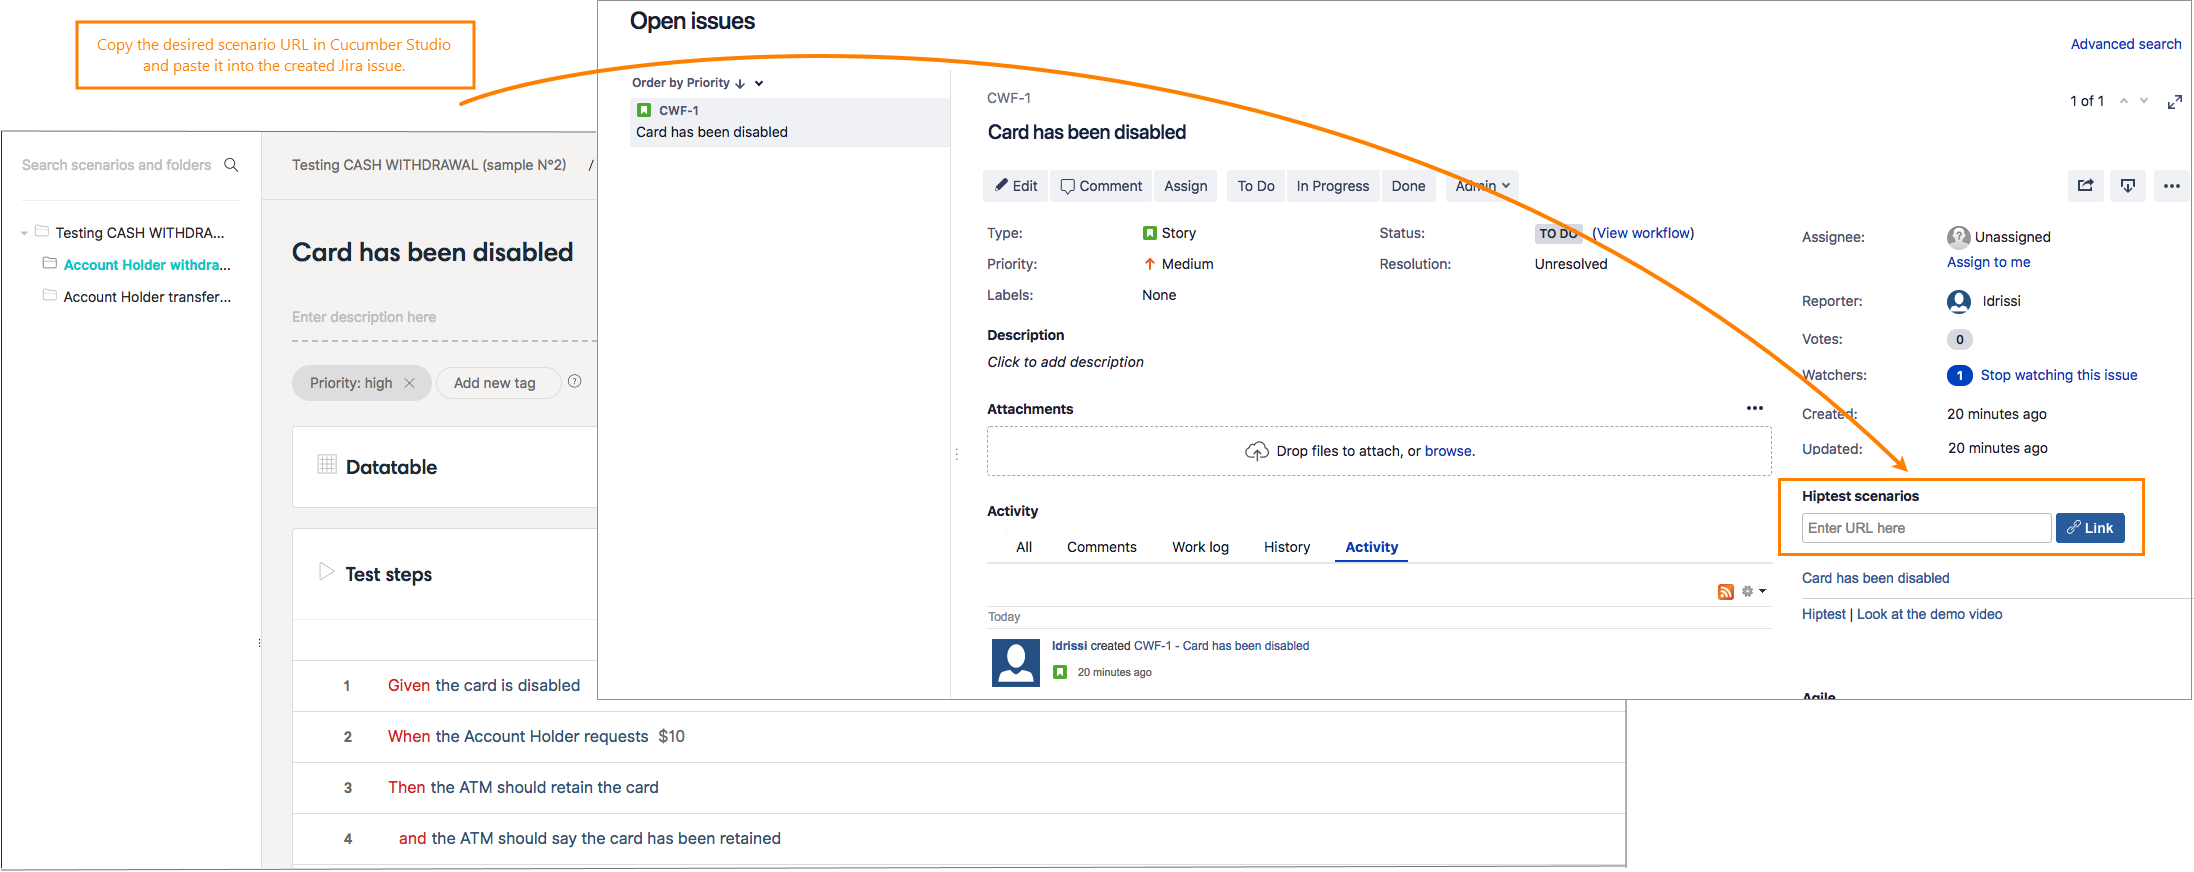
Create a scenario and link it to a Jira user story.
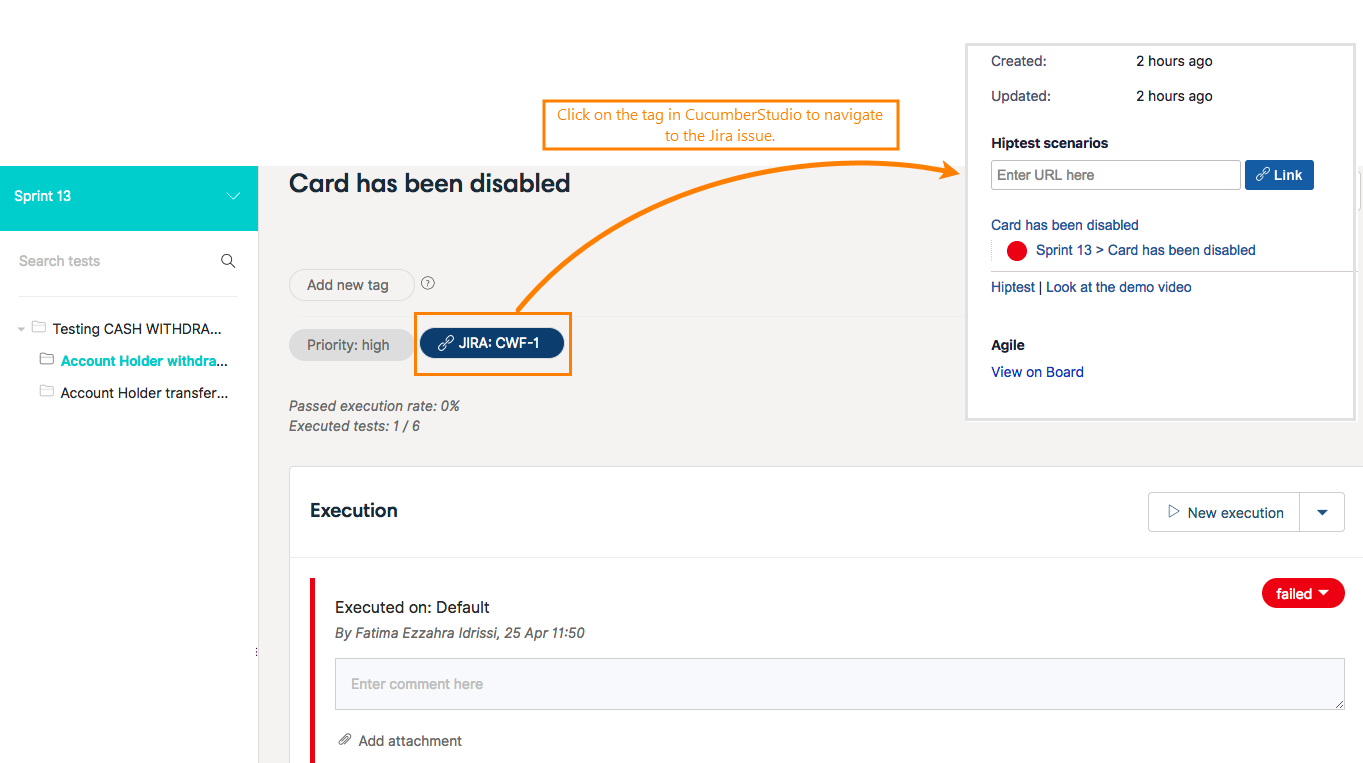
Execute the test in CucumberStudio and the status in Jira is updated in real-time!
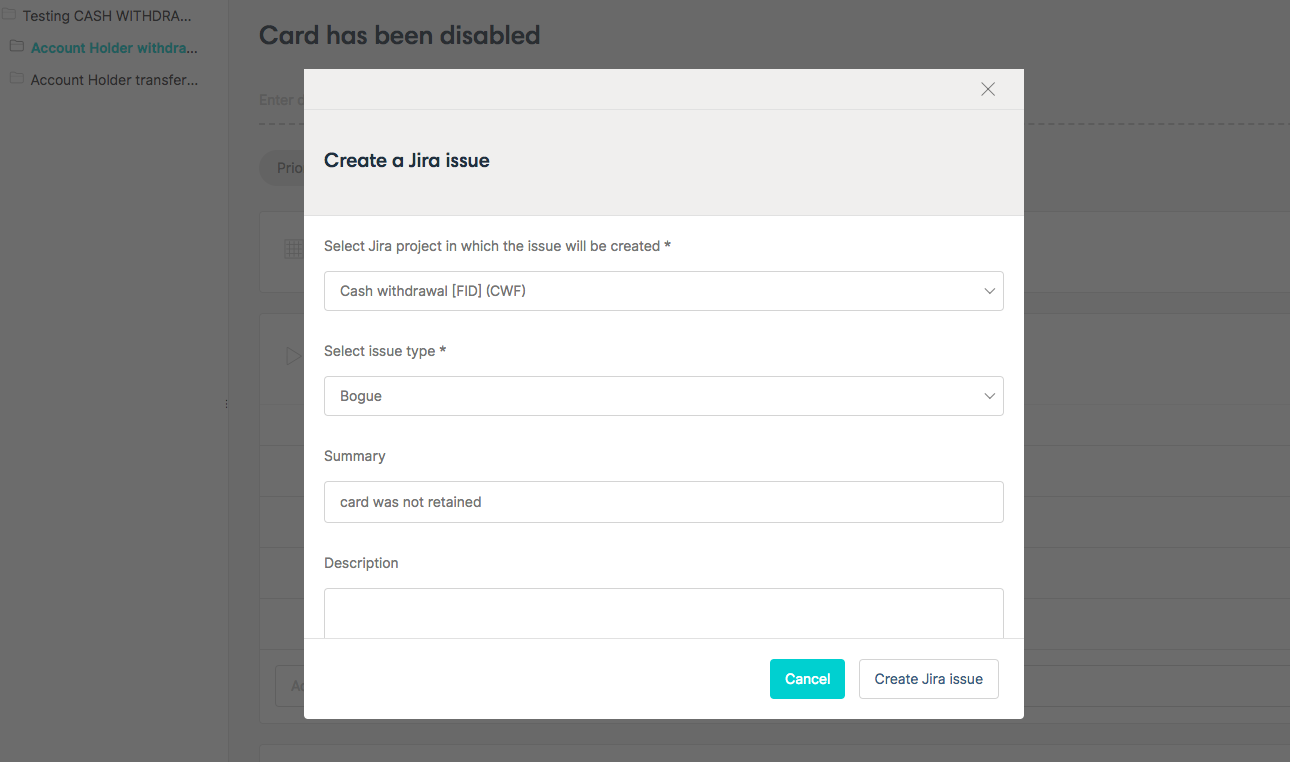
Create an issue (bug) directly from CucumberStudio:
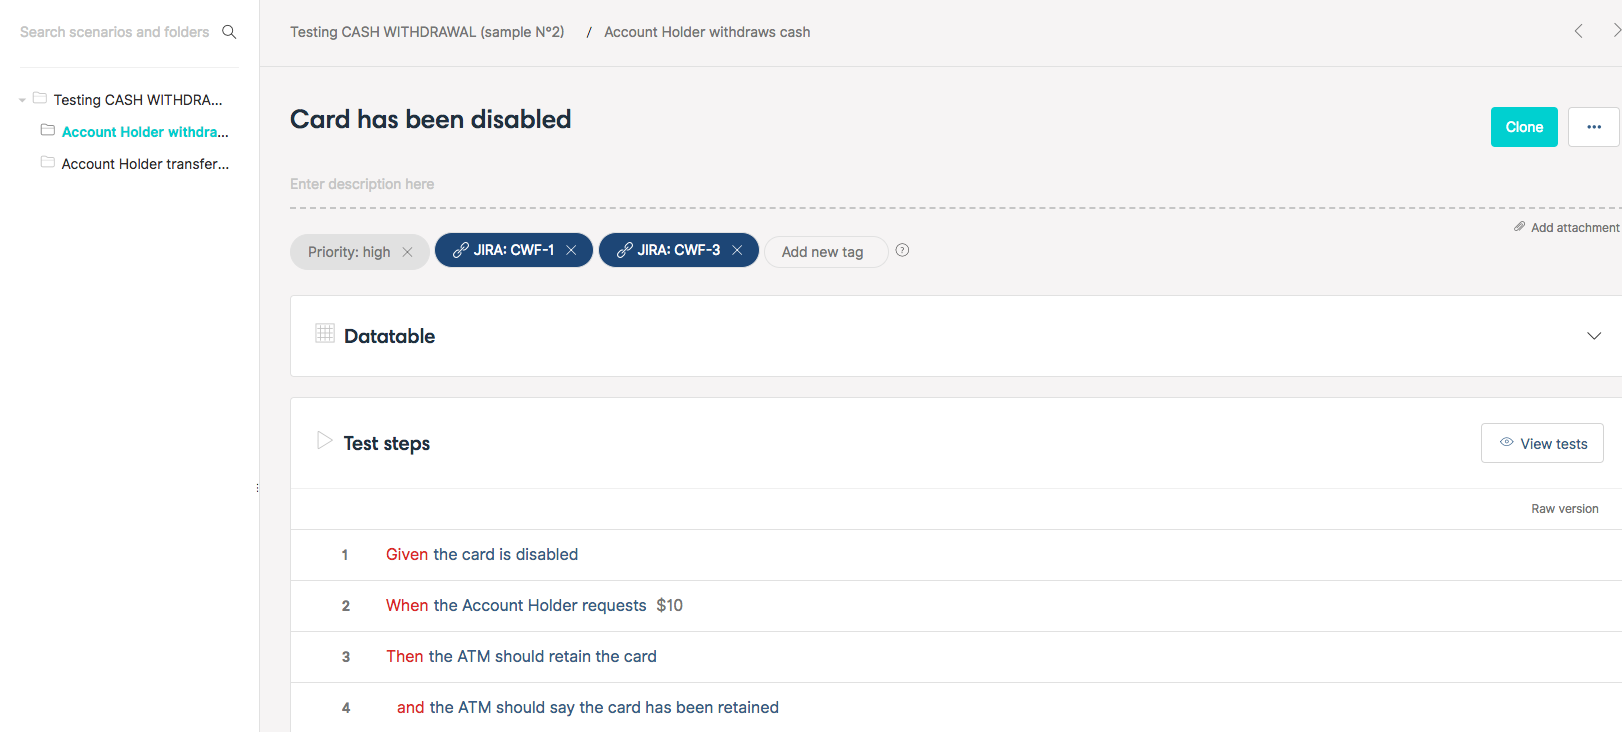
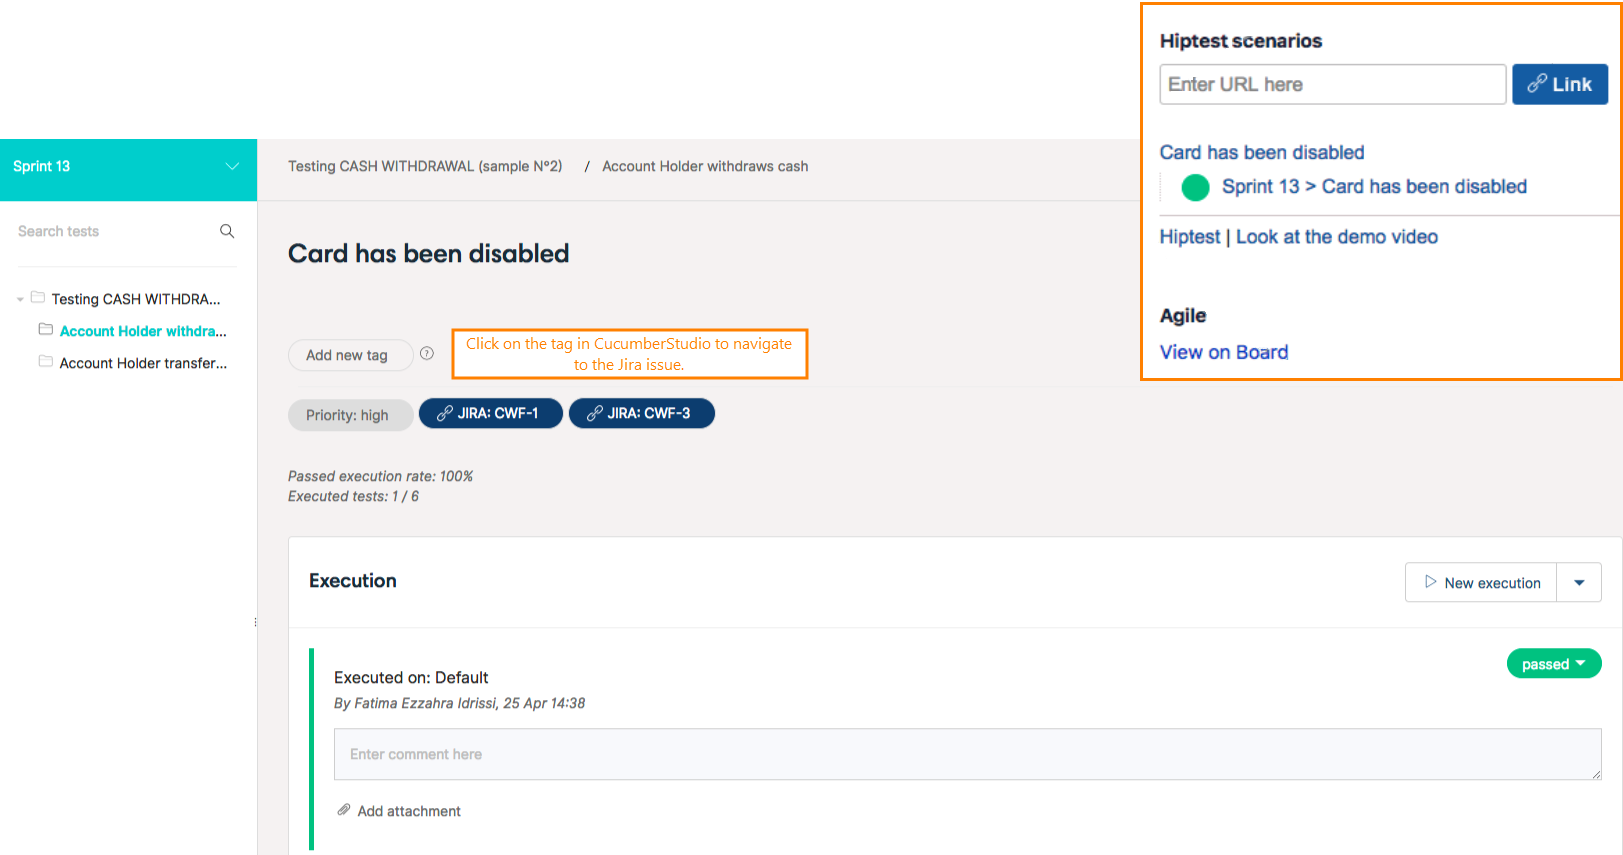
A new Tag JIRA: CWF-3 has been created. Just click on the tag to navigate to the issue.
Execute the test again and the status in Jira is updated in real-time!
Next you can see at a glance your project coverage with the CucumberStudio traceability matrix.

