Gherkin is a plain-text language with a simple structure. It is designed to be easy to learn by non-programmers, yet structured enough to allow concise description of test scenarios and examples to illustrate business rules in most real-world domains.
Here is a sample Gherkin document:
Gherkin
Feature: Account Holder withdraws cash
Scenario: Account has sufficient funds
Given The account balance is $100
And the card is valid
And the machine contains enough money
When the Account Holder requests $20
Then the ATM should dispense $20
And the account balance should be $80
And the card should be returned
CucumberStudio enables you to create executable specifications written in Gherkin. Let’s see how it works.
Watch this video tutorial
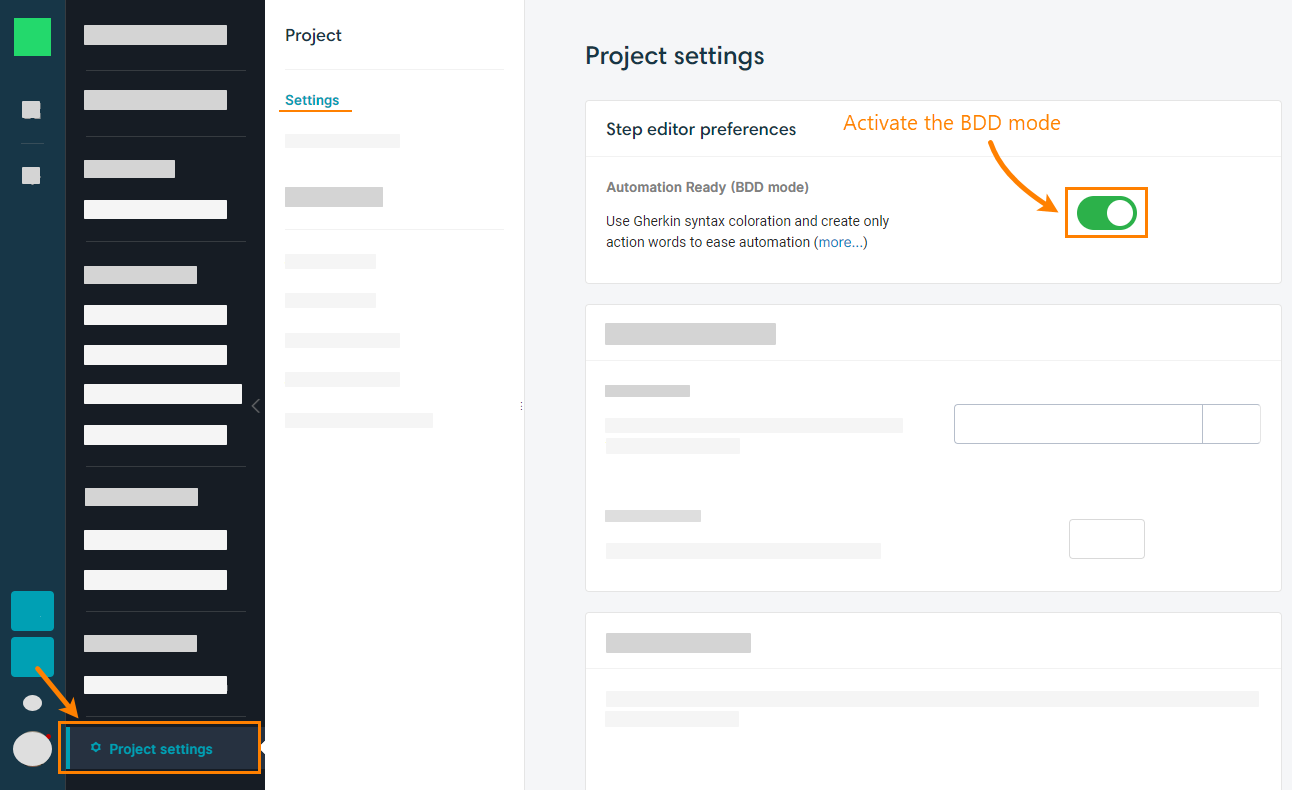
Step 1: Activate the BDD mode
To create Gherkin test scenarios suitable for both manual and automated execution, turn on the Automation ready (BDD mode) setting of your test project. This will command the test editor interpret the Gherkin keywords appropriately and automatically create action words (reusable steps) from them.
By default, the setting is on in all new projects. You can open the project’s settings screen to check this:
Step 2: Create a feature
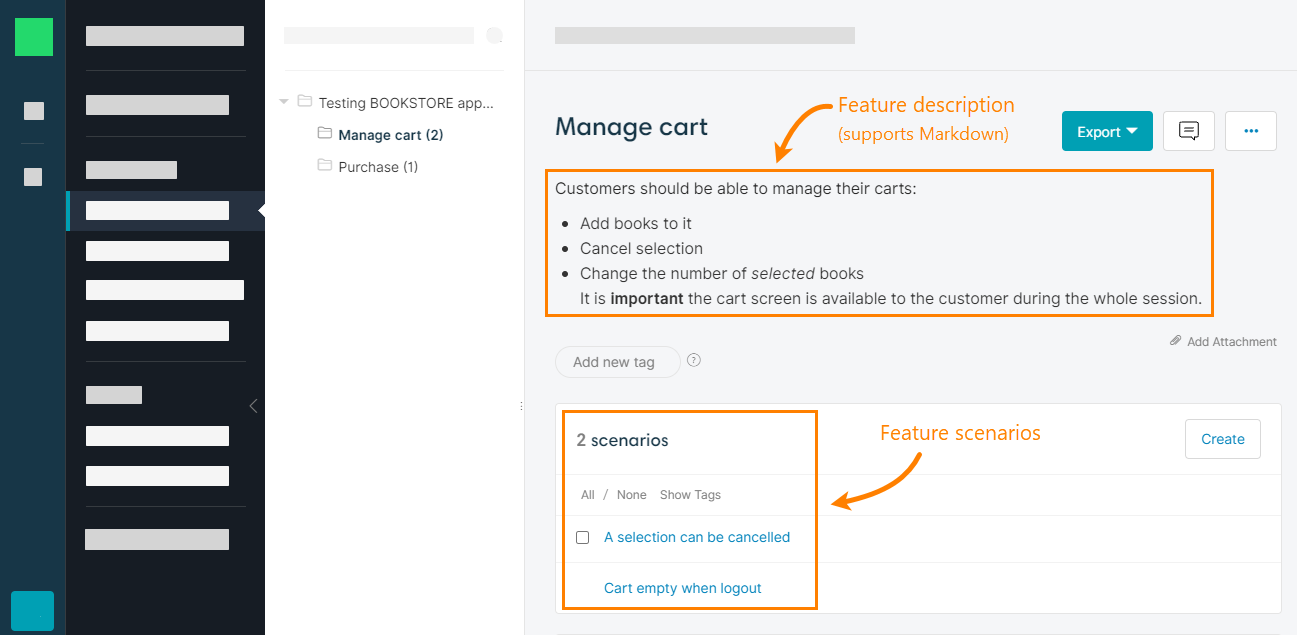
A feature is a Gherkin keyword that corresponds to one product feature. A Gherkin feature has one or more test scenarios related to the same product functionality. Also, it typically includes a description of that functionality:
In CucumberStudio projects, you can organize features into folders for easier management.
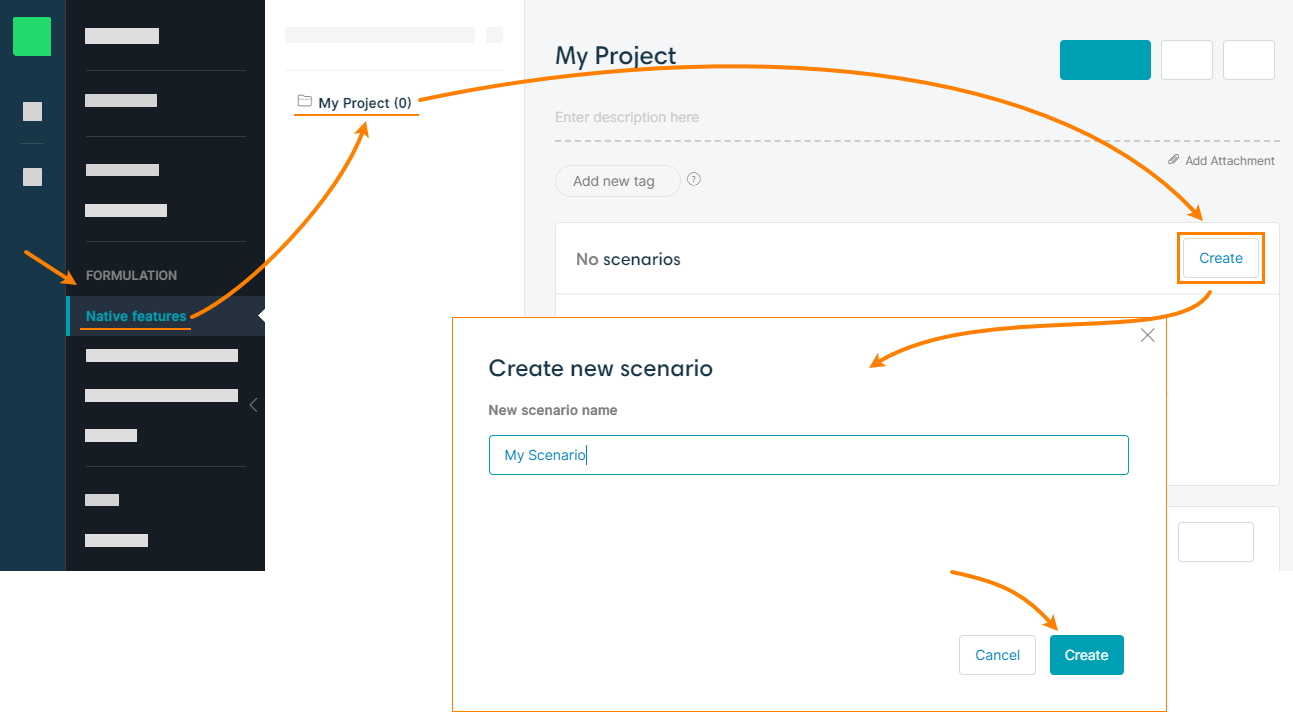
To create a feature, select Formulation > Native features from the menu on the left, then go to the needed folder, click Create and enter the feature name:
Step 3: Write a scenario with the Given/When/Then syntax
The “given/when/then” vocabulary is pretty clear to all team members: analysts, developers, testers, and others. It helps your team avoid ambiguities and make conversations more efficient.
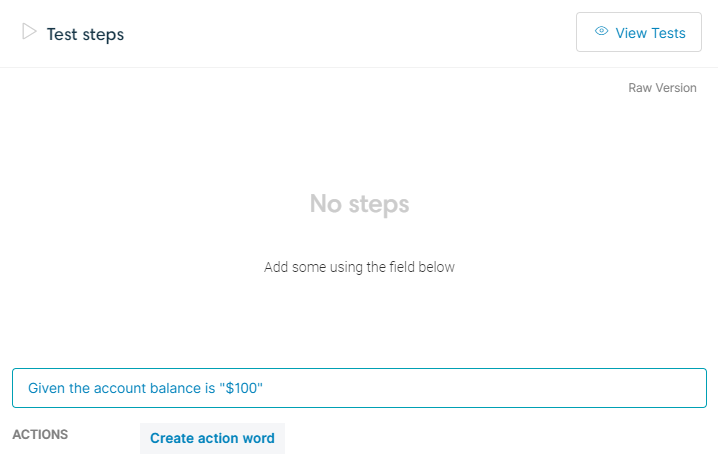
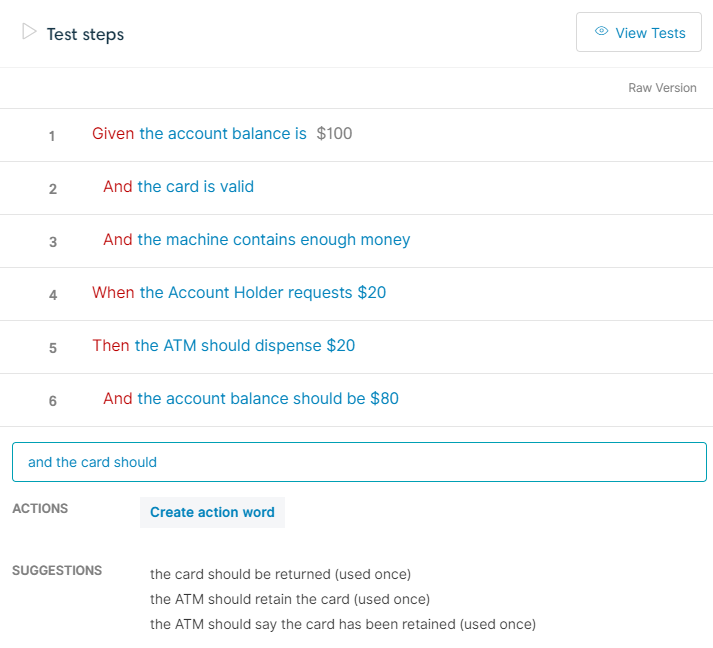
Let’s write the first step:
Press Enter or click Create action word.
CucumberStudio interprets and highlights the keyword Given. It will also consider $100 as a parameter because of the double quotes ("parameter-value"). This way you’ll be able to reuse the same step in the future with a different value:
And after a couple of seconds we get the following scenario:
The step editor comes along with a powerful suggestion capability that enables you to reuse existing steps and design scenarios with a consistent business terminology (see the image above).
It’s also possible to use free text parameters in steps.
Step 4: Add examples and use scenario outline
To test some functionality thoroughly, you may want to run tests on different sets of input data. Cloning scenarios to use different values can quickly become tedious and repetitive. Scenario outlines allow you to more concisely express these examples through the use of parameters and datatables.
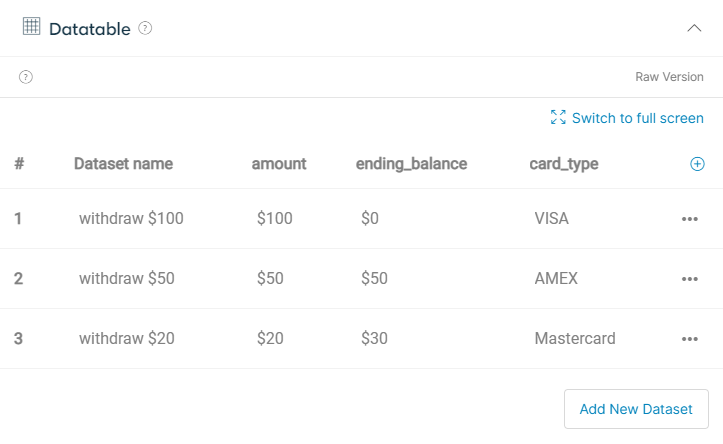
You can specify test data in the Datatable section of the scenario editor. Start with creating columns and then add as many rows as needed (in CucumberStudio terms, rows are also called datasets):
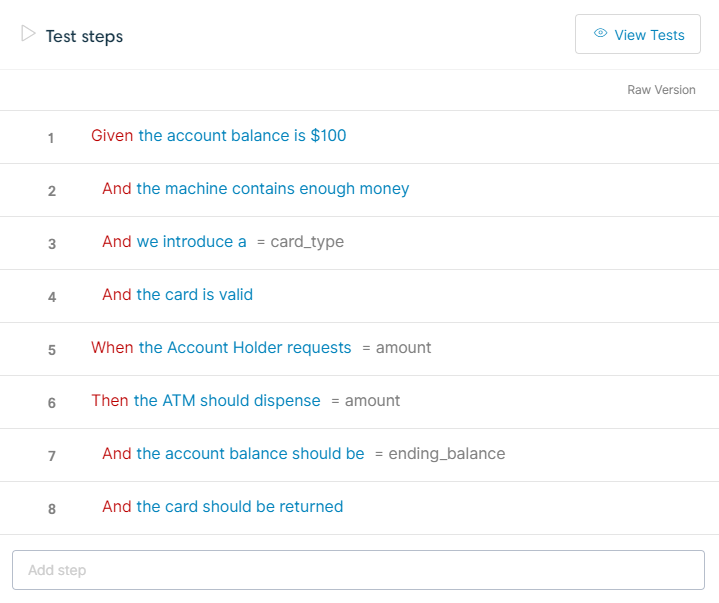
When you create a new step, you can type the column name in quotes (" column-name ") to specify it as a parameter:
After the step validation, you can notice that the character = is automatically set before the column name. This indicates that the word after the = character is a variable that will be replaced by the matching datatable column value.
Now that we have the scenarios completed. Let’s execute them.
See Also
Create scenarios
Use action words
Best practices for scenario writing

