Using HipTest Publisher as a service
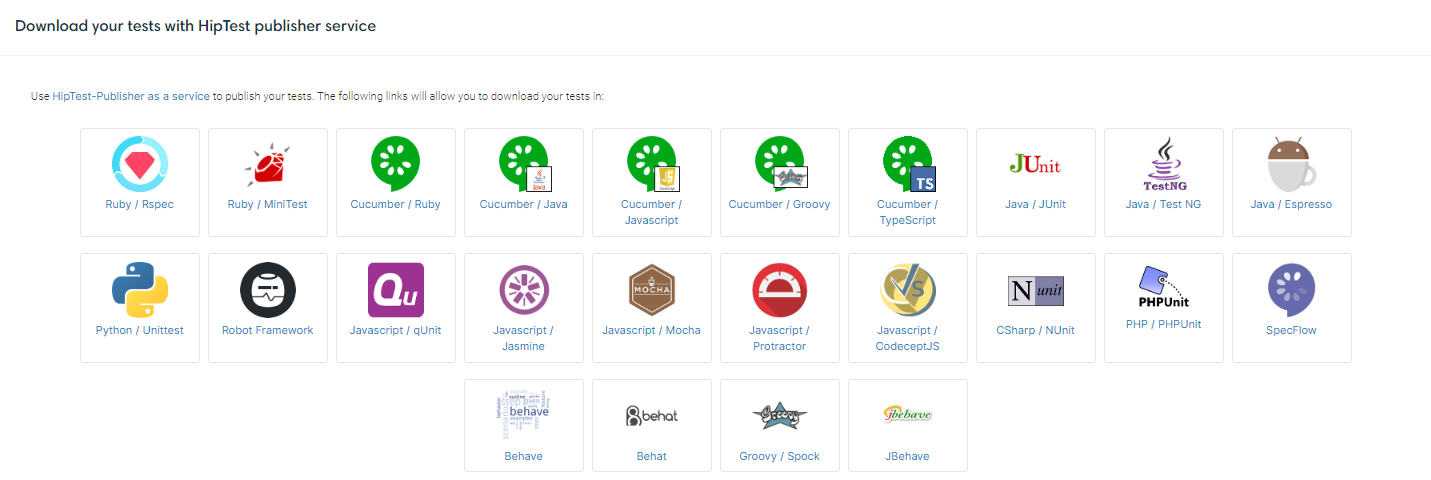
In order to get a quick look at how hiptest-publisher generates executable code, you can use HipTest Publisher as a service. Go to the Automation tab of your project and you will see a list of links to quickly download code generated from your project:
After clicking on one of the links, you get a zip file containing two files: one with the scenarios transformed into tests and one containing all the action words (two particular cases: Robot framework exports generates one file for each scenario and Selenium IDE does not have action words. Note that Selenium IDE export has some particularities, check this specific documentation. Extract those files to your existing test folder and add them to your test suite. Then implement the action words and you can start playing your tests. If you followed those guidelines, the action words needing implementation should be easy to find by searching for the tag you defined for the leaf action words.
The ”HipTest Publisher as a service“ solution provides a quick way to get your tests as executable code. But if you need to do some customization on the code or ease the integration in a continuous integration process, the best way is to use the HipTest Publisher tool.
Using HipTest Publisher
In this part of the documentation, we’ll consider you use a version control system (such as Git or SVN) to version your test code.
Install
hiptest-publisher is the Ruby gem used by HipTest Publisher as a service to generate the executable code. It is open-source, so you can freely get and even modify it.
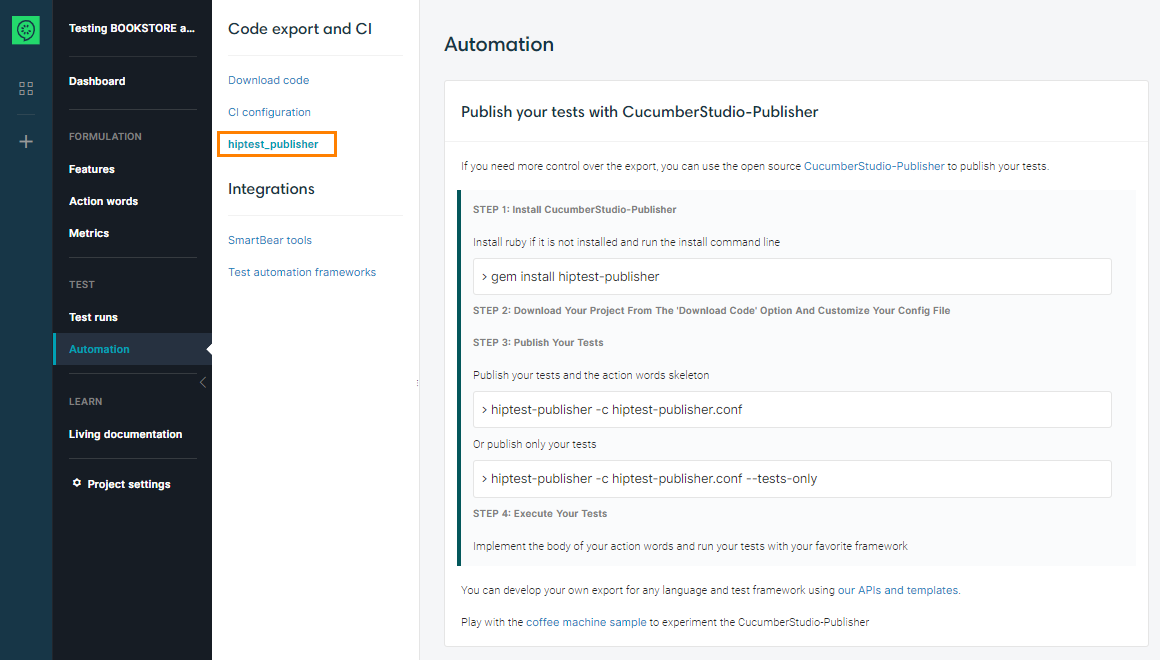
To install it, you first have to install Ruby on a development machine. Then type the command:
Note for Windows users: have a look at this documentation for installing HipTest Publisher.
To ensure the tool is correctly installed, type the following command in a terminal:
This should give you the list of options used by HipTest Publisher.
Configuring the tool
Even if the tool does not need a configuration file (you can use command line arguments) it is easier to store its configuration in a file. You can download the template for this file from CucumberStudio. In your CucumberStudio project, go to the Automation tab and unfold Publish your tests with Hiptest-Publisher at the bottom of the page:
Select your favorite language and test framework, and click on the link to download the configuration file. Add this file to your application source code. If this is possible with your test framework, create a folder for the CucumberStudio-related tests and store the file in it. If you use a Version Control System like Git, you should add this file to your code repository.
You can edit this file to add some more control on how the tests are generated. Here is a few options that you might need:
-
output_directory =: when set, it generates the executable code to the given path. This option can be useful if you have created a specific folder for your CucumberStudio tests. -
split_scenarios = 1: add this to your configuration file if you want to get one file for each scenario.Note: This option is mandatory for Robot framework exports. -
leafless_export = 1: add this line if you want the high level action words to be interpreted when generating the code. The high level action words will not be generated as code (so you will not have to implement them) but you will not be able to use this option with a test run (so you will not be able to push the results back to CucumberStudio).Note: This option is mandatory for Selenium IDE export.
Generating the tests
Now that the tool is installed and configured, you simply have to run the following command to generate the test code:
As with HipTest Publisher as a service, this should generate one or more files for the scenarios and an other one for the action words. Implement the action word, declare the tests in the test suite and you should be able to run the tests. You should save the generated files in your source code repository too.
Customizing the export
One possibility given by the tool is to override the templates used to generate the code. This can be pretty useful when the output code does not match your needs (for example you need an extra import at the scenario level, you want to add some comments, you want to change the name of the test module…)
To do so, the first step is to create a new folder where you will store the customized templates. For example at CucumberStudio, we have a subfolder inside the folder where the tests are output. Then, in the hiptest-publisher configuration file, add the following line:
Then go to the Github repository of HipTest Publisher and find the template you need to override, based on your language and test framework.
For example, at CucumberStudio, we have overridden the template generating the tests to include some comments and import another module. The original file is located in lib/templates/ruby/scenarios.hbs. We have copied this file in our overridden template and modified it this way:
require 'spec_helper'
require_relative 'actionwords'
# Do not modify this file manually, use:
# hiptest-publisher -c spec/features/hiptest4hiptest/hiptest4hiptest.config
describe '{{{ camelize project_name }}}' do
include HiptestActionwords
{{#indent}}
{{#each rendered_children.scenarios}}{{{this}}}
{{/each}}
{{/indent}}
end
Now there is a command to avoid getting any manual change in it and instead of including Actionwords, we include HiptestActionword (which is our own intermediary layer).
The language used for the template is Handlebars, we chose it as it is pretty easy to understand. If you need any help to customize the template, do not hesitate to contact us via the in-app chat or via the support email.
Customizing multiple versions of a template
To make templates reusable across multiple languages/frameworks combinations, templates are looked up from multiple directories. These directories are defined in config files.
For exports like Cucumber Java, there can be multiple version of a template with the same name: cucumber/java/actionwords.hbs is used to generate the StepDefinitions.java file, and java/actionwords.hbs is used to generate the Actionwords.java file. So overriding actionwords.hbs would impact both StepDefinitions.java and Actionwords.java files.
The solution to modify one but not the other file is to recreate the directory structure in the overridden template folder, then hiptest-publisher picks the matching template. So, in this example, adding a custom template in overriden-templates/cucumber/java/actionwords.hbs will only impact the generation of the StepDefinitions.java file.
Updating the scenarios
When your test scenarios have been changed (but not the action words), you can update them with hiptest-publisher, using the following command:
This will regenerate the test file(s) but not the action words.
Updating the action words
As for the scenarios, it is possible to regenerate only the action words code, by using the following command:
This will regenerate the action words content file. If you managed the content of this file in a Version Control System like Git, you should be able to get the changes in the action word signatures. We are aware of the difficulties the update can bring. It is the reason why we are currently experimenting solutions to ease this part of the process.
Now that your first tests are executed, you certainly want to get the execution results back to CucumberStudio. The best way to do so is to integrate the CucumberStudio test inside a Continuous Integration process.


