
Viewing differences between documents is merely the beginning. The key to reviewing documents is communication.
There are various global and content-specific types of comments and defects in Collaborator. See Types of Review Comments and Defects for detailed description of each type.
This topic describes how to communicate during a review.
Make Conversation – Chatting at Particular Files, Lines, Coordinates, Cells
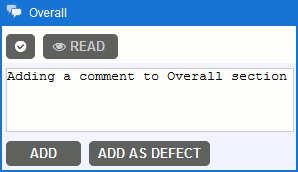
To start a general conversation about some particular file, open the desired file in the Diff Viewer, type your comment in the Overall section and click Add.
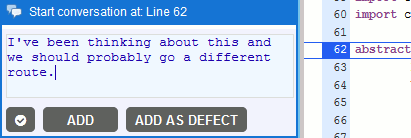
To start a conversation about some particular location (line, coordinates, cell), just click the desired location and start typing. The interface will open up automatically and accept your chat message:
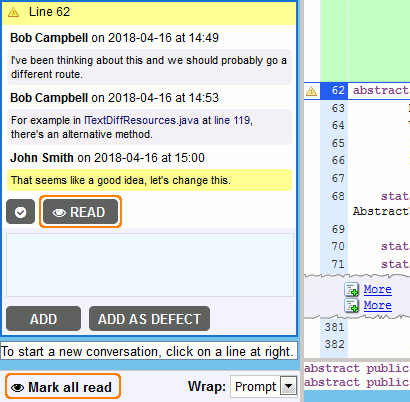
When you click Add, your message is transmitted to all other users and you have started a threaded conversation for that particular location (line, coordinates, cell). In this case, it would look something like this:
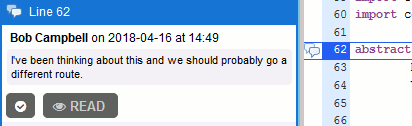
Notice how the conversation is now threaded by line 62 and how a little icon ![]() appears next to the source line where the conversation was made.
appears next to the source line where the conversation was made.
When you type the name of a file in the same review, it will turn into a link to that file. You can also link to a different line number in the current file by typing "line NNN", where NNN stands for the number of the line.
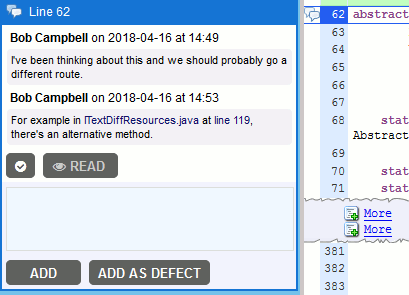
When another user chats on that same line, that message appears in yellow and yellow bubbles help make the conversation stand out as needing to be read. The screen updates immediately without the need to refresh the browser:

To answer a message, just type your answer in the chat window.
To clear the "unread chat" state without answering, click the Read button (there is also the Mark all read button at the bottom of the chat pane):
Accept Files and Comments
In addition to marking a conversation as read, you can also click the Mark Accepted button in the chat to accept the comment or file revision. The Mark Accepted button affects conversations/revision that is currently displayed in the After pane of the Diff Viewer. The button can be inactive when the conversation/revision is already accepted, or when the revision currently displayed in After pane actually precedes (is earlier than) the revision displayed in Before pane.
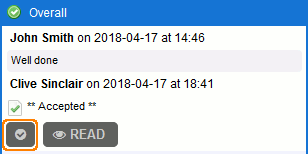
"Accept" means whatever you want it to mean. If you want, you can never use the Mark Accepted button at all. The actual effect of clicking Mark Accepted on a conversation is to mark that conversation as read and to put a green check mark ![]() next to that conversation in the Review Material section of the Review Screen. Those check marks are visible to all users.
next to that conversation in the Review Material section of the Review Screen. Those check marks are visible to all users.
Conversation status icons in the Review Materials section
Some people use it to mean explicit agreement with the conversation (as opposed to simply not replying, which is implicit agreement).
Many people use "Accept" as sort of a bookmark within the review to keep track of what file revisions they have already looked at and agree with its changes. When the author uploads new revision of a file, the ![]() icon will change back to
icon will change back to ![]() denoting that the participant has not yet approved this new revision.
denoting that the participant has not yet approved this new revision.
Edit Comments
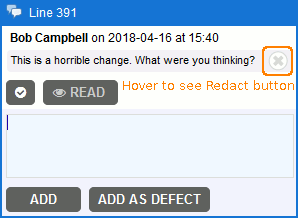
People have a knack for typing things that for various reasons they should not. When you do this, you can redact your harsh, erroneous or otherwise inappropriate statement by clicking the "X" to the right of your comment. The "X" will appear when you mouse-over the specific comment you would like to redact.
The comment will then be displayed in a much more difficult to read manner.
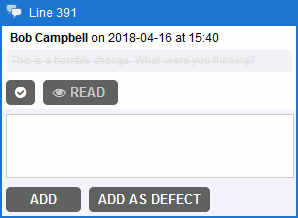
This styling is meant to deter the casual reader from actually reading the text. You cannot undo redacting a comment. If you have accidentally redacted a comment, you can copy the text from the redacted comment into a new comment. System administrators are allowed to redact any comment. Normal users are allowed to redact their own comments.
Create Defects When Something is Wrong
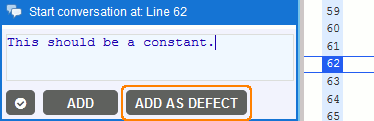
When you want to indicate that there is a problem that needs to be fixed rather than simply discussed you open a defect. Do this using the Add as defect button below the comment field:
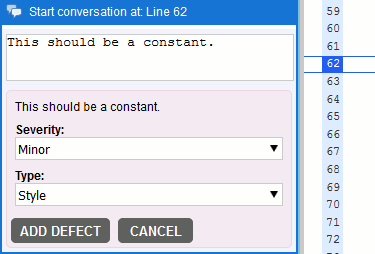
Besides the comment text, defects can have any number of additional fields. These are all completely configurable by the system administrator and can also vary depending on the review workflow that was originally selected for the review. Because this is completely configurable, this manual cannot say exactly what the fields will be or what they mean; ask your administrator for details. It is common to see fields like severity, type, checklist item, and phase-injected.
Once the defect is created, it is displayed in the Defect Log and Review Material sections of the Review Screen and in the Chat section of current file. The defect conversation is threaded. Open defects are denoted by red icon ![]() :
:
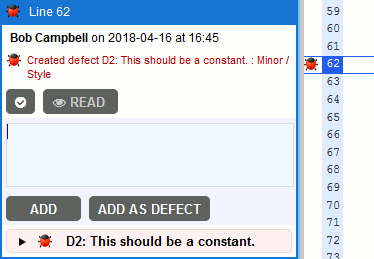
Every defect is given a unique number on the server; in the example above the number is D2. There will only ever be a single defect numbered D2, no matter how many defects, documents or reviews exist on the server.
You can have any number of defects on a single line; all will be logged into the list beneath the chat area.
 |
The word "defect" has many connotations that are inappropriate for peer review. This does not mean the problem will be mirrored in an external issue-tracking system, and it does not necessarily mean it was a bug! Even "bad documentation" can be a defect. A "defect" is just a way of identifying something that needs to be fixed. Moreover, if the word "defect" has a negative connotation in your environment, your Collaborator administrator can change it to another term. |
Verify Defects Have Been Fixed
Later, after the author has attempted to fix the defects and has uploaded the new files to the review, the reviewers will verify that the fixes do fix the defect and do not open more defects in the process.
When the fix is verified, expand the defect log and click the Mark Fixed button.
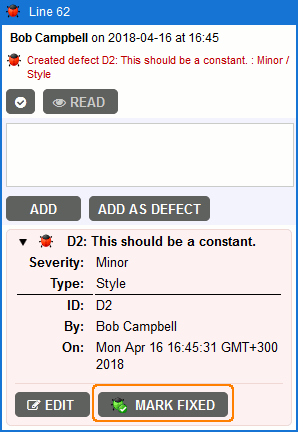
The defect icon will change to green ![]() to denote that the defect have been fixed. The new state of the defect will be reflected in the Defect Log and Review Material sections of the Review Screen and in the Chat section of current file.
to denote that the defect have been fixed. The new state of the defect will be reflected in the Defect Log and Review Material sections of the Review Screen and in the Chat section of current file.
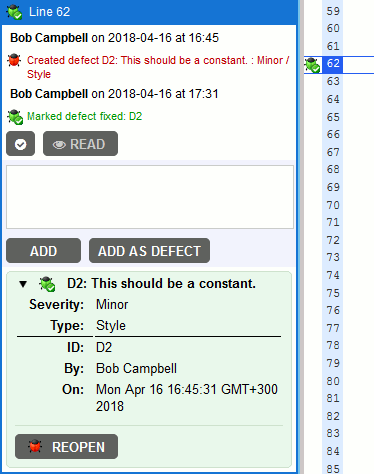
If the defect has re-appeared again in some subsequent revisions, you can reopen it by pressing Reopen.
Modify Defect Information
You can modify defect information by expanding the defect log and clicking Edit button.
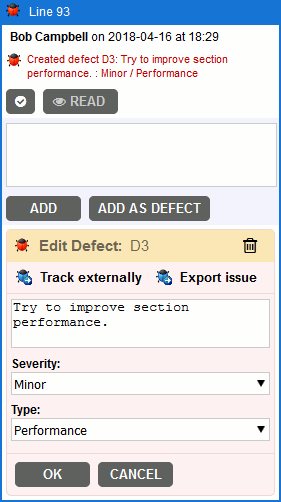
In the edit mode, you can change defect description, modify other defect custom fields, and even delete a defect. Also you can move the defect to external issue tracker (see next section for details on this). All of these activities will be logged into the chat conversation area as an audit trail of what happened.
|
It is tempting to delete a defect once the author has corrected the problem, but this is the wrong thing to do. You want to keep the defect record around, just mark it "fixed". This process is described next. Delete a defect only if it turns out that it really was not a defect at all. |
Externalize Defects
Sometimes you decide that a defect should be fixed at a later date. You do not want to mark it fixed because it is not fixed yet. But you do not want to delete it either because it is still a defect.
In this case you can move the defect to the external issue-tracking system and mark the defect as external. This special state tells everyone else that (a) the review can be completed but (b) the problem was not fixed during the review and (c) how to find the external issue for further auditing.
You may either create the issue (ticket, work item) manually and link it afterwards, or create new item directly from Collaborator and link it automatically. The latter requires, that your Collaborator administrators setup and configure issue-tracking integration.
-
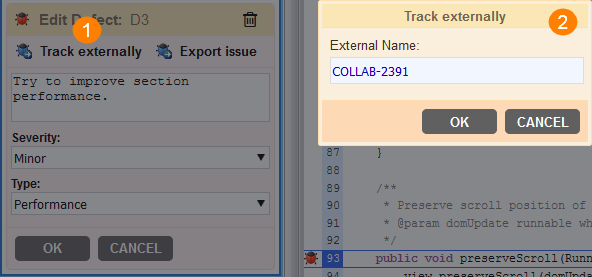
To link the defect to some existing issue (ticket, work item), press Track externally and specify the defect identifier in your external issue tracking system.
-
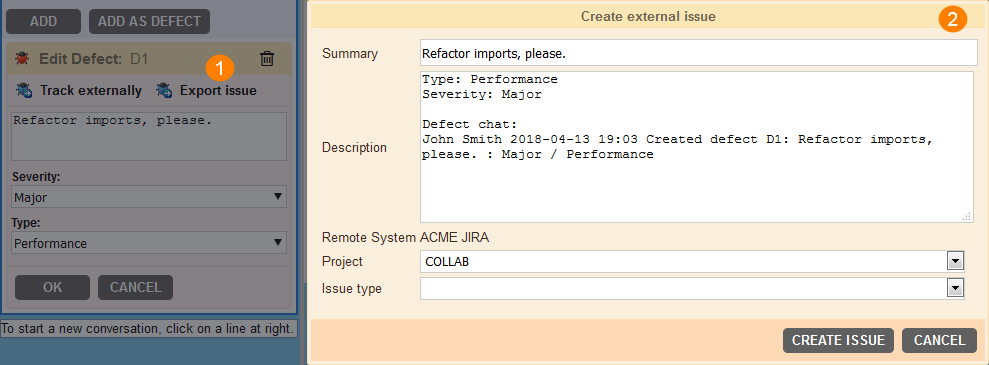
To create a new issue (ticket, work item), press Export issue and specify the defect details in the ensuing dialog.
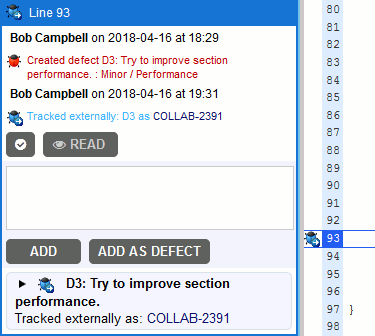
Any of these actions changes the state of the defect from "Open" to "Tracked Externally".
The defect icon will change to blue ![]() to denote that the defect have been tracked externally. The new state of the defect will be reflected in the Defect Log and Review Material sections of the Review Screen and in the Chat section of current file.
to denote that the defect have been tracked externally. The new state of the defect will be reflected in the Defect Log and Review Material sections of the Review Screen and in the Chat section of current file.
See Also
Types of Review Comments and Defects
Basic Concepts
Participate in Reviews
Rework Defects