Before using the Collaborator plug-ins for Microsoft Word, PowerPoint or Excel, you must specify Collaborator server and user credentials.
When you open the Microsoft Word, PowerPoint or Excel and the plug-in is not configured yet, it will suggest to do so.
Settings
To change the plug-in settings, select SmartBear > Options from the main menu.
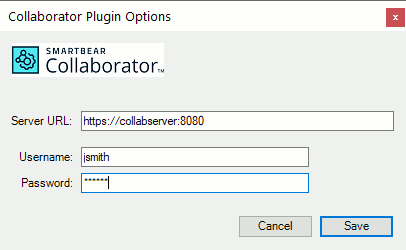
The Collaborator plug-ins have the following settings:
|
Server URL |
Denotes which Collaborator server to use. The Server URL must include the correct port number and path if applicable. If your server uses HTTPS, you may need to install its certificate as described below. |
|
Username and Password |
Specifies user credentials. The Username and Password are the same as you use when logging into the web server. It is not recommended to use empty password. You can specify your password or login ticket. When single sign-on authentication is disabled, specify password. When single sign-on authentication is enabled, specify login ticket instead. |
Configure HTTPS Connection
When your Collaborator server uses HTTPS connection and its certificate cannot be automatically verified, or server uses a self-signed certificate, then you will need to install the certificate manually.
Note on self-signed certificates: You have to use certificate signed with Certificate Authority (CA). It can be any CA - even yourself. And you must install that CA certificate in trusted authorities. You cannot use self-signed certificate directly.
Obtain Certificate
At first, you need to obtain the certificate from the Collaborator server administrator, or obtain it yourself as described below:
-
Launch Firefox browser and navigate to Web UI of your Collaborator server.
-
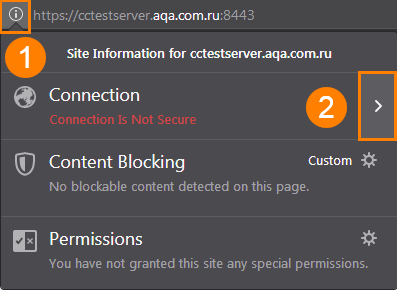
Click the info button to the left of a web page's address.
-
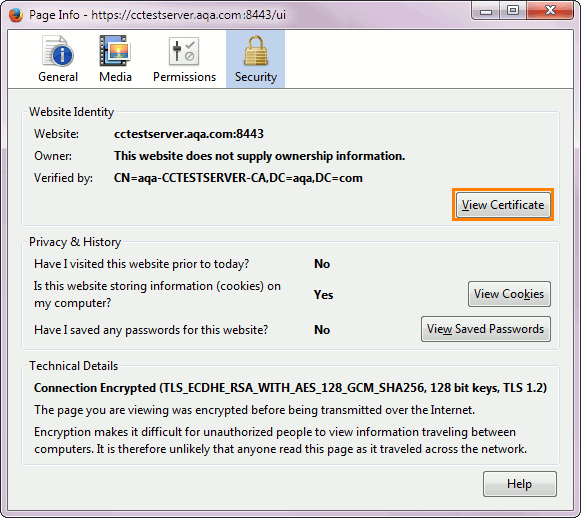
Click the More Information button in the next prompt. This will open the Page Info window.
-
Switch to the Security panel and click the View Certificate button.
-
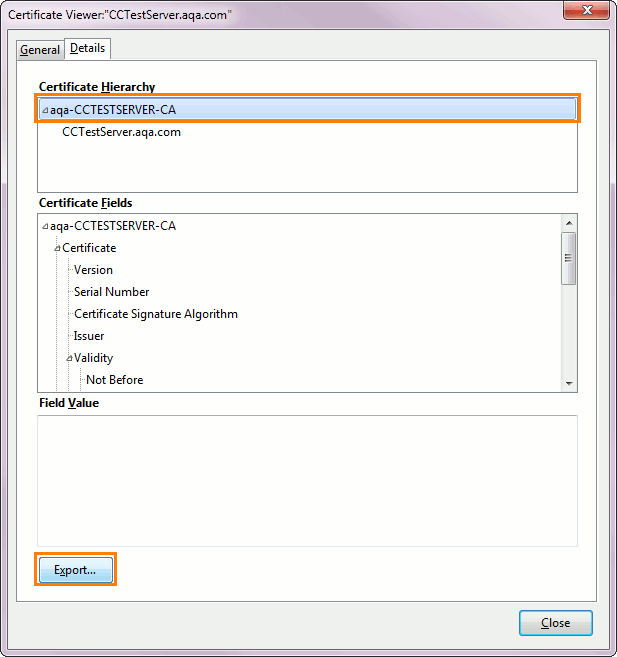
In the ensuing Certificate Viewer dialog, switch to the Details tab.
-
Select the topmost certificate in the hierarchy and click Export button.
-
Specify a path where to save the certificate in a standard Save File dialog.
Install Certificate
-
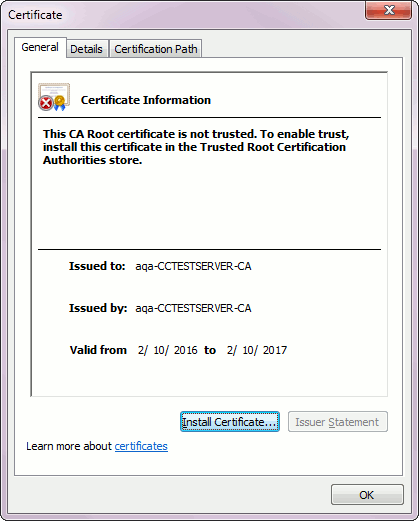
Double click the certificate. This will open the Certificate Information window.
-
Click Install Certificate button.
-
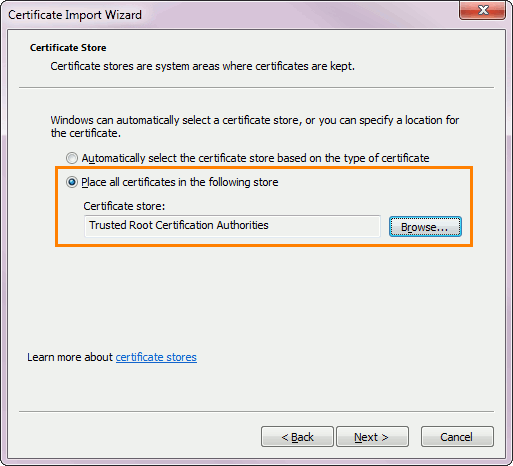
In the ensuing Import Certificate Wizard, click Next to proceed to the Certificate Store page.
-
Select the Place all certificates in the following store option, click Browse and select the Trusted Root Certificate Authorities store.
-
Click Next and Finish.
-
For self-signed certificates, a Security Warning will be displayed. Click Yes to confirm certificate installation.
See Also
Microsoft Office Plug-ins
Install and Remove Microsoft Office Plug-ins
