| Note: | To use this guide, you need to know how to use AlertSite DéjàClick transaction recording tool. If you do not have the DéjàClick toolbar in your Firefox browser, go to the DéjàClick Downloads page to download the DéjàClick add-on and additional modules (TrueScreen and ImageMagick). If you have never used DéjàClick before, please go to the DéjàClick Quick Start Guide. After you have become comfortable with recording DéjàClick transactions, you will be able to move on to this more advanced feature. |
Overview
By default, DéjàClick runs transactions in the Mozilla Firefox browser on our monitoring servers, however, some web pages are designed or optimized for use with the Google Chrome browser. To meet the needs of those users, DéjàClick provides the additional flexibility to run transactions on Google Chrome (Chrome). The script is recorded by using Firefox, but can be uploaded to certain monitoring locations running Chrome. In addition, the script can be run on Chrome with Test On Demand.
DéjàClick Chrome limitations
The following features are currently not supported in DéjàClick Chrome:
- TrueScreen (Flash)
- Dialogs and Pop-ups
- Image Validation
- Mobile Devices
- DejaNotes
- Encryption
- Complete web page capture
- Perceived User Experience Reporting
Browser Selection
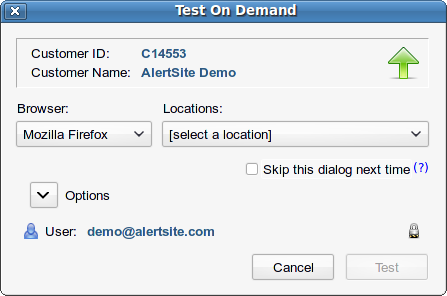
The Upload and Test On Demand dialogs accommodate Chrome by including a drop-down menu for Browser Type. After recording and replaying your script on Firefox, click ![]() on the DéjàClick toolbar. The Test On Demand dialog will be displayed with two drop-down lists, Browser and Locations, as shown below:
on the DéjàClick toolbar. The Test On Demand dialog will be displayed with two drop-down lists, Browser and Locations, as shown below:

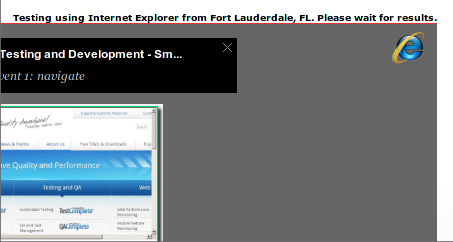
By default, Mozilla Firefox is displayed in the Browser list. The browser list also includes Google Chrome. The list of Monitoring Locations will change depending on the selected browser type. After selecting a location, the Test button will be activated. Click Test to run the transaction on your selected location. An icon will appear at the upper right of the Test On Demand progress screen denoting the selected browser type. Here is an example of the Test On Demand dialog:

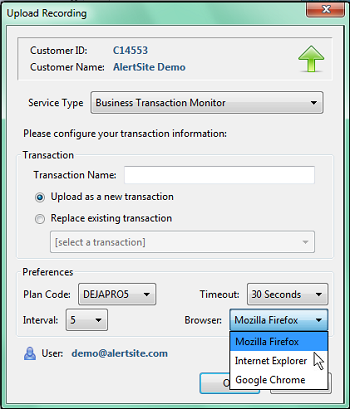
Once verified that the script will run successfully on the selected DéjàClick server, AlertSite customers can upload the script to their account. Click ![]() on the DéjàClick toolbar and select Upload Recording from the drop-down menu. In the Upload dialog, fill in all the fields as needed, selecting the desired browser type from the Browser drop-down list:
on the DéjàClick toolbar and select Upload Recording from the drop-down menu. In the Upload dialog, fill in all the fields as needed, selecting the desired browser type from the Browser drop-down list:

If your account is configured with default monitoring locations that are not Chrome-compatible and you upload a script to one of those browser types, the monitoring locations will be determined at random. To change default locations, navigate to Account > Manage Account in your AlertSite account and click the Locations button at the upper right. The Type column displays the icons for each location's supported browser types.
AlertSite Console Interaction
The AlertSite Console has been modified to display icons in selected areas to make it easier to see at a glance which browser type is being used for each transaction. The icons are:
|
Firefox  |
Google Chrome |
Dashboard
AlertSiteDashboard Device tab displays icons in the Type column to show different monitor types (website, secure website, name server, transaction, etc.). For transaction monitors, the icon for the browser type used to monitor the monitor is shown:
Reports
Most of the individual monitor reports display the browser type icon next to the monitor name:
- Transaction Detail
- Hourly Summary
- Daily Summary
- Regional Breakdown
- Statistics by Hour of Day
- Transaction Step
- Transaction Step Summary
- Page Objects
- Notifications Detail (for individual transaction)
|
Report Heading for Firefox Monitor |
|
Report Heading for Google Chrome Monitor |
Custom Notifications
Several alert notification methods can be customized to include a Browser Type variable. Customizable notification templates are:
- Site error via email (text format)
- Site error via AIM
- Site error via wireless email
- Site error clear via email (text format)
- Site error clear via AIM
- Site error clear via wireless email
- Website change via email (text format)
- Website change via AIM
- Website change via wireless email
The two variable names are:
-
$BROWSER_TYPE_LONG- Long description of the browser type. -
$BROWSER_TYPE_SHORT- Short description of the browser type.
To add either of these variables to a notification template:
-
Log into your AlertSite account.
-
Navigate to Notifiers > Notifiers.
-
Click the Manage Notification Templates button at the upper right.
-
Select any of the customizable templates listed above from the Message Type drop-down list.
-
Click View available variables for a dialog of Template Variable Descriptions.
-
-
Modify the Subject or
Bodyof the message by entering the desired Browser Type variable (long or short) and optional text.Type: $TYPEPORT, addBrowser: $BROWSER_TYPE_LONG. -
Click Save Custom Template.
When a recipient configured to use any of the methods listed above receives an alert, the additional line displaying the Browser Type will appear in the notification body. For example:
Site: Amazon site
URL:
IP Address: 216.137.33.241
Type: DéjàClick Device
Browser Type: Mozilla Firefox
Last Status: 5 - Round Robin -- Keyword verification error within returned page
HTTP Status: HTTP/1.0 200 OK
Last Checked: 2011-10-05 23:46:03
Consecutive errors: 1
[...]
Once you have customized your templates, if you do not have any recipients configured with the custom template, add a recipient using that notification method (the Send a(n) field on the Manage Notifier screen).


