The DéjàClick Test on Demand feature allows AlertSite customers to run scripts on a remote server immediately, right from your desktop. This gives you instant results for checking a website’s transaction performance. It also allows you to ensure your script is fully functional before deploying it to your AlertSite account or distributing it to your team.
DéjàClick Test on Demand is similar to AlertSite's test on demand, except you can run it for any DéjàClick script without creating an AlertSite monitor first.
Requirements
To run a test on demand, you must have an AlertSite account. You can sign up here.
Run a Test on Demand
DéjàClick 2.0
-
Open the DéjàClick extension in Chrome.
-
Open a saved script by clicking , or record a new script.
-
(Recommended.) Replay the script locally to make sure it works correctly. To do this, click on the toolbar.
-
Click > Sign In and log into your AlertSite account.
-
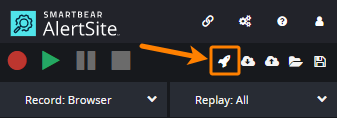
Click Begin Test On Demand.
-
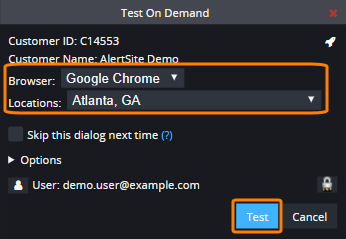
The Test On Demand dialog appears.
Note: If the test starts immediately without prompting for options, it is because the Skip Test on Demand Options Dialog option is selected in > Options > General. Unselect this option to choose the test location and other options manually every time you run the test. -
Specify the options for the Test On Demand:
-
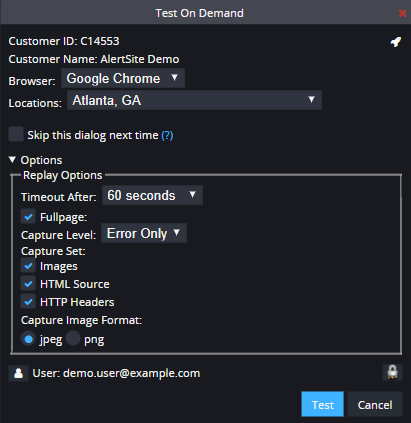
Select the Location to run the test from and the Browser to run the script.
-
Expand Options to set the timeout, Capture Set (Images, HTML Source, HTTP Headers) and the image format (.jpeg or .png).
-
Tip: You can select the Skip this dialog next time check box to command DéjàClick to remember your selections and not to ask for them again.
-
Click Test.
-
-
DéjàClick will upload your script to the selected monitoring location.
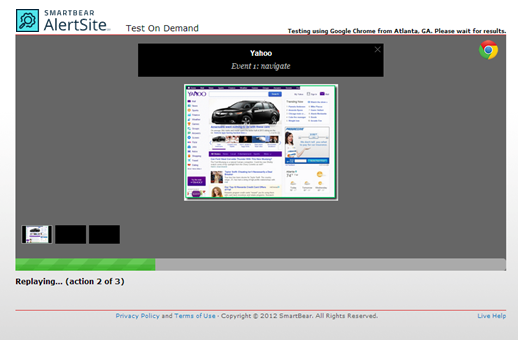
Once the uploading finishes, Test on Demand runs your script and displays screenshots of each action as the test progresses.
-
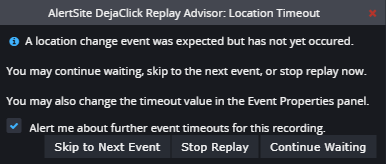
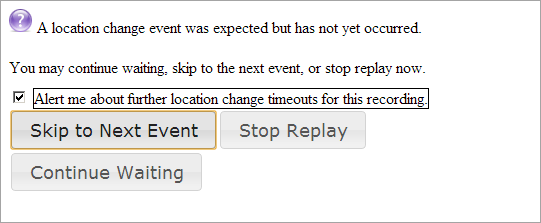
The Replaying status bar shows you the progress. If there are any messages, Test on Demand will ask you how to proceed:
DéjàClick 1.x
-
Open the DéjàClick extension in Chrome.
-
Open a saved script by clicking
 , or record a new script.
 -
(Recommended.) Replay the script locally to make sure it works correctly. To do this, click
 on the toolbar.
 -
Click
 and log in to your AlertSite account.
 -
Click
 Begin Test On Demand on the toolbar.
 -
The Test On Demand dialog appears.
Note: If the test starts immediately without prompting for options, it is because the Skip Test on Demand Options Dialog option is selected in  Configure Options > DéjàClick Options > General. Unselect this option to choose the test location and other options manually every time you run the test.
 -
Specify the options for the Test On Demand:
-
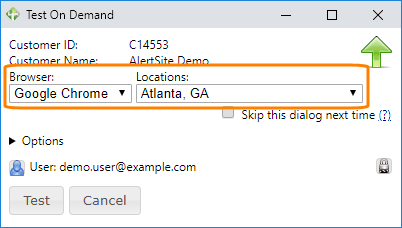
Select the Location to run the test from and the Browser to run the script.
-
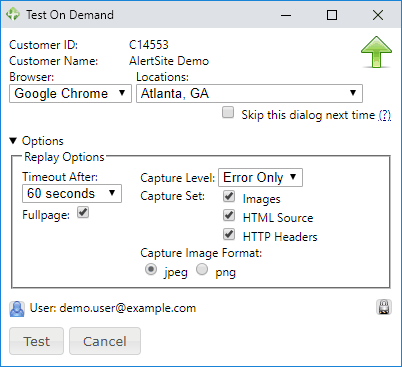
Expand Options to set the timeout, Capture Set (Images, HTML Source, HTTP Headers) and the image format (.jpeg or .png).
-
Tip: You can select the Skip this dialog next time check box to command DéjàClick to remember your selections and not to ask for them again.
-
Click Test.
-
-
DéjàClick will upload your script to the selected monitoring location.
Once the uploading finishes, Test on Demand runs your script and displays screenshots of each action as the test progresses.
-
The Replaying status bar shows you the progress. If there are any messages, Test on Demand will ask you how to proceed:
Reports and results
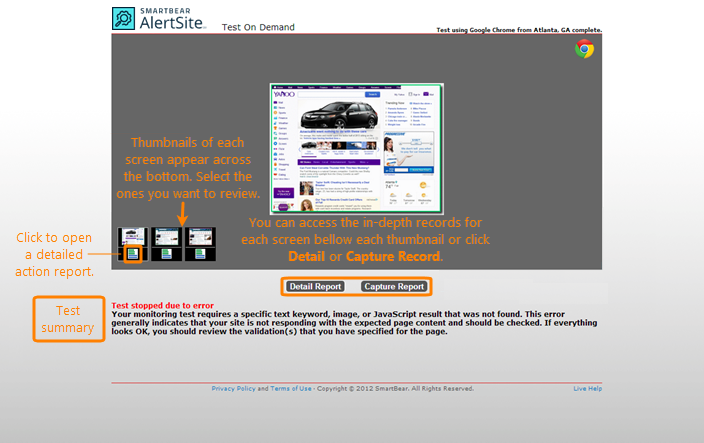
When finished, Test on Demand provides you with detailed reporting options.
A thumbnail of each screenshot appears across the bottom. You can select each screen shot to view the page. Beneath the thumbnails is a link to show the object report for each page.
Click the object report icon below any thumbnail to get to the detailed action report.
| Tip: | You can also generate the detail and capture reports. For more information on AlertSite reporting, see About Reporting. |

