ReadyAPI v. 1.3.1 and later and SoapUI 5.2 and later include the AlertSite Connector plugin that lets you upload your test cases as monitors in AlertSite.
Create API monitor using AlertSite Connector plugin
To create an API monitor using AlertSite Connector:
-
In ReadyAPI:
-
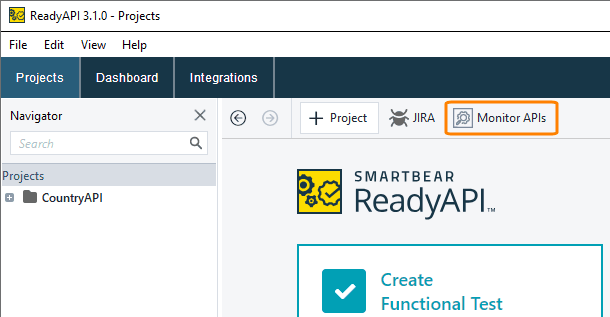
On the start page, click
 Monitor APIs. (If you do not see the start page, select Help > Show Starter Page from the menu.)
In older versions of ReadyAPI:
-
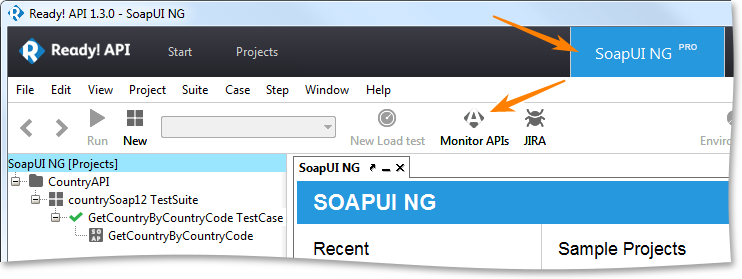
Switch to SoapUI NG and click Monitor APIs.
In SoapUI:
-
Select Project > Monitor APIs from the main menu.
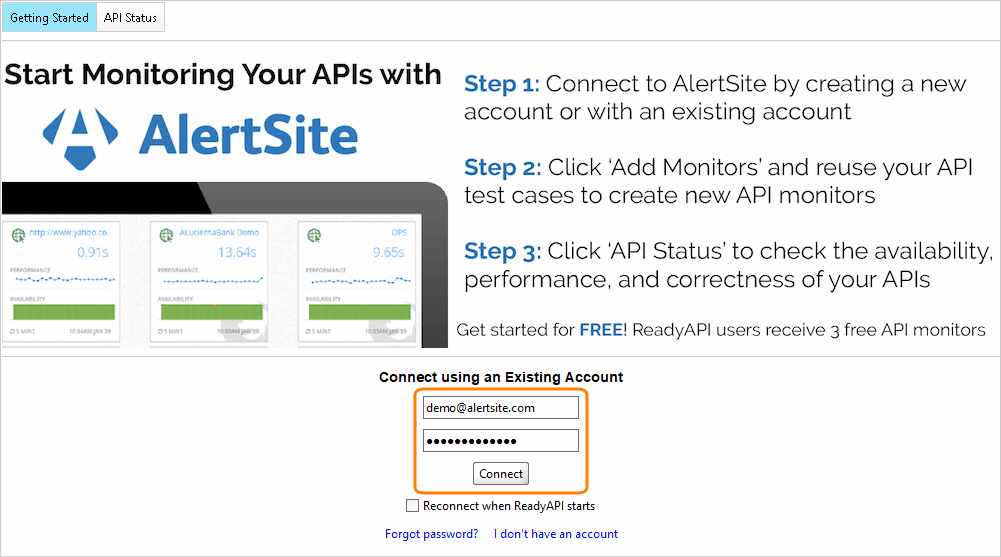
This will open the AlertSite Connector.
-
-
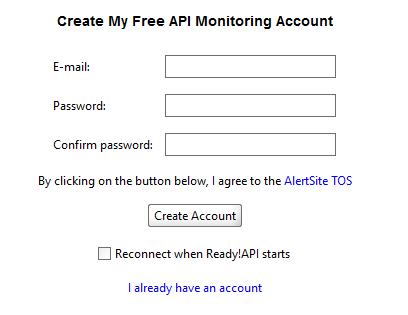
If you have an AlertSite account, click I already have an account, enter your AlertSite email and password, and click Connect.
If you do not have an AlertSite account, create a free API monitoring account:
-
Enter your email.
-
Enter your password, and then confirm it by entering it again.
-
Click Create Account.
-
-
(Optional) Select the Reconnect when ReadyAPI starts check box if you want ReadyAPI to automatically connect with AlertSite and update the status of your running monitors.
-
Click Add Monitors in the top left corner.
-
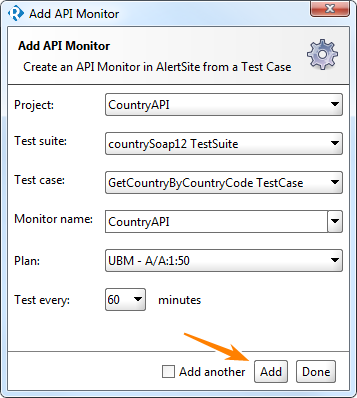
In the dialog that appears, configure your monitor:
-
Select the Project, Test suite, and Test case to be run.
-
Name your API monitor in the Monitor name field to create a new monitor and select how often the test should run (every 1 to 120 minutes, depending on your plan).
Note: Selecting an existing monitor name will overwrite that monitor. -
If you have several plans, select the Plan to be used for this monitor.
Note: For internal APIs monitored only from private locations, select the InSite or VM Node plan. -
Click Add. If you want to create more than one monitor, select the Add another check box and click Add.
-
Once you are ready with adding monitors, click Done.
-
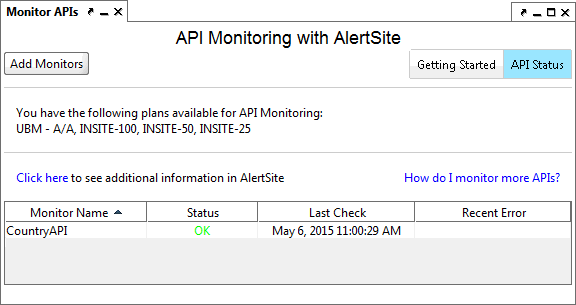
You will see the API Status page with your monitor added. The monitor will start running shortly, and you will see its status.
If you need to change the monitor settings (run interval, monitoring locations, and others), use the Click here link to open AlertSite and proceed from there. For details, see Editing a Monitor.
Plugin options
Configure the AlertSite Connector plugin to use it more effectively:
-
In ReadyAPI, click
 on the toolbar.
 -
Select AlertSite Connector Plugin in the left part of the AlertSite Preferences window.

If you uninstall the AlertSite Connector plugin, this page will be unavailable. -
Specify how often ReadyAPI will update information about monitoring services in the Refresh API status frequency (in minutes) text box.
-
Click OK.
Update plugin
-
In ReadyAPI, click Plugins on the toolbar.
-
On the Available tab, find the AlertSite Connector for ReadyAPI plugin in the table.
-
Click Install/Upgrade Plugin and confirm that you want to download and install the plugin to upgrade it.
Uninstall plugin
-
In ReadyAPI, click Plugins on the toolbar.
-
Switch to the Installed tab.
-
Select the AlertSite Connector for ReadyAPI plugin from the list.
-
Click Uninstall Plugin and confirm that you want to uninstall the plugin.
-
Restart ReadyAPI.
See Also
SoapUI and ReadyAPI Integration
AlertSite Integrations
Creating Monitors
Create API Monitor From SoapUI Test
SoapUI API Monitor Settings

