Azure Active Directory (Azure AD) is a directory and identity management service for Microsoft cloud services, such as Azure and Office 365.
Azure AD can be used to authenticate users in AlertSite. Integrating AlertSite with Azure AD includes the following steps:
-
Adding AlertSite as an application in Azure AD.
-
Assigning the AlertSite application to Azure AD users, groups and roles.
-
Specifying Azure AD details in the AlertSite configuration.
Prerequisites
To configure Azure AD integration, you must be an administrator in Azure and have the Admin account (not Co-Admin) in AlertSite.
Configure Azure AD
First, get AlertSite SAML information that you will need to specify in Azure AD:
-
If you use AlertSite UXM, navigate to > Settings > Single Sign-On .
If you use AlertSite 1.0, navigate to Account > Manage Account and click Single Sign-On.
-
Copy the values displayed in the AlertSite SAML Settings section:
- Entity ID
- Assertion Consumer Service URL
- Application URL
Then, in Azure AD:
-
Log in to your Azure portal as an administrator.
-
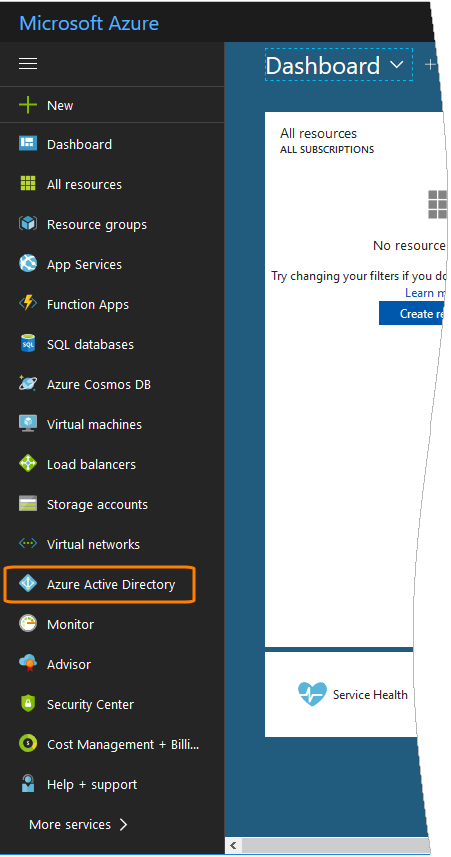
In the left navigation pane, click Azure Active Directory.
-
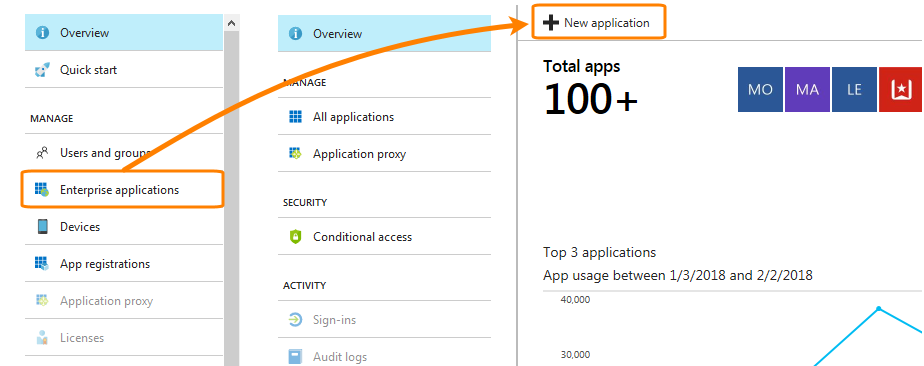
Select Enterprise applications and click New application.
-
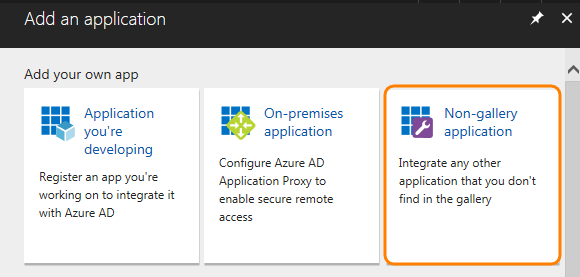
Click Non-gallery application.
-
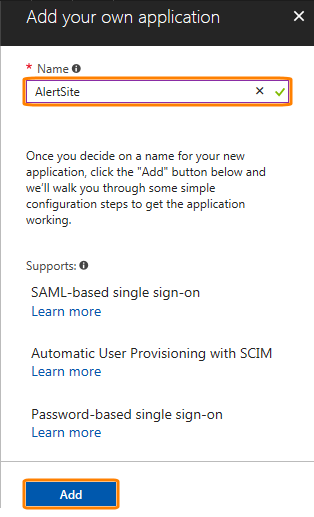
Enter AlertSite in the Name field, and click Add.
-
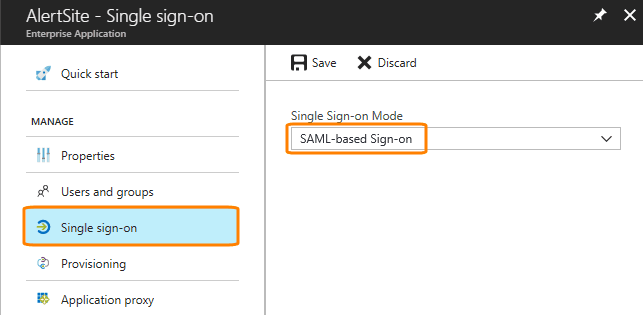
Select Single sign-on and change the mode to SAML-based Sign-on.
-
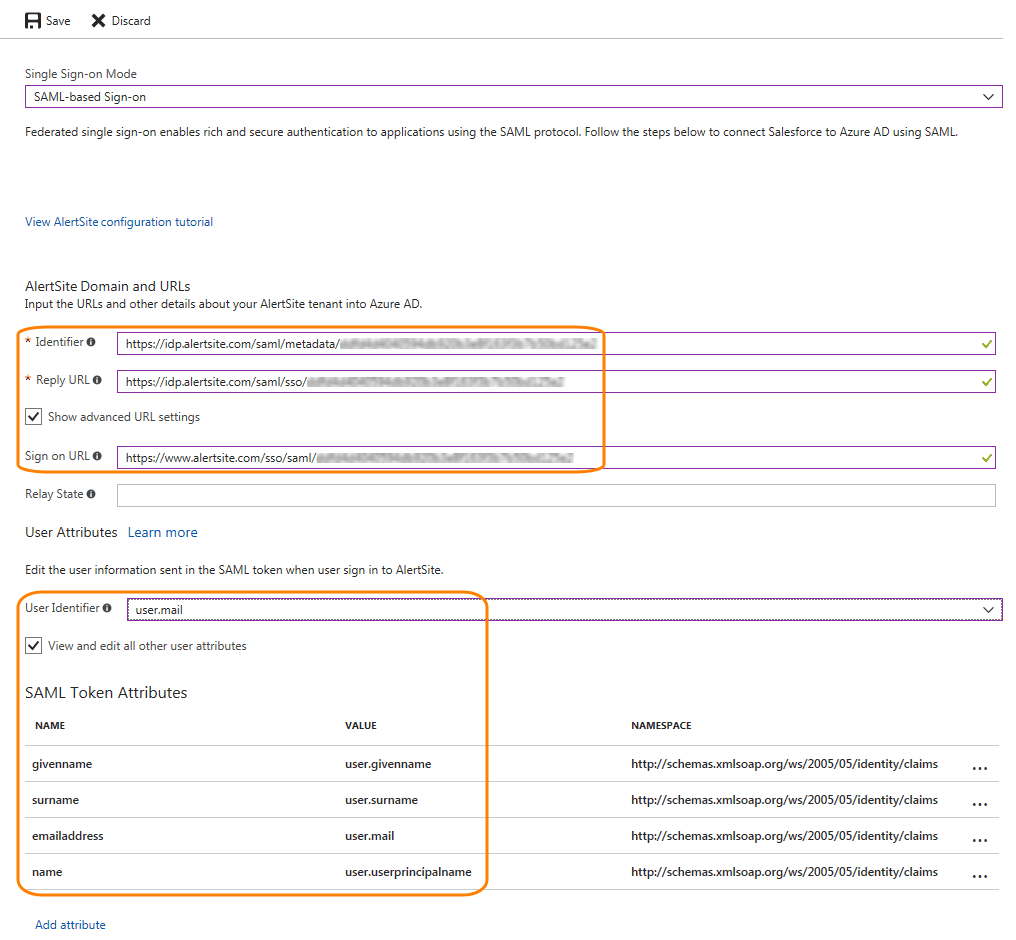
Specify the following settings:
-
Identifier – Paste the Entity ID value from AlertSite.
-
Reply URL – Paste the Assertion Customer Service URL value from AlertSite.
-
Sign on URL – Paste the Application URL value from AlertSite.
-
User Identifier – Select the attribute that contains the user email address. This is typically
user.mailoruser.userprinciplename. -
Click View and edit all other user attributes and add the following SAML token attributes:
Name Value givennameuser.givennamesurnameuser.surnameemailaddressuser.mailnameuser.userprincipalname
-
-
Leave everything else by default and click Save at the top.
-
Under SAML Signing Certificate, click the Metadata XML link to download the metadata file.
Configure AlertSite
AlertSite UXM
AlertSite 1.0
-
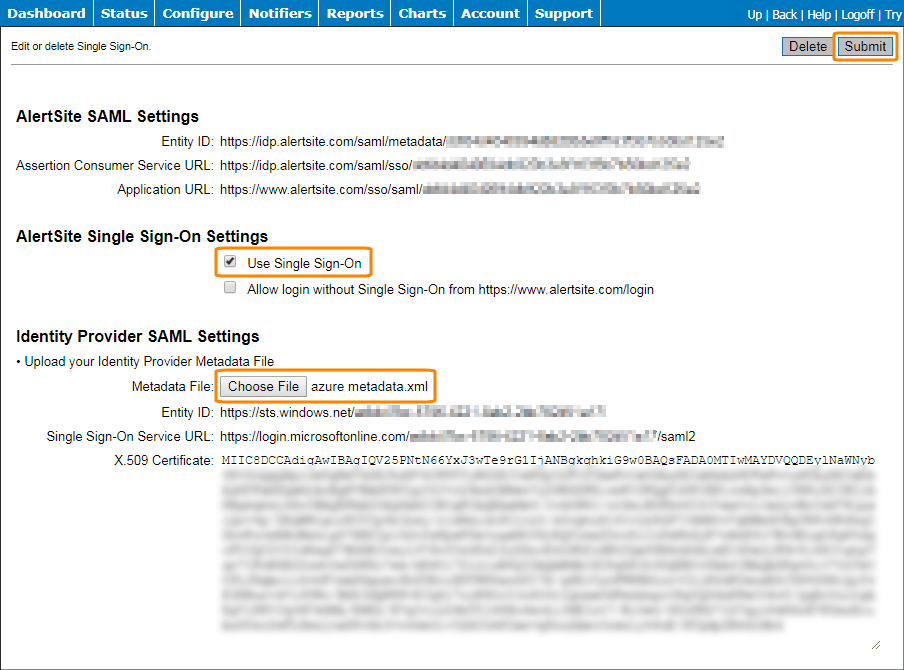
Navigate to Account > Manage Account and click Single Sign-On.
-
Select the Single Sign-On check box.
-
Under Identity Provider SAML Settings, upload the metadata file you previously downloaded from Azure AD. Other settings will be populated automatically.
-
Click Submit in the top right corner.
Assign the AlertSite Application to Azure AD Users
Next, configure which Azure AD authenticated users will have access to AlertSite:
-
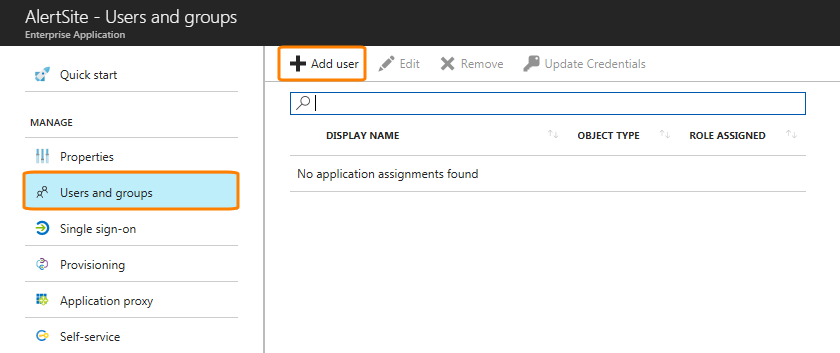
In the AlertSite application settings, switch to the Users and groups tab and click Add user.
-
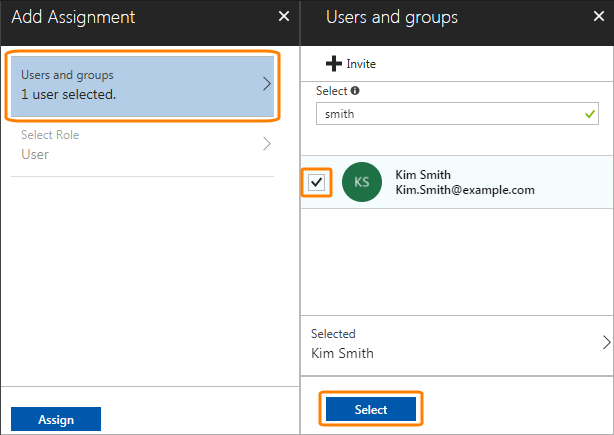
Select the users, groups or roles that will have access to AlertSite.
-
Add other users, groups or roles if necessary.
-
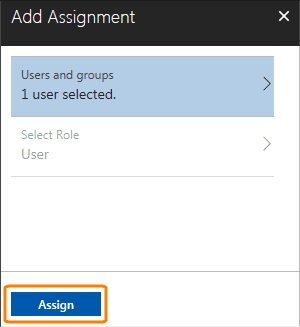
Click Assign.
Test Single Sign-On
To test single sign-on initiated from Azure AD:
-
Log out from AlertSite.
-
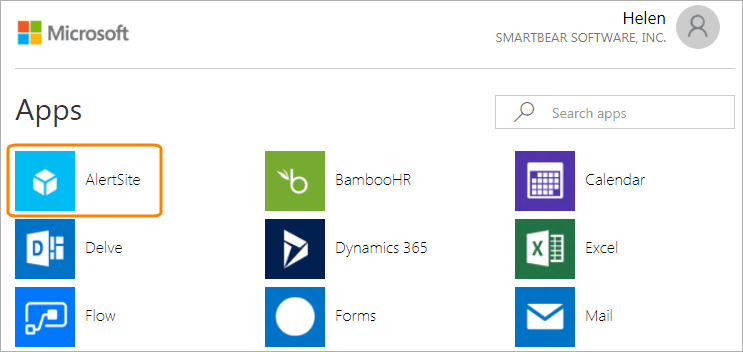
Open your Azure Apps gallery at https://account.activedirectory.windowsazure.com/r#/applications.
-
Click AlertSite in the list.
You will be redirected to AlertSite and will be logged in automatically.
To test single sign-on initiated from AlertSite:
-
Copy the Application URL value from the Single Sign-On settings in AlertSite. This will be the AlertSite login page for your company while SSO is enabled. It looks like this:
https://www.alertsite.com/sso/saml/<ID>
-
Log out from AlertSite and from Azure AD.
-
(Recommended.) Open a new browser tab in incognito mode.
-
Navigate to the URL you got on step 1.
-
You will be redirected to the Azure AD sign-in page.
-
Log in using your Azure account credentials.
You will be redirected to AlertSite and will be logged in.

