
Enhanced Permissions allow users to view or edit monitors based on access groups assigned to them, rather than relying solely on their account role.
With Enhanced Permissions enabled, access to monitors is controlled at the group level. Administrators can also allow Co-Administrators to manage Enhanced Permissions settings.
| Note: |
Only Admin and Co-Admin users can enable or manage Enhanced Permissions. |
Access Control Rules
When Enhanced Permissions are enabled:
-
Enhanced Permissions do not grant global administrator privileges.
-
Users must be assigned to at least one access group with Edit permission to modify monitors.
Monitor-Level Access
-
Users can view or edit only the monitors assigned to their access group.
-
Monitor create, update, and delete operations via API are allowed only for monitors the user has Edit access to.
Related Features Restrictions
Enabling Enhanced Permissions
AlertSite UXM
A. Create Monitor Group
-
Click Settings, and then click Enhanced Permissions.
-
Click Add New Monitor Group.
-
Enter a Monitor Group name and select the required monitors.
-
Click Save.

Click the image to enlarge it.
B. Create Access Group
-
Click Settings, and then click Enhanced Permissions.
-
Click Add New User Group.
-
Enter an Access Group name and select users.
-
Under Monitor Access Level, select the appropriate monitor group and assign permission:
-
View Only – Users can view assigned monitors only.
-
View/Edit – Users can view and modify assigned monitors.
Note: If All Monitors is selected with View/Edit access, users can view and manage all monitors and create new ones. If specific monitor groups are assigned with View Only access, users can only view those monitors and cannot make changes, even if they have Co-Admin or Power User roles.
-
-
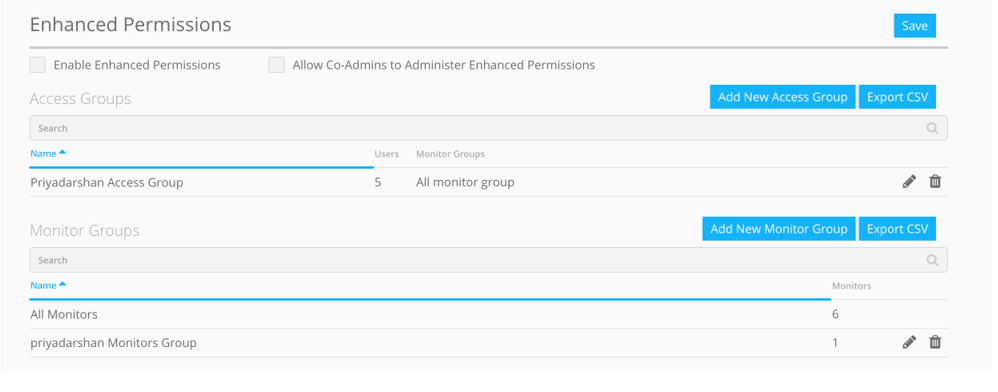
Click Save.
-
After creating both Access and Monitor groups, select the Enable Enhanced Permission checkbox, and then click Save.

Click the image to enlarge it.
AlertSite 1.0
A. Create Monitor Group
-
Click Accounts, click Manage Account, and then click Enhanced Permissions.
-
Click Add Monitor Group.
-
Enter a Group Description and select monitors.
-
Click Submit.

Click the image to enlarge it.
B. Create Access Group
-
Click Accounts, click Manage Account, and then click Enhanced Permissions.
-
Click Add Access Group.
-
Enter an Access Group name and select users.
-
Under Monitor Access Level, assign the appropriate monitor group with:
-
View Only, or
-
View/Edit permissions.
-
-
Click Save.
-
After creating both Access and Monitor groups, select the Enable Enhanced Permission checkbox, and then click Save.

Click the image to enlarge it.