TestLeft identifies objects in tested applications by unique combinations of their properties and values. In your tests, you write code that identifies the needed tested object and then call the tested object's methods and properties to simulate user actions over it.
In your tests, you usually simulate user actions over a great number of tested objects, and you have to write identification code for each of these objects. This can make your test code hard to read and maintain.
To avoid such an issue, you can separate the object identification code from test instructions that simulate user actions by implementing models.
About Models
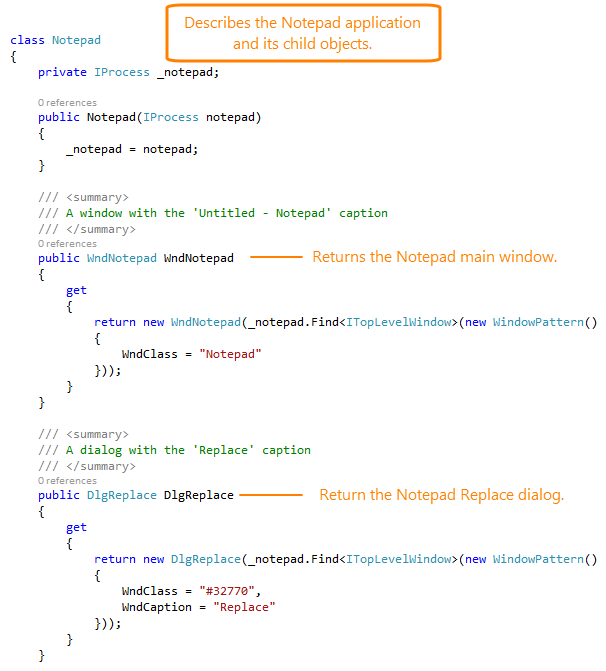
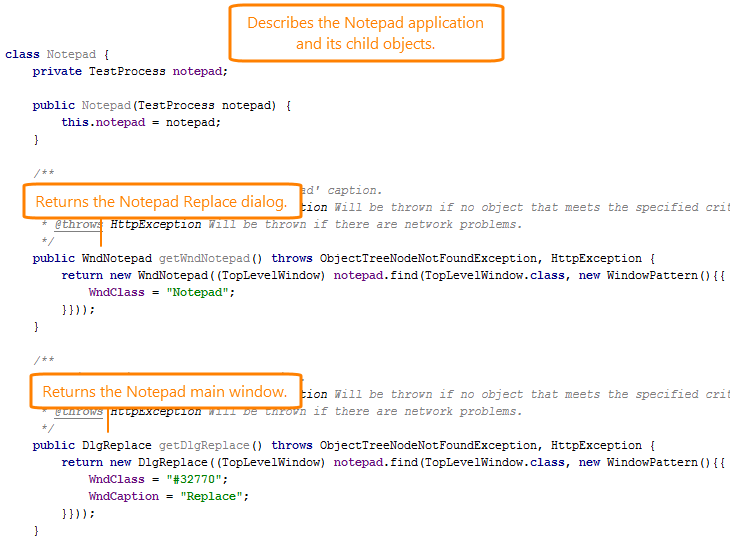
A model is a class in your test project that describes the object hierarchy in the tested application’s window, on a web page, or in the entire tested application.
A model implements properties and methods that return child objects of a window, page or application. These child objects are identified by their properties and values.
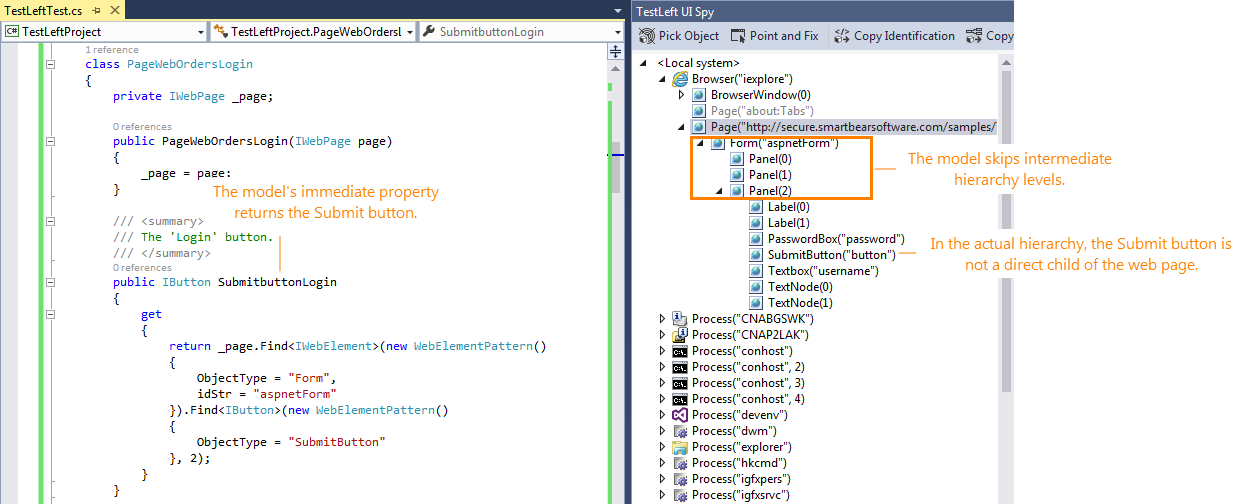
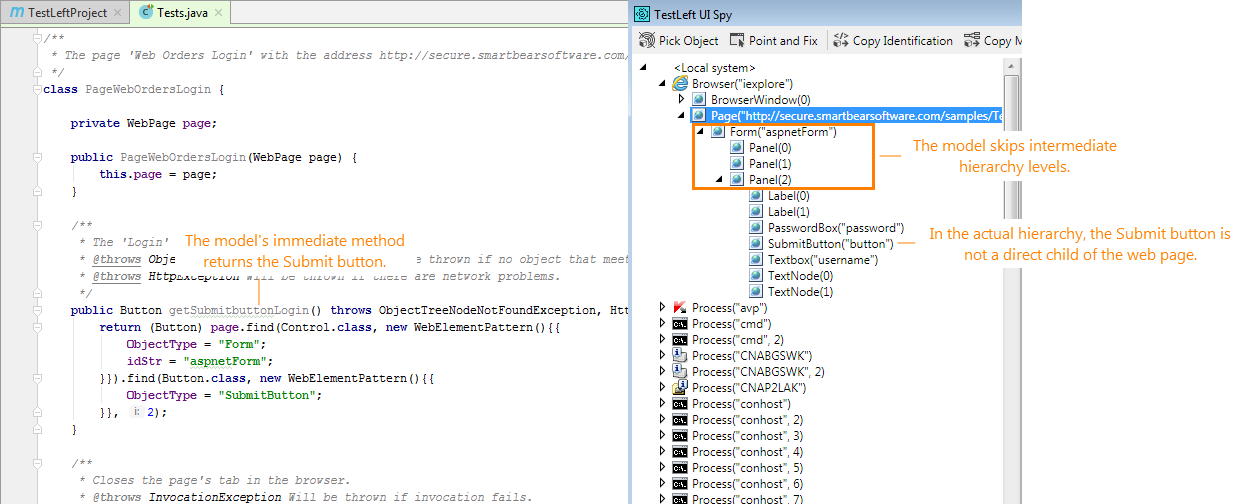
Your model can describe only those objects that you use in tests, and skip those objects that you do not use. If needed, your model can also skip intermediate levels of the object hierarchy. For example:
Mapping Models to Actual Objects
To use models in tests, you map them to an actual process or object in your tested application. To do this, create an instance of the model class and pass the actual test object to the constructor:
C#
using SmartBear.TestLeft.TestObjects;
using SmartBear.TestLeft.TestObjects.Win;
…
[TestMethod]
public void Test()
{
// Map the Notepad model to the actual Notepad application
Notepad notepad = new Notepad(Driver.Find<IProcess>(new ProcessPattern()
{
ProcessName = "notepad"
})
);
…
}
…
Application 'Notepad'
class Notepad
{
private IProcess _notepad;
public Notepad(IProcess notepad)
{
_notepad = notepad;
}
…
}
Visual Basic .NET
Imports SmartBear.TestLeft.TestObjects
Imports SmartBear.TestLeft.TestObjects.Win
…
<TestMethod()>
Public Sub Test()
' Map the Notepad model to the actual Notepad application
Dim notepad As Notepad = New Notepad(Driver.Find(Of IProcess)(New ProcessPattern() With {
.ProcessName = "notepad"
}))
…
End Sub
…
'Application 'Notepad'
Public Class Notepad
Private _notepad As IProcess
Sub New(notepad As IProcess)
_notepad = notepad
End Sub
…
End Class
Java
import com.smartbear.testleft.testobjects.*;
import com.smartbear.testleft.testobjects.win.*;
…
@Test
public void Test() throws Exception{
// Map the Notepad model to the actual Notepad application
Notepad notepad = new Notepad(driver.find(TestProcess.class, new ProcessPattern() {{
ProcessName = "notepad";
}}));
…
}
…
// Application 'Notepad'
public class Notepad {
private TestProcess _notepad;
public new (TestProcess notepad)
_notepad = notepad
}
…
}
If a model describes child objects of a tested object, the child models will be mapped to the appropriate child objects of the mapped object.
Then you can use the model’s properties and methods to access the needed objects and simulate user actions over them:
C#
using SmartBear.TestLeft.TestObjects;
using SmartBear.TestLeft.TestObjects.Win;
…
[TestMethod]
public void Test()
{
// Map the Notepad model to the actual Notepad application
Notepad notepad = new Notepad( Driver.Find<IProcess>(new ProcessPattern()
{
ProcessName = "notepad"
})
);
// Use the WndNotepad property of the Notepad model to get Notepad's main window
// Then use the main window's Edit property to get Notepad's edit box and simulate user actions over it
notepad.WndNotepad.Edit.Keys("Test");
// Use the Close method that the model implements to close Notepad
notepad.Close();
}
Visual Basic .NET
Imports SmartBear.TestLeft.TestObjects
Imports SmartBear.TestLeft.TestObjects.Win
…
<TestMethod()>
Public Sub Test()
' Map the Notepad model to the actual Notepad application
Dim notepad As Notepad = New Notepad(Driver.Find(Of IProcess)(New ProcessPattern() With {
.ProcessName = "notepad"
}))
' Use the WndNotepad property of the Notepad model to get Notepad's main window
' Then use the main window's Edit property to get Notepad's edit box and simulate user actions over it
notepad.WndNotepad.Edit.Keys("Test")
' Use the Close method that the model implements to close Notepad
notepad.Close()
End Sub
Java
import com.smartbear.testleft.testobjects.*;
import com.smartbear.testleft.testobjects.win.*;
…
@Test
public void Test() throws Exception{
// Map the Notepad model to the actual Notepad application
Notepad notepad = new Notepad(driver.find(TestProcess.class, new ProcessPattern() {{
ProcessName = "notepad";
}}));
// Use the getWndNotepad method of the Notepad model to get Notepad's main window
// Then use the main window's getEdit method to get Notepad's edit box and simulate user actions over it
notepad.getWndNotepad().getEdit().keys("Test");
// Use the Close method that the model implements to close Notepad
notepad.close(0);
}
Using object models can significantly increase the efficiency of your tests:
-
Your test code will be easier to read and understand.
-
Your test code will be easier to maintain. For example, if your tested application is changed, you will not have to re-write the whole test code. You will only have to update the model that describes the application.
Generating Models Using UI Spy
You can write models manually. However, it may be more convenient to command TestLeft to generate a model for a test object automatically:
-
Click
 on TestLeft UI Spy panel and configure the code generation settings. For example, select the language you use to write test code and select a root object for object identification code.
 -
Select the needed object in the object hierarchy in the UI Spy panel and click
 Copy Model to generate model code to the clipboard.
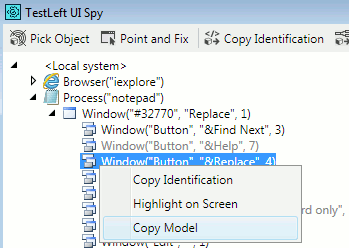

TestLeft can generate models only for objects that exist in your application and that are visible on screen. -
Paste the code to your test module.
-
Tweak the generated code, if necessary. For example, you can modify the identification code that TestLeft generates to describe an object’s child objects.
Generating models automatically may come in handy when you need to create a model for the entire application. TestLeft will generate a model for an application’s process, its windows and all their controls.
 About Models