To create and run TestLeft tests, you must have one of the following versions of Microsoft Visual Studio installed:
-
Microsoft Visual Studio 2015 - 2019 (Community, Professional or Enterprise)
-
Microsoft Visual Studio 2013 (Professional, Premium or Ultimate)
1. Install TestLeft
To learn how to install TestLeft, see Installing TestLeft.
2. Open TestLeft UI Spy
UI Spy is shipped with TestLeft. You use it to explore the hierarchy of tested application objects and generate code for your tests.
You can run it as a standalone tool or as a panel in Visual Studio:
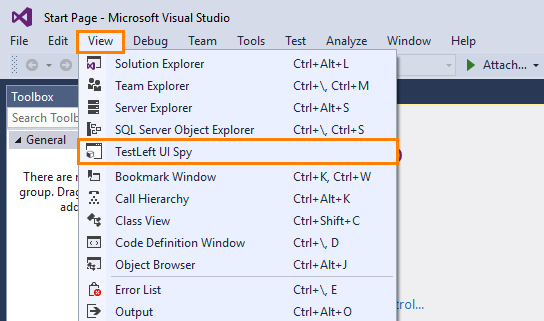
Select View > TestLeft UI Spy from Visual Studio main menu:

If needed, drag and dock the panel in the Visual Studio IDE as you find convenient.
You can use UI Spy as a standalone tool only if you have TestLeft version 2.50 or later.
The TestLeft executable file is <TestLeft>/SmartBear.TestLeft.UI.Spy.exe.
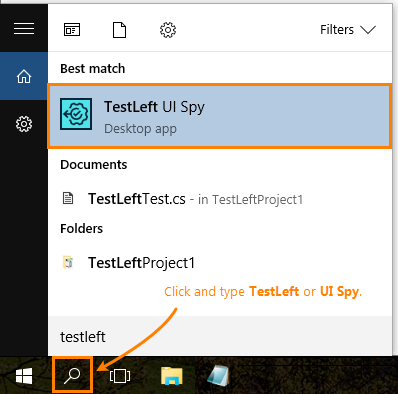
You can find TestLeft UI Spy in the Windows All apps menu, or simply type UI Spy in the Windows Search box:

Note: If you use Windows 10 and cannot find UI Spy via Windows Search, try restarting Windows Explorer or rebooting your computer.
3. Run the Notepad Application
This application is included in all the supported versions of the Windows operating system. We will use the application to demonstrate how to create tests.
Run it in a usual way from Windows Explorer.
 Prev
Prev