You can write test code using C# and Visual Basic .NET languages, and you can add your test code to projects of any supported type in Visual Studio.
In addition, TestLeft provides templates for creating tests in Visual Studio (for the .NET Framework). You can run projects created via these templates by using MSTest, NUnit and xUnit.net unit testing frameworks. This way, you will be able to create and run TestLeft tests using the testing framework you already use in your company.
In this tutorial, we will show how to create a test project for both .NET Framework and .NET Core. We will use the following templates:
-
The template shipped with TestLeft – the TestLeft MSTest Project template (for .NET Framework).
-
The standard template – the MSTest Project (.NET Core) template (for .NET Core).
1. Create a Project
Add a new project to an existing Visual Studio solution or create a new project.
-
In the list of project templates, select the Test category and then select TestLeft MSTest Project and MSTest Project (.NET Core) for .NET Framework and .NET Core, respectively.

Project templates for .NET Core are available in Microsoft Visual Studio 2017 or later. In the New Project dialog, make sure that the project targets .NET Framework version 4.5 or higher if you select the TestLeft MSTest Project template.
If needed, specify the project name and location.
Click OK.
-
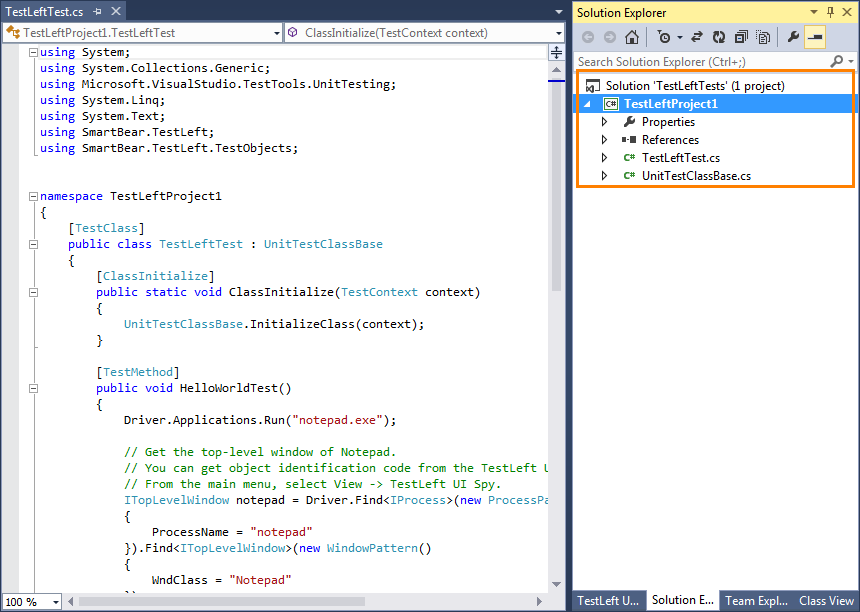
Visual Studio will create a new project and add it to your solution:
2. Configure the Project
-
To create TestLeft tests, you must have a reference to the SmartBear.TestLeft.dll library added to your Visual Studio project. The library is shipped with TestLeft and resides in the <TestLeft>\API\dotNET\ folder.
The project for .NET Framework is based on the TestLeft MSTest project template and has the needed reference by default:
If you create a project for .NET Core, add the reference manually:
-
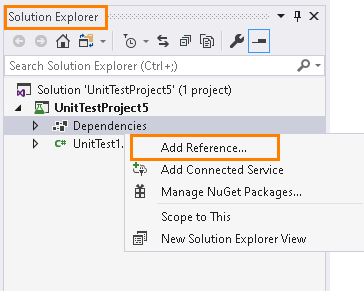
In the Solution Explorer, right-click the Dependencies node and select Add Reference:
-
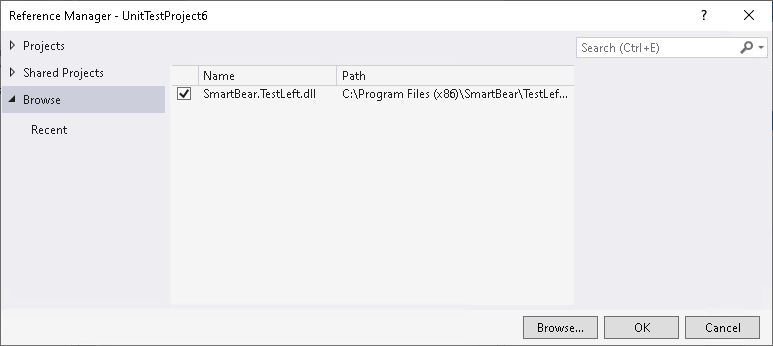
In the opened Reference Manager, click Browse at the bottom-right of the manager.
-
Specify the path to the SmartBear.TestLeft.dll library:
<TestLeft>\API\dotNET\SmartBear.TestLeft.dll
-
Click OK. The Visual Studio engine will add the library to your project.
You can install the TestLeft NuGet package as an alternative to the SmartBear.TestLeft.dll library.
-
-
The
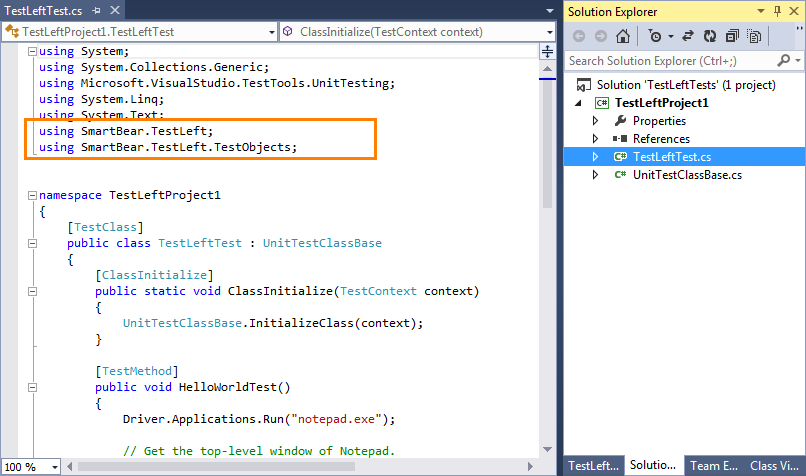
SmartBear.TestLeft.dlllibrary declares namespaces that provide base test classes and interfaces for all the supported application technologies. In the source file where you will create your test code make those namespaces available in the file's name scope.In this tutorial, we will need the
SmartBear.TestLeftandSmartBear.TestLeft.TestObjectsnamespaces. They are already available in our TestLeftTest source file:If you create a test module from scratch, or if you need other
SmartBear.TestLeftnamespaces in your tests, make them available manually. -
The project created by using the TestLeft project template has the sample
HelloWorldTesttest method. Let’s delete it and create a new test method from scratch.
 1. Create a Project


 Prev
Prev