1. Install TestLeft
To learn how to install TestLeft, see Installing TestLeft.
2. Launch TestLeft UI Spy
TestLeft UI Spy is shipped with TestLeft. You use it to explore the hierarchy of tested application objects and generate code for your tests.
If you use IntelliJ IDEA version 2016.x or later, you can run it directly from IDEA IDE. Otherwise, you can run it manually by using its executable.
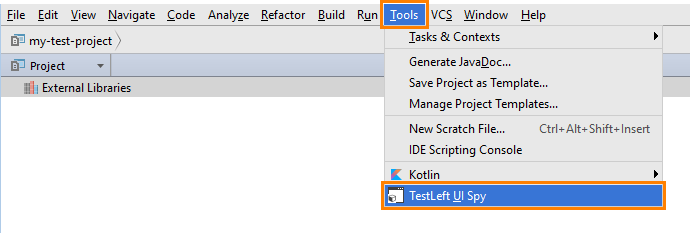
Select Tools > TestLeft UI Spy from the main menu:

The TestLeft UI Spy will start as a standalone executable.
If the menu command is not available, make sure that you have the TestLeft IntelliJ Idea Plugin installed and enabled in IntelliJ IDEA (by default, it is installed automatically when you install TestLeft).
As an alternative, you can launch TestLeft UI Spy as a standalone executable manually.
Run TestLeft UI Spy as a standalone executable. The UI Spy executable file is –
<TestLeft>\Bin\SmartBear.TestLeft.UI.Spy.exe
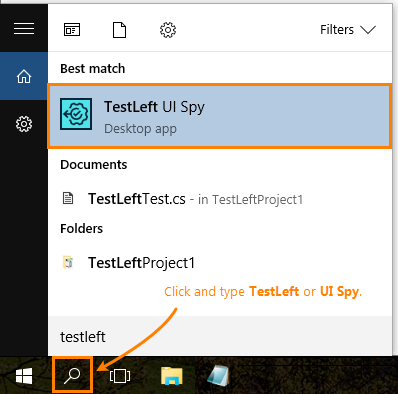
You can find it in the Windows All apps menu or by typing UI Spy in the Windows Search box:

3. Run the Notepad Application
This application is included in all the supported versions of the Windows operating system. We will use the application to demonstrate how to create tests.
Run it in a usual way from Windows Explorer.
 Prev
Prev