NuGet is a tool for creating, delivering and sharing reusable code (packages) for .NET. You can use it to install packages to your Visual Studio projects.
The SmartBear.TestLeft package that provides TestLeft API is available in the NuGet Gallery (the NuGet public package repository):
 nuget.org/packages/SmartBear.TestLeft
You can install it to your Visual Studio projects by using the NuGet Package Manager UI and Package Manager Console.
 To explore applications by using TestLeft UI Spy and to run tests, you must have TestLeft installed on your computer.
Via NuGet Package Manager
-
In Visual Studio, open your test project.
-
In the Solution Explorer, right-click the Reference collection of your project, and then click Manage NuGet Packages.
-
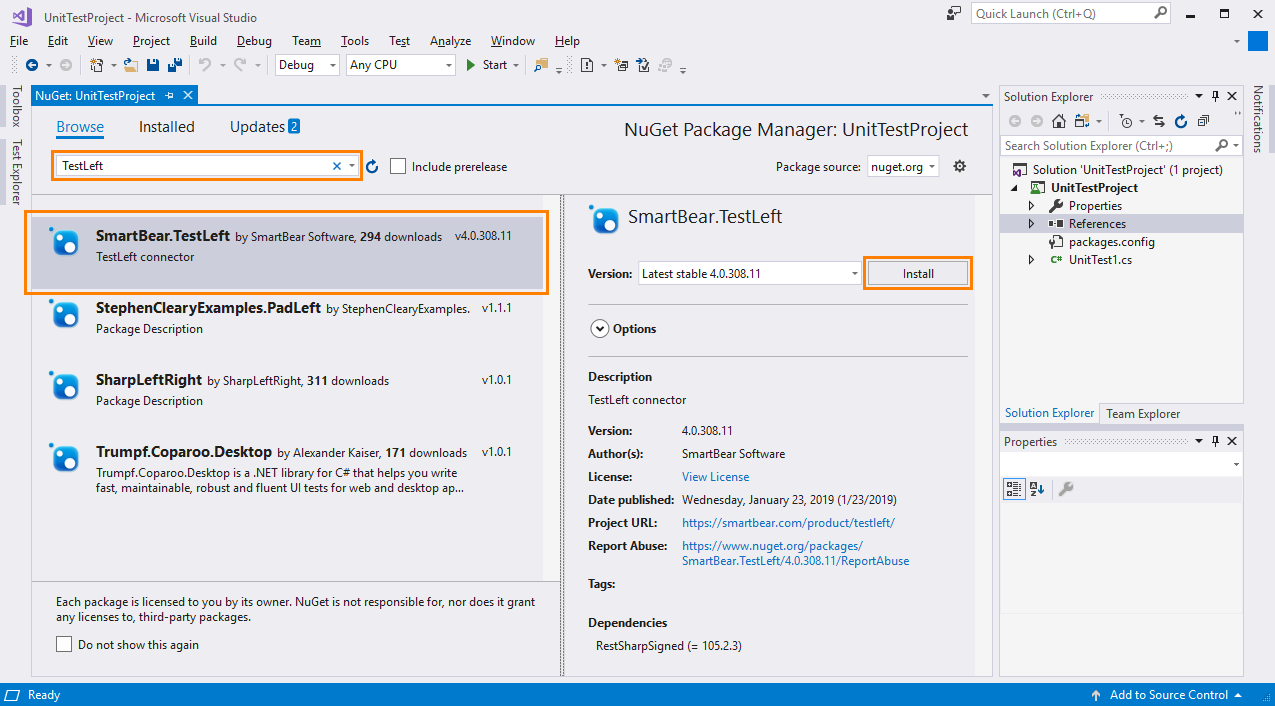
In the NuGet Package Manager, click Browse.
-
Make sure the package source is nuget.org.
-
In the Search box, type TestLeft.
-
In the search results, select the SmartBear.TestLeft package and click Install.
The package will be added to your project.
Via Package Manager Console
-
In Visual Studio, open your test project.
-
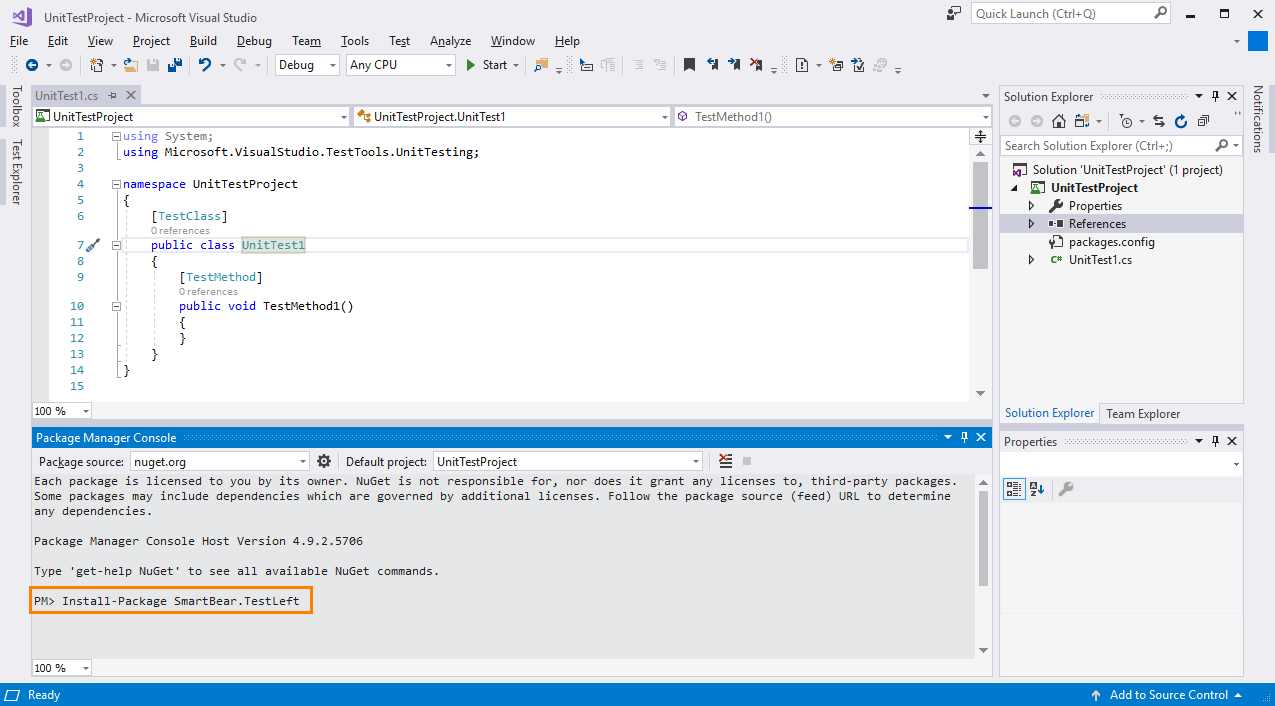
Select Tools > NuGet Package Manager > Package Manager Console from the Visual Studio main menu.
-
In the Package Manager Console, make sure the package source is nuget.org and the default project is the one to which you want to add the TestLeft package.
-
To install the latest version of the package, type the following:
Install-Package SmartBear.TestLeftTo install a specific version of the package:
Install-Package SmartBear.TestLeft -Version N.N.NNN.NNWhere N.N.NNN.NN is the needed version. You can view all the available versions on the TestLeft page in the NuGet Gallery.
The package will be added to your project.
Now, you can access the TestLeft API via the SmartBear.TestLeft namespace. To learn how to create tests by using the TestLeft API, see Creating TestLeft Tests.
See Also
Introducing TestLeft
System Requirements
Creating TestLeft Tests

