1. Install the SpecFlow Extension
-
Run Visual Studio.
-
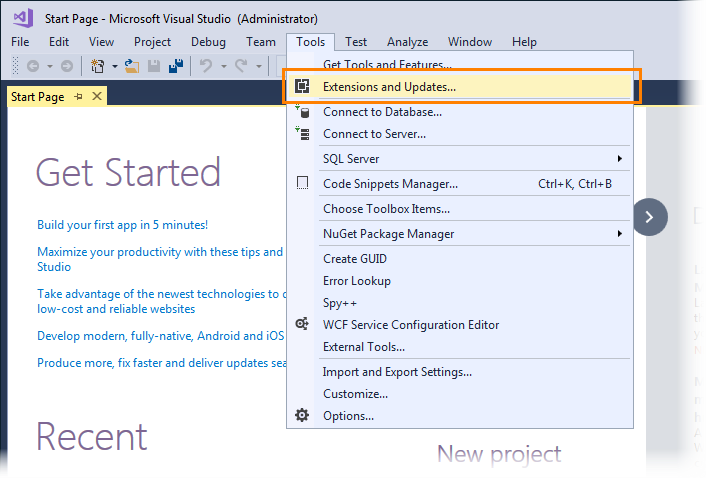
Select Tools > Extensions and Updates from the main menu:
-
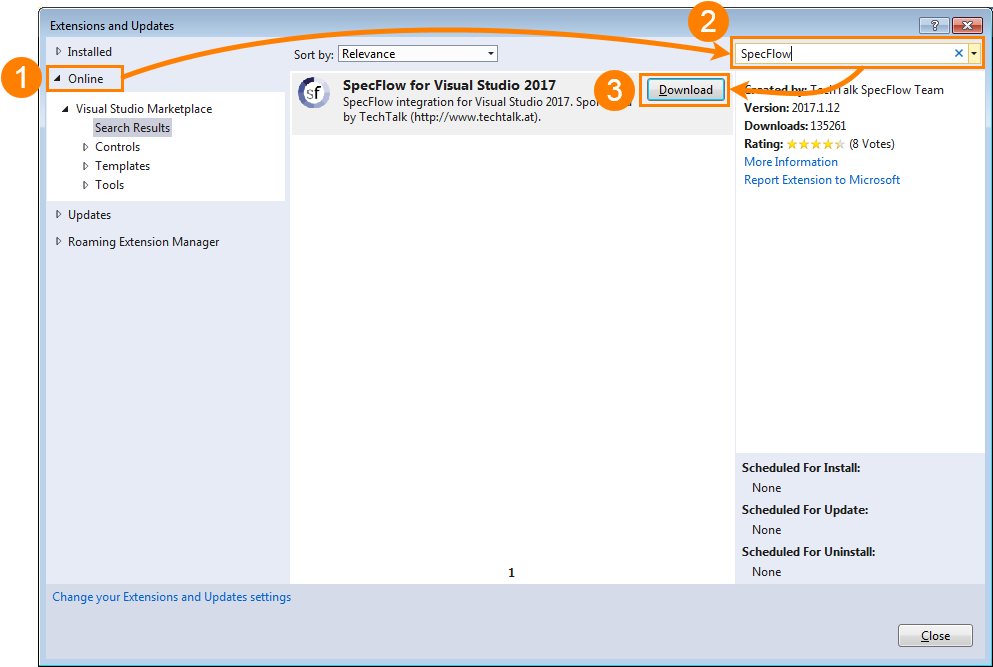
In the subsequent dialog, switch to the Online tab, search for SpecFlow and download the SpecFlow extension:
Follow the instructions to install the extension. You may need to close Visual Studio during the installation.
2. Create a Project
-
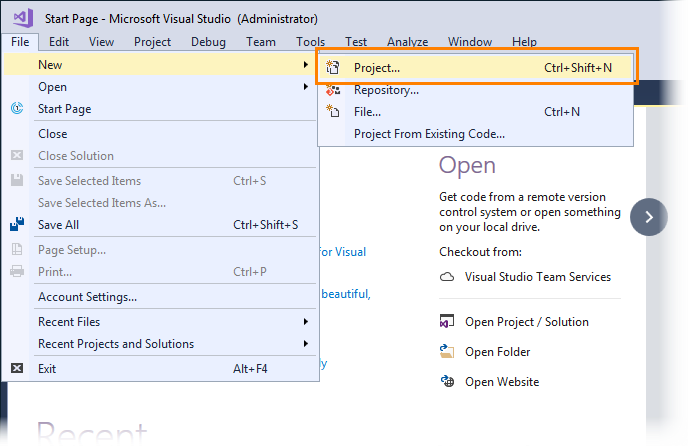
In Visual Studio, select File > New > Project to create a new project:
-
In the New Project dialog, create a new unit test project:
Visual Studio will create the project from a template.
-
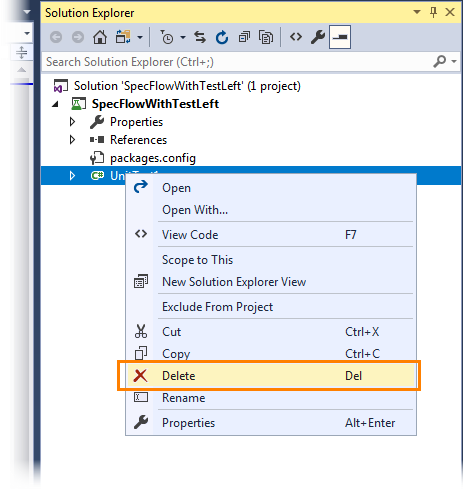
Remove the UnitTest1.cs file from the created project. We will not use it in this tutorial. To do this, right-click the file in the Solution Explorer and select Delete from the context menu:
3. Install NuGet Packages
-
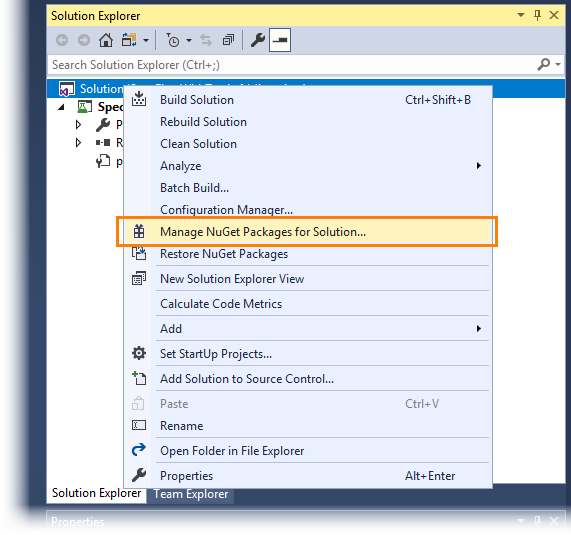
Right-click your solution in the Solution Explorer and select Manage NuGet Packages for Solution:
-
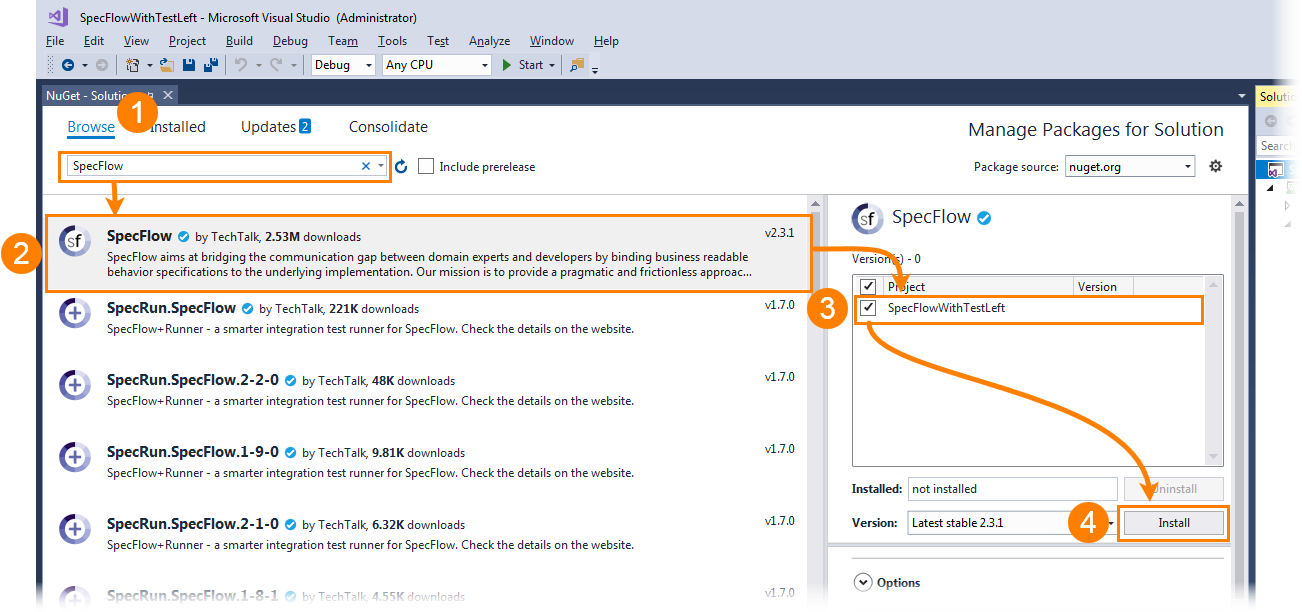
In the subsequent window, switch to the Browse tab, type SpecFlow in the search field and install the SpecFlow package to your project:
-
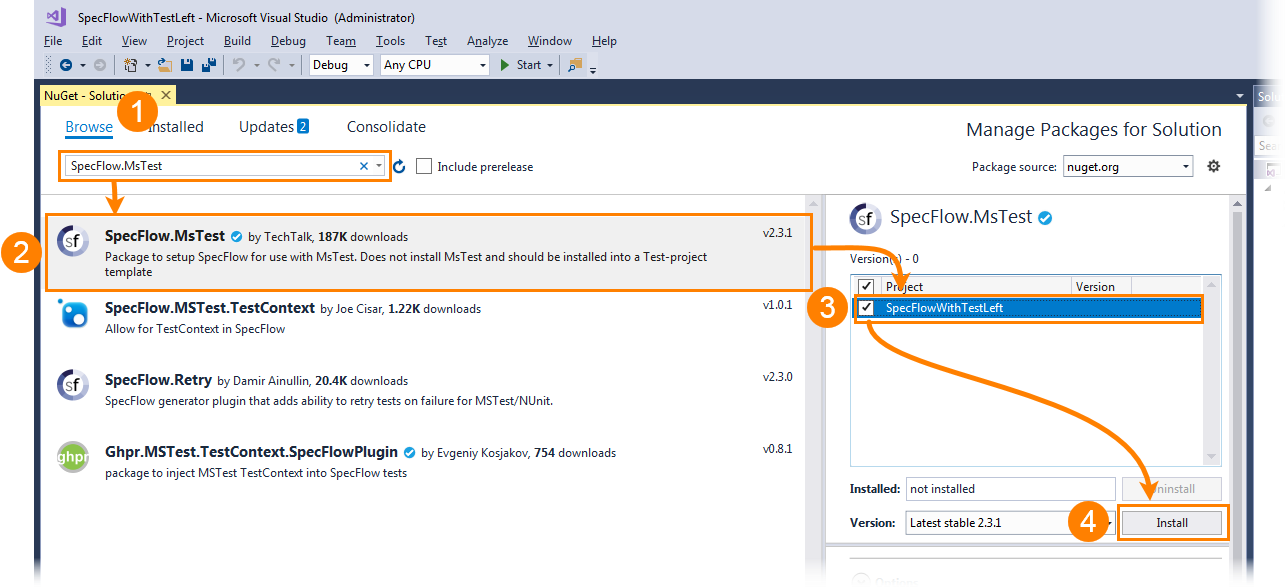
To run SpecFlow tests, you will use the MSTest unit test provider. To be able to do that, install the SpecFlow.MsTest package. Type SpecFlow.MsTest in the search field and install the package to your project:
4. Add a TestLeft Reference
-
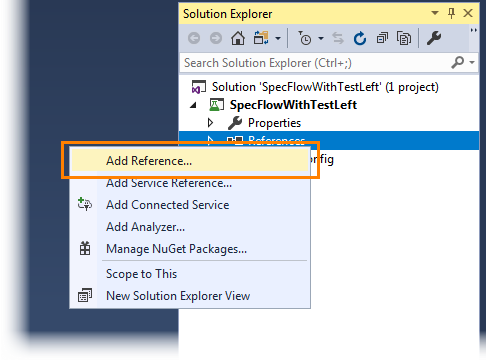
Right-click the References item in the Solution Explorer and select Add Reference:
-
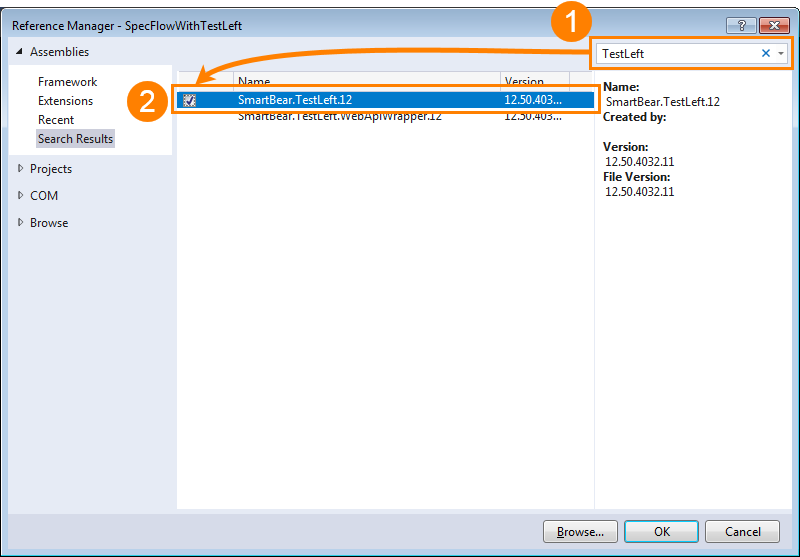
Search for TestLeft and check the
SmartBear.TestLeft.12assembly:
See Also
Behavior-Driven Development
About Behavior-Driven Development

 Prev
Prev