
You use the Select Server dialog to form a URL to the Team System database with which the issue-tracking template you are creating will work.
To call the wizard, click the ellipsis button in the URL edit box on the Team System Settings page of the Connection wizard.
-
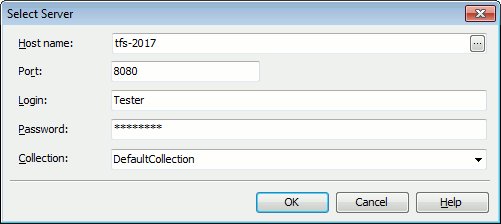
In the Host name edit box, specify the name of your Team Foundation server. You can either type this name, or click the ellipsis button and choose the desired computer from the subsequent dialog.
-
In the Port edit box, you specify a port for connecting to the Team Foundation server. By default, the port is 8080.
-
In the Login and Password edit boxes, you specify the user account and password for the connection.
Note: The Login string must not contain the domain name. These values are needed to retrieve the list of team project collections (see below). If you entered the login and password on the Team System Settings page of the Connection wizard, the wizard will “pass” these values to the dialog automatically to free you from repeating the input. (Note that the login and password you specify in the dialog will not be passed back to the wizard).
-
In the Collection edit box, you specify the team project collection to which your team project belongs. You can either type the collection name, or choose it from the drop-down list. For TestExecute to fill this list, you need to specify the host, port, login and password in the dialog.
After you specify all the data, click OK to apply the settings and form the connection URL. You will return back to the Team System Settings page of the Connection wizard, where you will be able to see the resulting URL. Cancel will close the dialog without generating the URL.