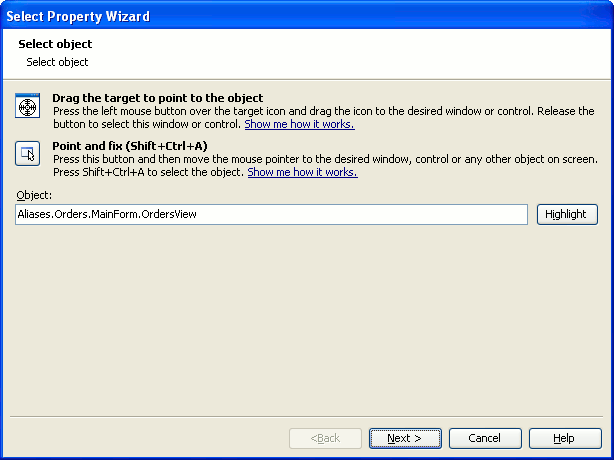
On this page of the Select Property wizard, you can specify the window, control or object whose property you would like to use in the context of the task you are accomplishing.

You can specify the object in one of the following ways:
-
Pick the object with the target glyph.
Drag the target glyph (
 ) to the needed object and drop it when a red frame appears around the object.
 -
Point to the object and fix.
Click the
 button and move the mouse pointer to the needed onscreen object. When a red frame appears around the object, press Shift+Ctrl+A. (The shortcut can be changed via the Select object setting in the Global Shortcut options.)
 -
Enter the object name manually.
Enter the full name, full mapped name or alias of the needed object to the Object box.
Tips for selecting objects:
-
You may find the “point and fix” technique more convenient than using the target glyph, because it allows you to manipulate applications before actually selecting the object. For example, you can open the tested application’s window containing the desired control and so on. Unlike using the target glyph, this technique allows you to point to popup windows, tooltips and other objects that are hidden in the application when being inactive.
-
To select a non-onscreen object, such as a process, enter the object name manually.
- Despite the way you specify the object name, you can change or correct it directly in the Object box.
To make sure you have selected the correct object, click Highlight and TestExecute will highlight the appropriate object on the desktop’s screen.
After you have selected the object, click Next to proceed.
