You can create Jira issues directly from TestExecute. The test log and system info can be automatically included in the issue as an attachment.
Requirements
- TestExecute 14.40.
-
Jira Server ver. 5.0 - 7.12 or Jira Cloud.
-
The issues of the target Jira project must:
-
have the Summary and Description fields.
-
allow attachments.
-
Adding Issues to Jira
-
Open a test project in TestExecute.
-
From TestExecute context menu, select Create Jira Issue and then select the log you want to submit to Jira.
Note: If the Create Jira Issue command is disabled, this means the project does not have any test logs. In this case, run the project to generate the logs. -
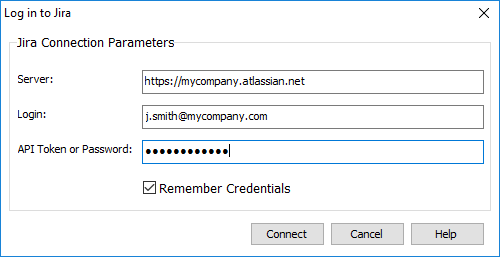
In the resulting dialog, specify your Jira server and user account:

Option Description Server Your Jira server URL, including http:// or https:// and (if needed) the port number. For example http://jira:8080 or https://<yourcompany>.atlassian.net. Login The email address you use to access Jira or the name of your Jira account. API Token or Password The API token or the password of your Jira account. To learn how to get a Jira API token, see the API tokens article in the Atlassian documentation. -
If you use an API token to access Jira, make sure the Login text box contains your email address (rather than your user name in Jira).
-
If you use a password to access your Jira server and you get an error, we recommend that you try using an API token instead. You can learn how to get an API token in the Jira documentation on the Atlassian web site.
Remember Credentials Select this check box to command TestExecute to remember the Jira credentials so that you do not have to enter them again the next time. -
-
Click Connect to get access to your Jira server and available projects.
-
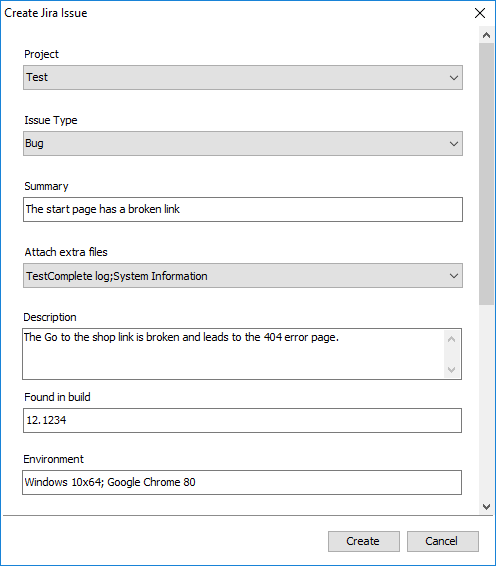
On the next page of the dialog, specify the desired Jira project, the defect type you want to report there, and details of this issue:

Some of the fields on this page are permanent, some of them are optional and depend on the selected project and the defect type. The table below includes only permanent fields:
Option Description Project The name of your Jira project where you want to create an issue. Issue Type Use this drop-drown list to specify one of the issue types available in the selected project. Summary The issue title. Attach extra files Use this drop-down list to specify whether the test log and System Information are attached to the created Jira issue.
-
TestComplete log. The selected test log will be attached in the MHT format.

Jira has a limit on the maximum size of attached files. If the MHT log size exceeds the attachment size limit, the issue will not be submitted. Contact your Jira administrator to learn the attachment size limit or increase it. -
System Information. The computer name, Windows version, a list of running processes will be attached to the created issue.
Description A detailed description of the issue. -
-
Click Create.
-
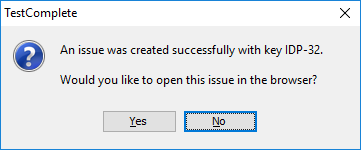
If the issue has been created successfully, TestExecute shows the issue ID and offers to open the issue in your browser. Click Yes to open the issue or No to close the dialog.

Troubleshooting
If an error occurs when connecting to the Jira server or when creating an issue in a database, TestExecute will show a message informing you about the error. Examine the error description to learn the details of what has happened. To learn how to fix the error, you may want to consult the Jira documentation on the Atlassian web site.
Remarks
You can create and update Jira issues and attach files to them directly from your tests. To learn how to do it, see the TestComplete documentation.
