The database checkpoints are used to check values stored in a database against the baseline copy that is stored in your project as a DBTable element of the Stores > DBTables collection. To help you set your database checkpoints, TestComplete includes the Database Table Checkpoint wizard. Below are detailed instructions on how to use the wizard:
1. Launching the Wizard
You can insert database checkpoints both during test recording and while editing the test:
-
If you are recording a test:
-
Click
 Add Check on the Recording toolbar:
Then select Database in the resulting dialog.
-
-
If you are editing a keyword test:
-
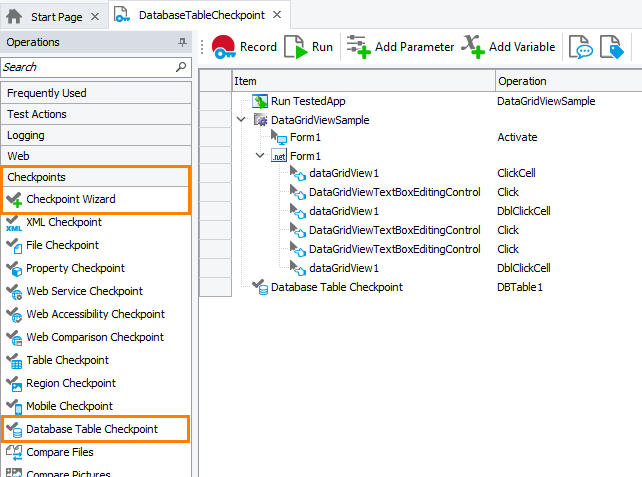
Select the Checkpoints category in the Operations panel of the Keyword Test editor.
-
Find the Checkpoint Wizard operation in the list and drag it to your test. In the Checkpoint wizard, click Database.
– or –
Find the Database Table Checkpoint operation in the list and drag it to your test.

-
-
If you are editing a script:
-
Open the script to be edited.
-
Click
 on the Code Editor toolbar:
-
In the Checkpoint Wizard, select Database, and then click Next.
-
2. Specifying the Baseline Database Table
On the first page of the wizard, you specify whether you want to use an existing DBTable element storing the baseline database table or whether you want to create a new DBTable element to store baseline data:
To create a new element
-
Click Retrieve data from a database and enter a name for the new item in the Save data to a new Stores item edit box.
Note: The specified name will be used to address the checkpoint from tests, so this name must be a valid identifier. To create the name that will match the naming rules adopted by all supported scripting languages, enter a string that starts with a letter and contains only letters, digits and underscore symbols.
-
To specify the connection settings, click the ellipsis button of the Connection string box. This will invoke the standard Data Link Properties dialog where you can specify the database, from which the data should be retrieved.
Note: If the connection string includes the database file name, then the settings will be computer-dependent. They may become invalid if you move the project to another computer. To avoid this problem, place the database file in a shared folder and use the network path to the file when specifying the connection settings. See also Computer-Specific Settings. -
In the User name and Password fields you specify the user name and password for connecting to the database.
The name and password are stored in the TestComplete project files in an encrypted form.
To select an existing DBTable element
Click Use stored data option button and select the desired element from the Stores item list.
If you choose to use an existing DBTable element, click Finish to complete the checkpoint creation. TestComplete will generate the checkpoint that will compare the baseline data stored in the element with the database table, view or query specified by the settings of the element and will add this checkpoint to your script or keyword test.
If you choose to create a new DBTable element, click Next.
 |
If TestComplete fails to retrieve data, it displays an error message returned by the database engine. Quite often, the cause of the message is that the table or query name does not match the rules adopted by the database engine. In order for TestComplete to be able to retrieve data from this table or query, you may need to change the table or view name. For detailed information about this, see Database Checkpoints - Specifics. |
3. Specifying the Data Source
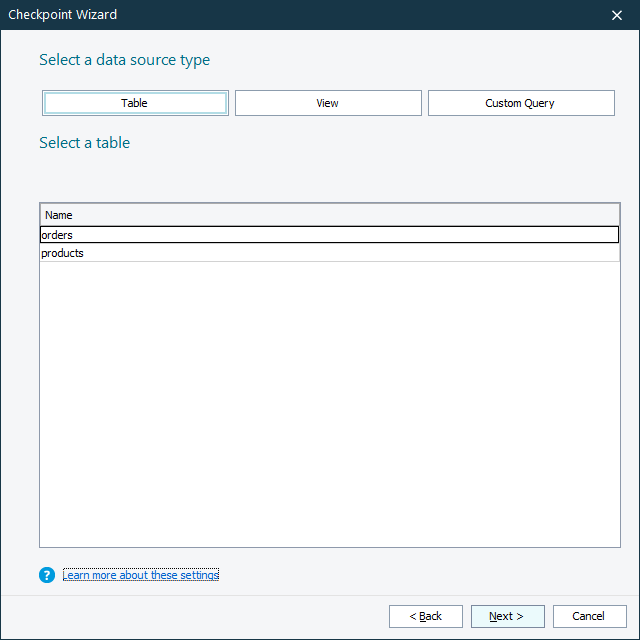
On the second page of the wizard, you specify the source of the data that will be retrieved:
-
Click Table to retrieve data from a database’s table.
Select the name of the desired table.
-
Click View to retrieve data from a database’s view or query.
Select the name of the desired view.
-
Click Custom query to specify an SQL query that TestComplete will use to retrieve data from the database.
You can enter query manually. You can also click Design and build the query in the ensuing SQL Designer.
| Note: | Since TestComplete 8.10, you can specify empty databases as baseline data for DB Table checkpoints. It can be useful if you need to verify that the database you are checking doesn't contain any data (for example, at the beginning of the test). |
4. Specifying the Data to Check
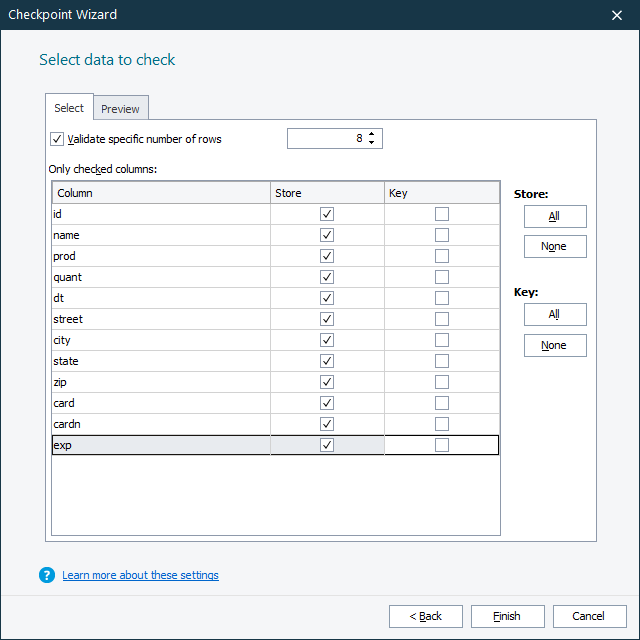
On the next page of the wizard, you select data to be checked:
-
By default, the checkpoint will verify all of the records that the wizard retrieves from the database. To limit the records number, select the Store only the specified number of rows check box and then enter the desired number of records.
-
Specify values that the checkpoint will verify:
-
To mark the database column for storing and verification, select its check box in the Store column.
-
To mark the database column as a key column, select its check box in the Key column of the page. TestComplete uses key columns to identify records. For more information on how to choose key columns, see Using Key Columns.
Note: The key fields are used to identify records, therefore, the database provider, which is used to access data, should support sorting of records on these fields. To avoid possible problems, we recommend that you select the Key check box for the fields of ordinary types and avoid selecting the check box for non-ordinary fields such as hyperlink or memo.
-
On the Preview tab of the wizard, you can view the data retrieved from the database.
5. Closing the Wizard
To store the selected data as baseline data for verification and to complete the checkpoint creation, click Finish. TestComplete will store the specified data to the DBTable element and add the database checkpoint statement to your test.
If you are creating a database checkpoint while editing a script test, the generated checkpoint code will be displayed in the Copy Text to Clipboard dialog. You will be able to copy this code to the clipboard and then paste it to the desired place in your script.

 1. Launching the Wizard

