 If you are a novice user, we recommend that you first go through the Getting Started tutorial to get familiar with the tool:
 Testing Web Applications - Tutorial
About
To increase your test coverage, you may want to run you tests in as many web browsers and on as many platforms and devices as possible. To check how your tested web application or website works in Safari, you can create tests for it with TestComplete.
TestComplete can run only on Windows operating systems and does not support Safari directly. However, TestComplete can run tests in Safari in environments managed by device clouds:
-
You create a web test on a Windows computer with TestComplete. To create a test, you use any of the browsers that TestComplete supports:
 Web browsers you can use for recording web tests
It does not matter which browser you choose. When creating tests in cross-platform web testing mode, you make them Safari compatible.
-
You modify the created test to connect to a device cloud and run test instructions on a Safari node.
-
You run the test and get the test results in TestComplete on your local computer.
Supported Safari Versions
You can run tests in any Safari version (both Mac and iOS) that is WebDriver compatible.
Which Safari versions are available depends on the device cloud provider you use. For instance, if you use BitBar as your device cloud provider, you can use the following Safari versions:
- Safari 8–13 for macOS.
- Mobile Safari 3–13 for iOS.
You can view supported Safari versions on the BitBar Release Notes page.
Requirements
To create tests
-
A Windows computer with TestComplete 14.40 or later installed. On this computer, you will create tests, control the test run, and get the test results. To learn about the requirements that the computer must meet, see System Requirements.
-
An active license for the TestComplete Web Module.
-
The Web Testing plugin and the Cross-Platform Web Testing plugin must be enabled in TestComplete.
-
One of the supported web browsers in which you want to record tests. The browser you use for recording does not matter. You can choose any browser you are comfortable with. The resulting test will be compatible with Safari.
-
The web browser selected for test recording must be prepared for testing as described in Preparing Web Browsers.
To run tests
Your tests will run in Safari in a device cloud. Therefore, you will require a device cloud. It can be:
-
Provided as a service by BitBar.
– or –
- A private hub with Selenium Grid configured. It can be Selenium Grid running on your local computer or on a remote computer in your network. To learn more about installing and configuring Selenium Grid, see selenium.dev.
Your Selenium Grid:
- Must have a registered node with the needed Safari version installed.
- Must be accessible from the computer where TestComplete is installed.
1. Prepare a local web browser for creating tests
You create your Safari-compatible web tests on a Windows computer using one of the browsers that TestComplete supports:
-
Internet Explorer
-
Microsoft Edge (Chromium-based)
Note: Recording web tests in the earlier versions of Edge is not supported.
-
Google Chrome
-
Mozilla Firefox
It does not matter which browser you choose. You will be able to run your test in Safari either way.
However, before you can start creating tests, you have to configure the selected browser in a special way. To learn how to do it, please see:
2. Enable cross-platform test support
Before you start creating cross-platform web tests, make sure that your TestComplete project is configured to locate web objects by their XPath expressions and CSS selectors:
In existing projects
-
Open your TestComplete project to which you want to add tests.
-
Select Tools > Current Project Properties from the TestComplete main menu to open the Properties page of your project.
-
In the tree on the left, select Open Applications > Web Testing > General.
-
Make sure that the Use XPath and CSS selectors for web objects check box is selected:
When creating new projects
-
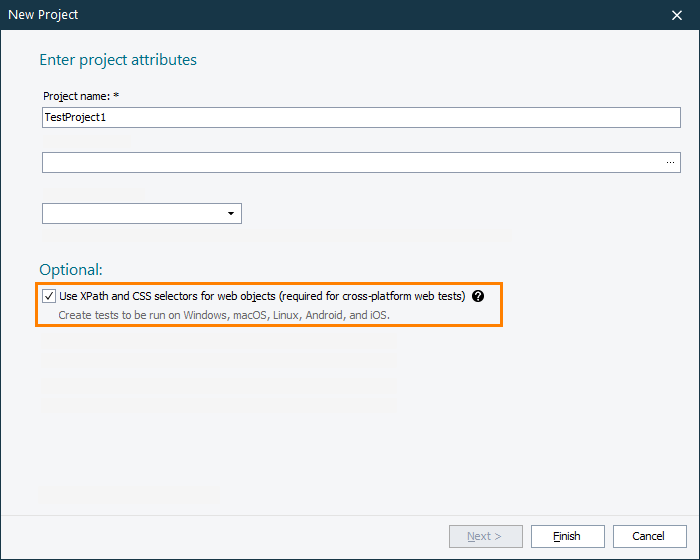
Create a new project in TestComplete. To learn how to do it, see Creating Projects and Project Suites.
-
On the first page of the New Project wizard, make sure to leave the Use XPath and CSS selectors for web objects check box selected:
3. Record a Safari-compatible test
To create a test you will run in your Safari web browser, you record required user actions or you can create a test from scratch. The easiest way to create a test is to record it. You record your user actions on your local computer, where TestComplete is installed, in one of the browsers that TestComplete supports and that you have prepared for testing at the preceding step.
-
Start recording. To learn more about recording in TestComplete, see Recording Automated Tests.
-
Launch your selected and prepared web browser.
-
Interact with your tested application or web page as an end-user would: navigate through pages, click the links, input data into forms, and so on.
-
Stop the test recording.
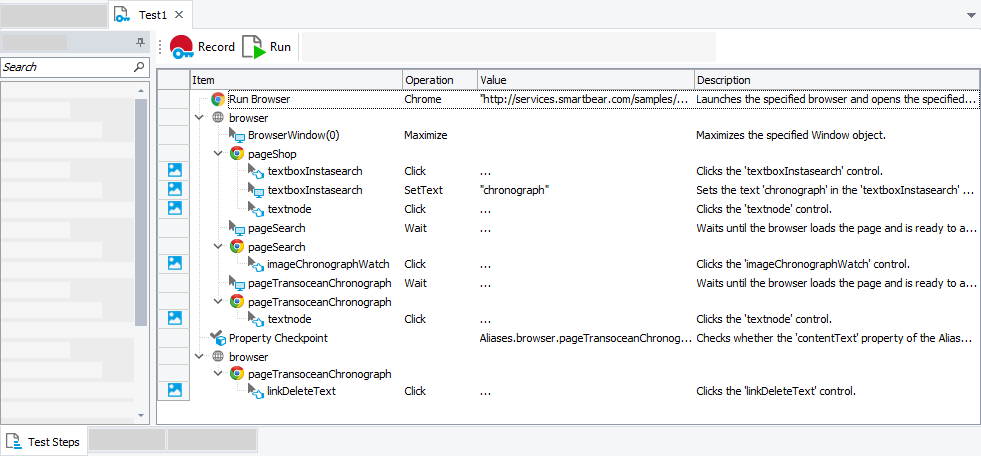
TestComplete will process the performed actions and generate a test. The test consists of the sequence of operations that define various interactions with objects in a web browser:
You can modify and enhance the recorded test in a number of ways to make it more flexible and efficient. For example:
-
Add new operations, reorder operations and modify their parameters.
-
Delete or disable unneeded operations (for example, superfluous recorded operations).
-
Insert checkpoints for verifying objects and values in the tested application.
-
Create data-driven tests that run multiple test iterations using different sets of data.
4. Configure the test to run in Safari
The recorded test interacts with the browser you used during the recording. To run the test in Safari, modify the test as following:
Keyword Test
-
Remove (or disable) all operations that interact with the local browser you have used for test recording. For example, disable or remove the Run Browser operation.
-
Add the Run Remote Browser operation to your test:
-
In the Operation Parameters dialog, log in to BitBar (if you have not logged in yet). If you still do not have a BitBar account, you can sign up for a free trial directly from the dialog.
-
Select the needed version of Safari and the device (Mac or iOS mobile device) where you want to run your test.
-
All the recorded operations that interact with a web browser and that follow the Run Remote Browser operation will be run in Safari.
Script Test
-
Remove (or disable) all test commands that interact with the local browser you have used for test recording. For example, remove or comment out all script lines that use the
Browsers.Itemproperty. -
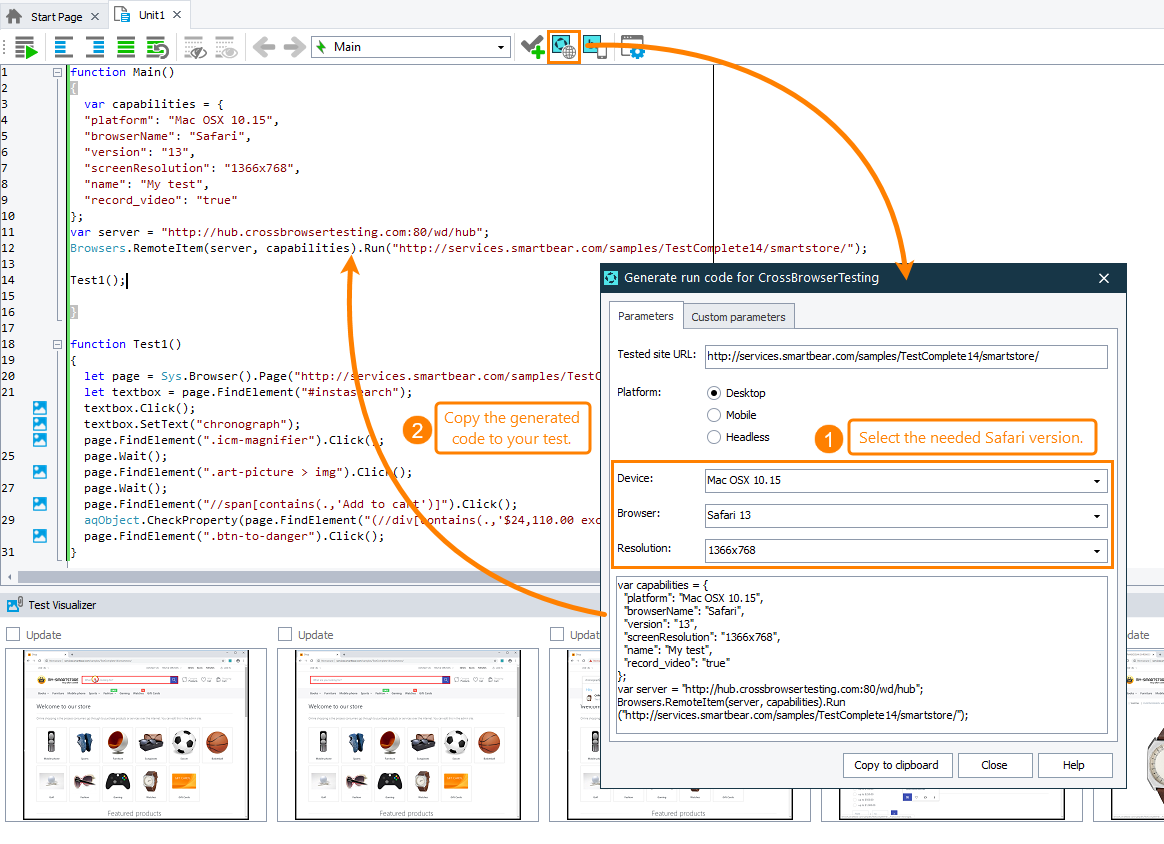
Click
 on the Code Editor toolbar.
 -
In the resulting dialog, log in to BitBar (if you have not logged in yet). If you still do not have a BitBar account, you can sign up for a free trial directly from the dialog.
-
Select the needed version of Safari and the platform (Mac or iOS) where you want to run your test.
-
Copy the code that the dialog generates and insert it into the needed place in your script test:
-
All the test commands that follow the
Browsers.RemoteItem.Runmethod and that work with theBrowserobject will run in the remote environment.
5. Run the test in Safari
After your test is configured as described above, run it. To learn how to run tests, see Running Tests.
TestComplete will connect to your device cloud, command it to start Safari on a suitable node, and execute test commands there.
Note: You will not be able to track you testing progress in TestComplete. However, if you use BitBar, you can connect to your BitBar account in a web browser and monitor the testing progress there.
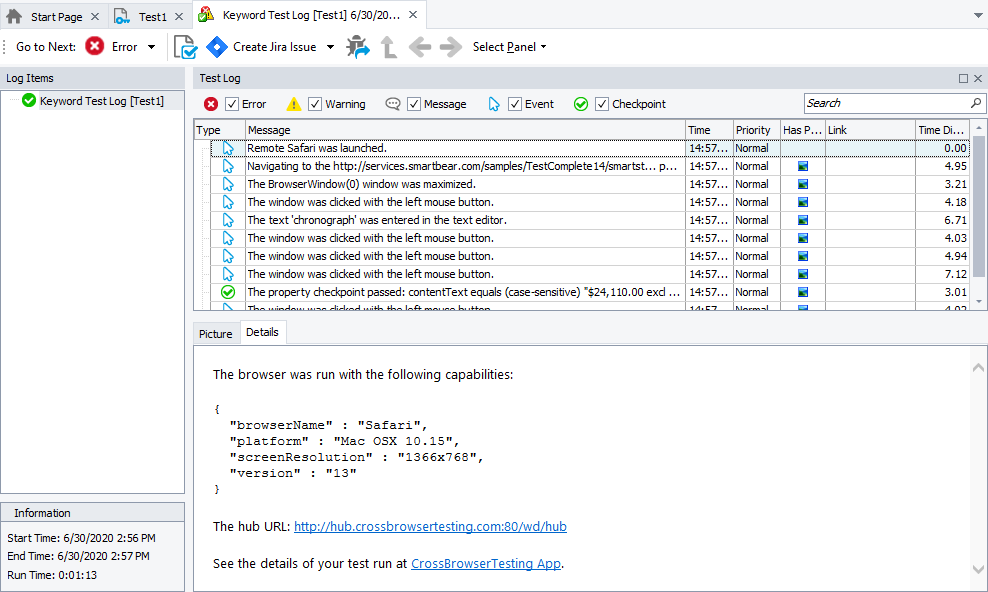
After the test run is over, you can view the test results in TestComplete:


