To test applications that TestComplete cannot recognize, you can use image-based tests. In image-based tests, TestComplete recognizes UI elements by their image rather than by a set of their internal properties.
About This Tutorial
In this tutorial, we will show you how to create image-based tests. In TestComplete, you can create tests manually or record them. As for image-based tests, TestComplete can record them only on Android mobile applications. For other applications, for instance, for desktop applications, you have to manually capture images and add test commands to your tests. So, in this tutorial, we will show you how to –
-
Capture an image of a control and store it to your project.
-
Add commands that will search for the control on the screen by a captured image and simulate user actions on it.
To create a test, we will use the Notepad application that is included in the Windows operating system. Our test will simulate a mouse click on the Notepad icon in the caption of the Notepad window:

To find the icon in the application, TestComplete will use its image that we will capture and add to the project.
Important: If you are new to TestComplete, we recommend that you first go through the Getting Started tutorial to get familiar with the tool.
1. Create a Test Project
Let us create a new test project in TestComplete:
-
Close any project or project suite you opened in TestComplete.
-
From the main menu, select File > New > New Project, and follow the instructions in the subsequent Create New Project wizard to create a new project.
When selecting a scripting language for your project, you can choose any language with which you are comfortable.
2. Create Image Repository and Image Set
To create image-based tests, you need images of your tested applications by which TestComplete will identify UI elements in it. You store those images in the Image Repository of your project:
-
Right-click your project in Project Explorer and then click New Item.
-
Select Image Repository in the Create Project Item dialog:
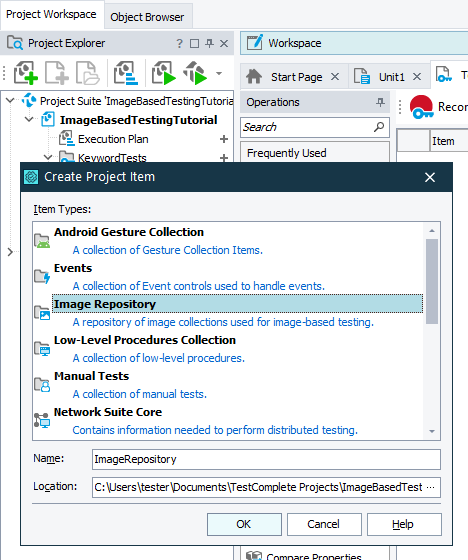
TestComplete will add the Image Repository to your project:
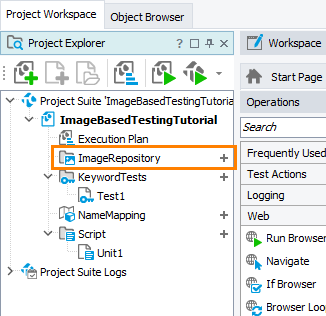
Images in the repository are grouped into image sets. Typically, each set corresponds to a tested application, or to a window or dialog in that application. Let us create an image set that will store images of our tested application:
-
Right-click Image Repository in Project Explorer and then click Add > New Item.
-
Enter a name for the new test set in the Create Project Item dialog.
You will use that name to refer to images in the image set from tests:
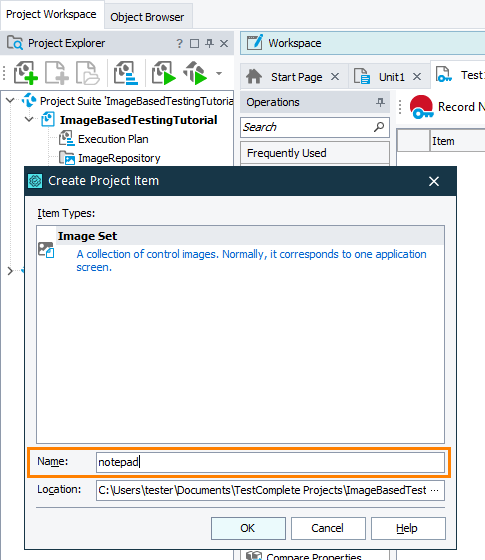
TestComplete will create an image set and open it in the Image Set editor:
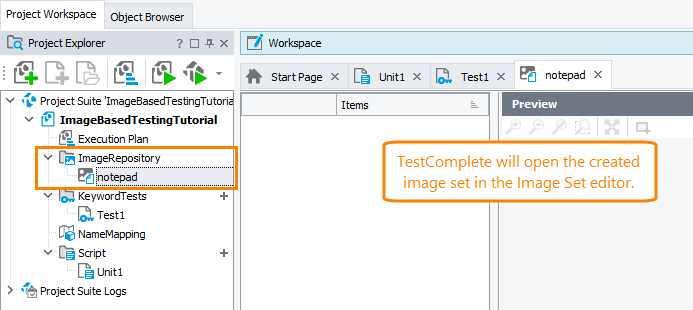
3. Capture Images
Let’s capture an image of the control on which we will simulate user actions and add it to the image set.
| Note: | Capturing images for desktop, web and mobile applications is basically the same. The only difference is that for mobile applications, you must have your mobile device connected to TestComplete. |
-
Launch your tested application. In our case, it is Notepad.
-
In TestComplete, in the created image set, right-click anywhere in the Items list and then click Add Item.
TestComplete will open the Add Image to Image Repository wizard.
-
On the Choose a Device for Image Capturing page of the wizard, click Desktop.
-
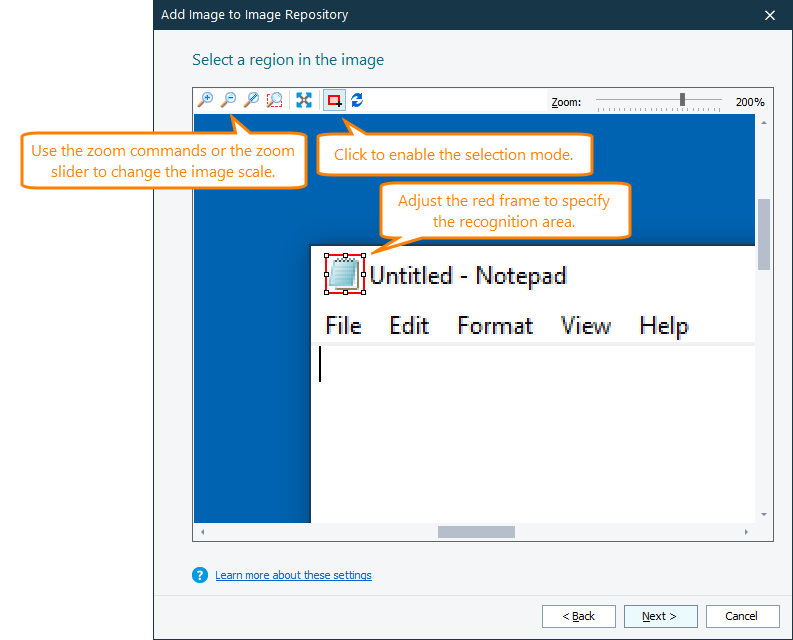
The Select a Region in the Image page will show the captured image of your entire screen.
On this page, you specify the recognition area - the area that TestComplete will search during the test run to get the needed UI element.
Adjust the red frame to specify the needed recognition area. In our case, it is the icon in the top-left corner of the window caption:
Click Next.
-
On the Specify Additional Parameters page of the wizard, enter the item name. This is the name you will use in your test to address the control from tests:
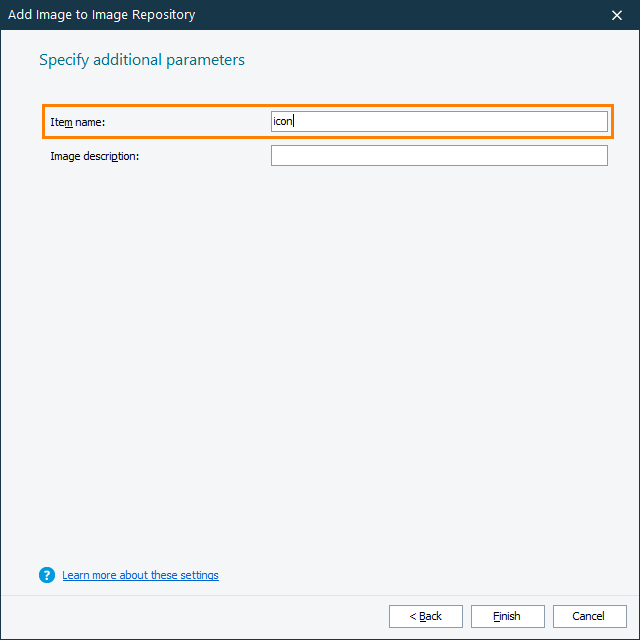
Click Finish.
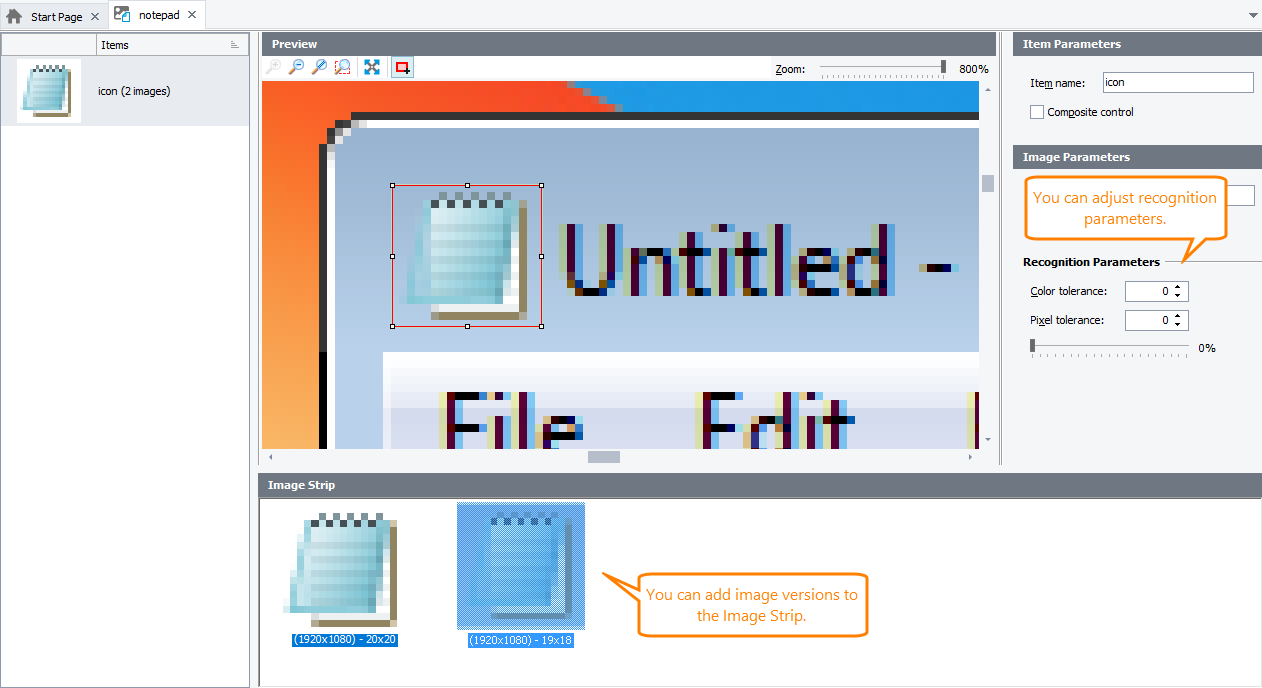
TestComplete will add the image to the Image Repository. If needed, you can adjust the recognition area in the Image Set editor:
4. Add Image-Based Test Commands
Let’s now create a test that will use the captured image to search for the icon in the Notepad window caption and then simulate a click on it.
| Note: | TestComplete can simulate various actions on controls recognized by their image. This depends on whether you search for an image on the PC desktop or on the screen of a mobile device. To learn more, see Simulating Basic User Actions in Image-Based Tests. |
In Keyword Tests
-
Add a new keyword test to the Keyword Test collection of your project.
-
In the Operations panel of the Keyword Test editor, locate the Image Based Action operation and add it to your test:
-
On the first page of the ensuing wizard, select the created image set from the Image Set drop-down list, and then select the needed image:
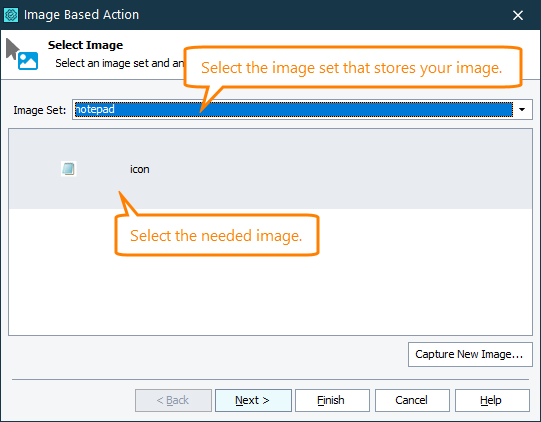
Note: If needed, you can capture images directly from this wizard. To do this, click Capture New Image. Click Next.
-
On the next page of the wizard, select the action you want to simulate on the control that corresponds to the selected image. We will simulate a mouse click:
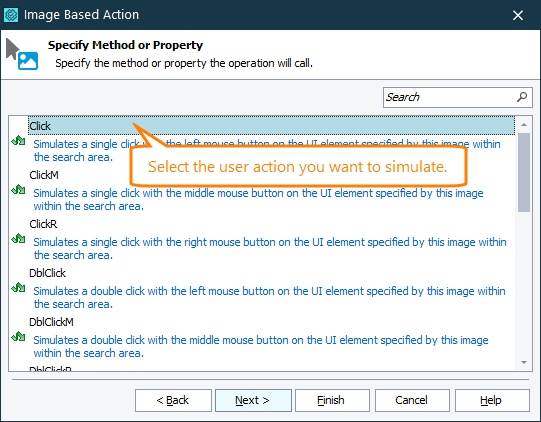
Click Next.
-
On the next page of the wizard, you can specify additional parameters of the click action to be simulated:
-
The exact coordinates of the click (relative to the image boundaries). Let’s leave the default values so that the click is simulated in the center of the control.
-
The keyboard key to be pressed during the click simulation. Let’s leave the default value so that no key is pressed.
-
The search area. By default, TestComplete searches for the specified image on the entire desktop screen (or mobile device screen). You can narrow down the search area by specifying the exact window or control within which the needed control is located. Let’s leave the default value for now.
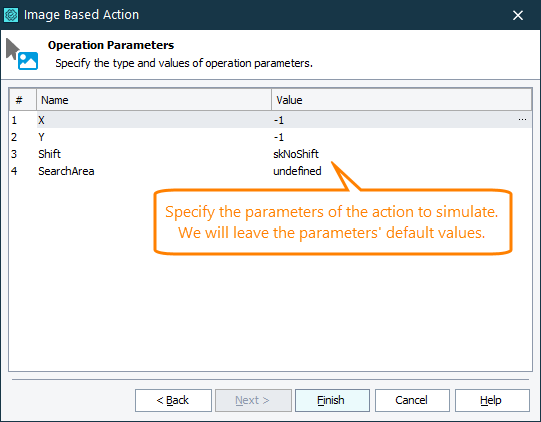
-
-
Click Finish.
The image-based Click operation will be added to your test:

In Script Tests
To simulate an image-based action in script tests, you use the methods of the following object:
ImageRepository.ImageSet_Name.Item_Name
Where ImageSet_Name is the name of the image set that stores your image, and Item_Name is the name of your image in the set.
To simulate a click on the icon in the Notepad caption, we will use the Click method:
JavaScript, JScript
{
ImageRepository.notepad.icon.Click();
}
Python
ImageRepository.notepad.icon.Click()
VBScript
ImageRepository.notepad.icon.Click
End Sub
DelphiScript
begin
ImageRepository.notepad.icon.Click;
end;
C#Script
{
ImageRepository["notepad"]["icon"]["Click"]();
}
The Click method takes the following parameters:
-
X and Y - The exact coordinates of the click (relative to the image boundaries). Let's omit the parameter so that the click is simulated in the center of the control.
-
Shift - A special key (Ctrl, Shift or Alt) to be pressed when a click is simulated. Let's omit the parameter so that no key is pressed.
-
SearchArea - The area on the PC desktop or on the screen of your mobile device where TestComplete will search for the image. You can use it to narrow down the search area. We will omit the parameter so that TestComplete uses its default value and searches for the image on the entire PC desktop.
5. Run the Test
Now let’s run the test and make sure that TestComplete can find the needed control and simulate user actions on it.
| Note: | The Notepad application must be running and activated on screen. Either run it manually, or add a command that will start the application at the beginning of your test. |
To run your keyword test, right-click it in the Project Explorer and then click  Run [Keyword_Test_Name].
To run your script test, right-click the script unit in the Project Explorer and then click  Run [Your_Script_Routine_Name].
TestComplete will run the test.
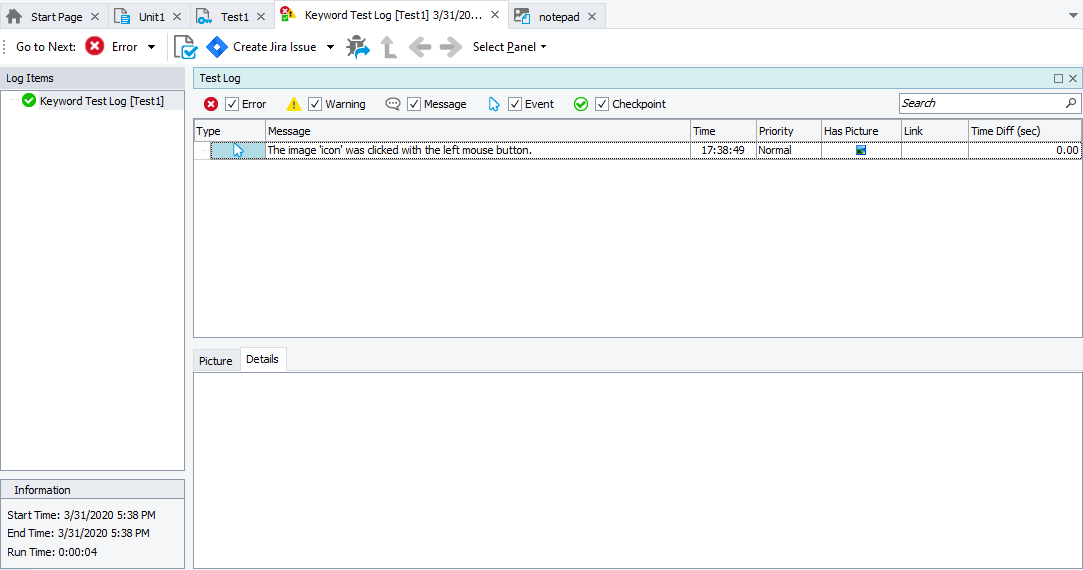
During the test run, TestComplete will capture the image of your desktop and will search for the specified image in it. As soon as it finds it, it will simulate a click at the coordinates where the found image is located.
You can see whether the action was simulated successfully in the test log:
If TestComplete fails to find the needed image, it will report an error to the test log. There are several reasons why this can happen. To learn more, see the Handling the 'Unable to Recognize the Image on the Current Desktop' Error description.
The most common reason is that the object is not on screen. Make sure Notepad is running and the Notepad window is activated and is visible on screen.
Another possible reason is that the needed UI element has a different appearance on screen. This can happen if, for example, the screen resolution or color scheme has changed. You can add all possible variations of the UI element appearance to the Image Strip collection of the image, or you can adjust the color tolerance and pixel tolerance to diminish slight differences in the control appearance:

 About This Tutorial