
All projects involved in distributed testing, both master and slave, must have the NetworkSuite project item added to them. This project item allows you to manage projects residing on the remote computers and makes distributed testing possible.
Let's add the NetworkSuite project item to the slave projects.
-
Open the Project1.mds project file in TestComplete.
-
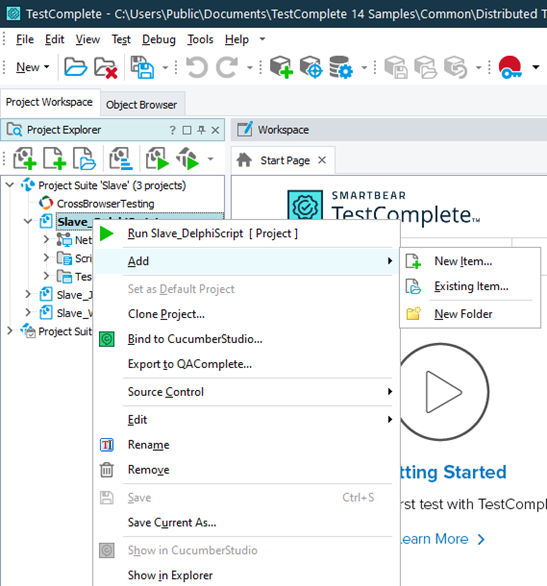
Switch to the Project Explorer.
-
Right-click the project node and select Add | New item from the context menu.
-
The Create Project Item dialog is invoked.
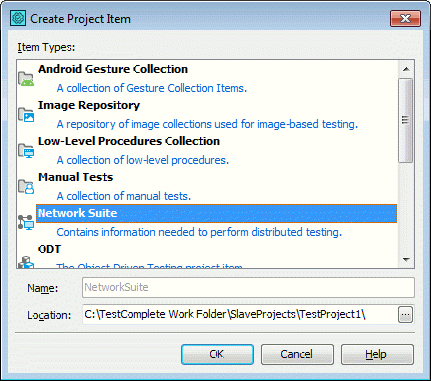
Select NetworkSuite item in the dialog and click OK.
-
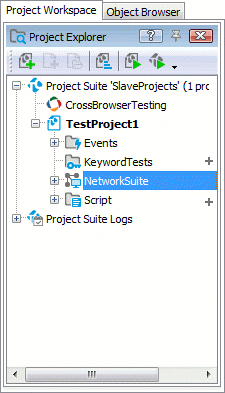
The NetworkSuite item is added to the project.
Perform the same actions over the other Project2, Project3 and Project4 slave projects.
The slave projects must reside on the slave hosts on which they are going to be run before distributed testing starts.
You can configure your master project to copy your slave projects to the target hosts automatically or you can copy them manually from the TestComplete IDE or by using a file manager. For more information on this, see Copying Slave Projects to Remote Computers.
-
Copy Project1.mds and Project2.mds files to the C:\Projects folder on the CompB host.
-
Copy the Project3.mds file to the C:\My Documents\Project3 folder and Project4.mds file to the C:\TestComplete\Projects folder on the CompC host.
 Prev
Prev
See Also
Distributed Testing
Projects Participating in Distributed Testing