
Expand the added NetworkSuite project item of the master project in the Project Explorer. By default it contains three collections: the Hosts, the Jobs and the SynchPoint collections.
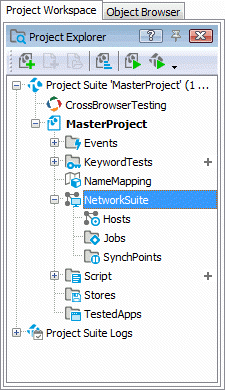
The Hosts collection stores the hosts on which the managing slave projects are executed. Add CompB and CompC to the Hosts collection.
To add a remote computer to the Hosts collection, do the following:
-
Right-click the Hosts item of the NetworkSuite project item in the Project Explorer and select Add | New item from the context menu.
-
The Create Project Item dialog in invoked. It allows you to add a new host to the collection.
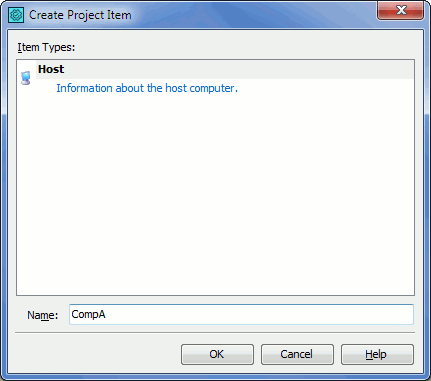
Specify the host name in the Name edit box of the dialog and click OK.
-
The new host is added to the Hosts collection.
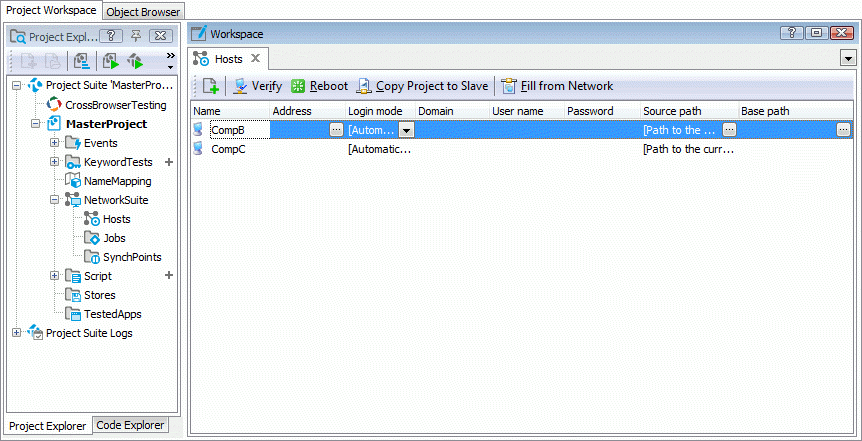
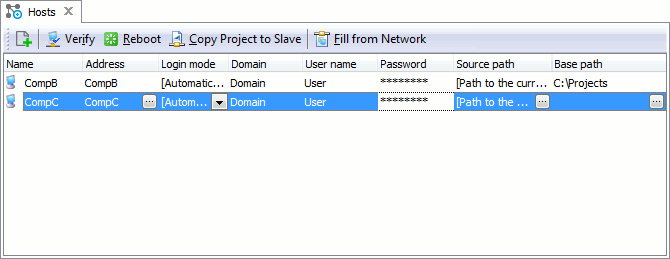
After the host is added, specify its properties:
-
Double-click the Hosts item of the NetworkSuite project item. TestComplete shows the Hosts editor in the Workspace panel.
-
In the Hosts editor click the ellipsis button of the Address column. Select the required computer (CompA or CompB) in the ensuing dialog.
-
Specify the user account information in the Domain, User Name and Password columns. This account information is required for opening user sessions on the slave hosts. If the account information is not specified, the user sessions on the slave hosts cannot be opened and the distributed test fails.
-
For the CompB host specify the C:\Project string in the Base path column. This base path is used for specifying the tasks running on the CompB.
-
After all properties are specified, save the changes.
 Prev
Prev