Prerequisites
 |
Use self-hosted (private) agents to run TestComplete tests. Running TestComplete tests on Microsoft-hosted agents is not supported. |
-
Your TestComplete projects must be prepared as described in Prepare TestComplete Project for Integration and added to your team project’s source control repository.
-
Your test agents on which you will run tests must have TestComplete (or TestExecute) installed.
-
Your team project must have the TestComplete test adapter extension installed. See Install TestComplete Test Adapter Extension.
1. Create a build
To run TestComplete tests during release deployment, you need to put your TestComplete test files into the folder where your release pipeline can access them. The easiest way to do it is to place them into a build output folder along with other artifacts:
-
Open the web portal of your team project. You can navigate to it directly in your web browser, or you can open it from Team Explorer in Visual Studio.
-
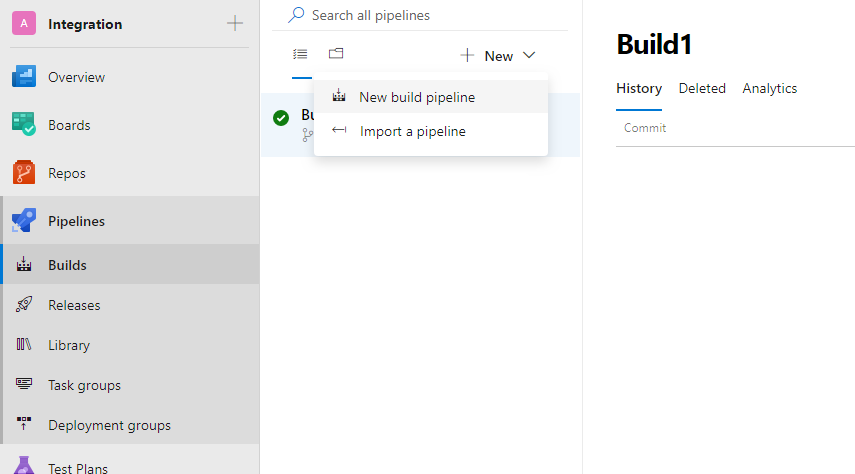
Navigate to the Pipelines > Builds page of your team project.
-
Open an existing build definition or click New to create a new build definition.
You can create a YAML script that describes your pipeline, or you can click Use the visual designer to create a pipeline via a wizard. This topic describes how to configure a build pipeline using the visual designer.
-
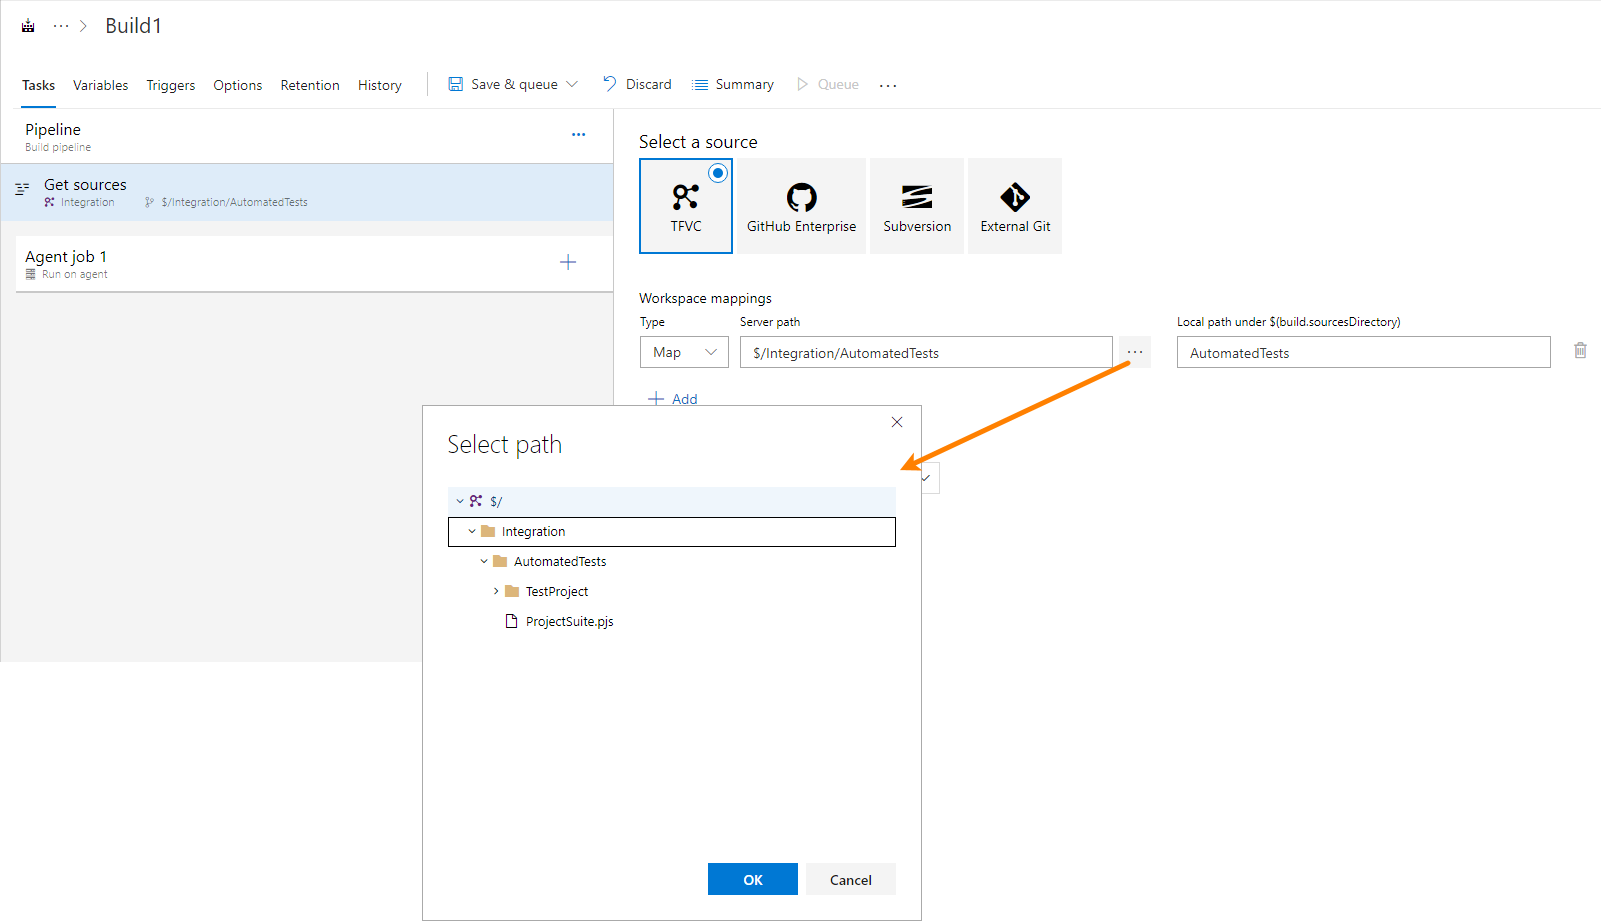
Configure your build pipeline to get your TestComplete project files from your team repository.
For example, if you are using Team Foundation Version Control, click the ellipsis button of the Server path edit box and locate the repository directory that stores your TestComplete project suite. Then, in the Local path under $(build.sourcesDirectory) text box, specify the local folder on your test agents to which your TestComplete project suite will be placed:
-
Add an agent job to the pipeline. Specify agents on which your tests will run. Make sure that the agents meet all the requirements.
If needed, configure the job to distribute the tests among multiple agents. To learn how to do it, see Run tests in parallel using the Visual Studio Test task. Note: Your tests must be able to run independently from each other.
-
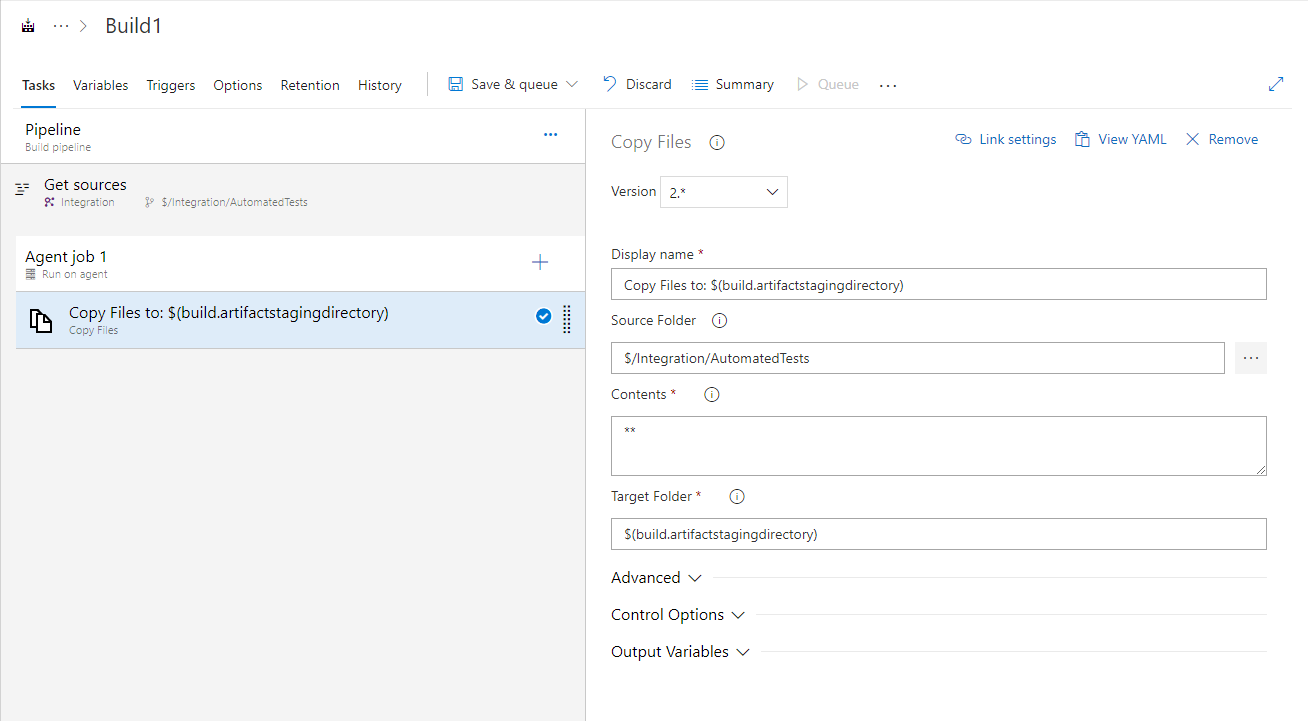
Add a task that will copy your TestComplete project files to an artifact staging folder on your build computer:
-
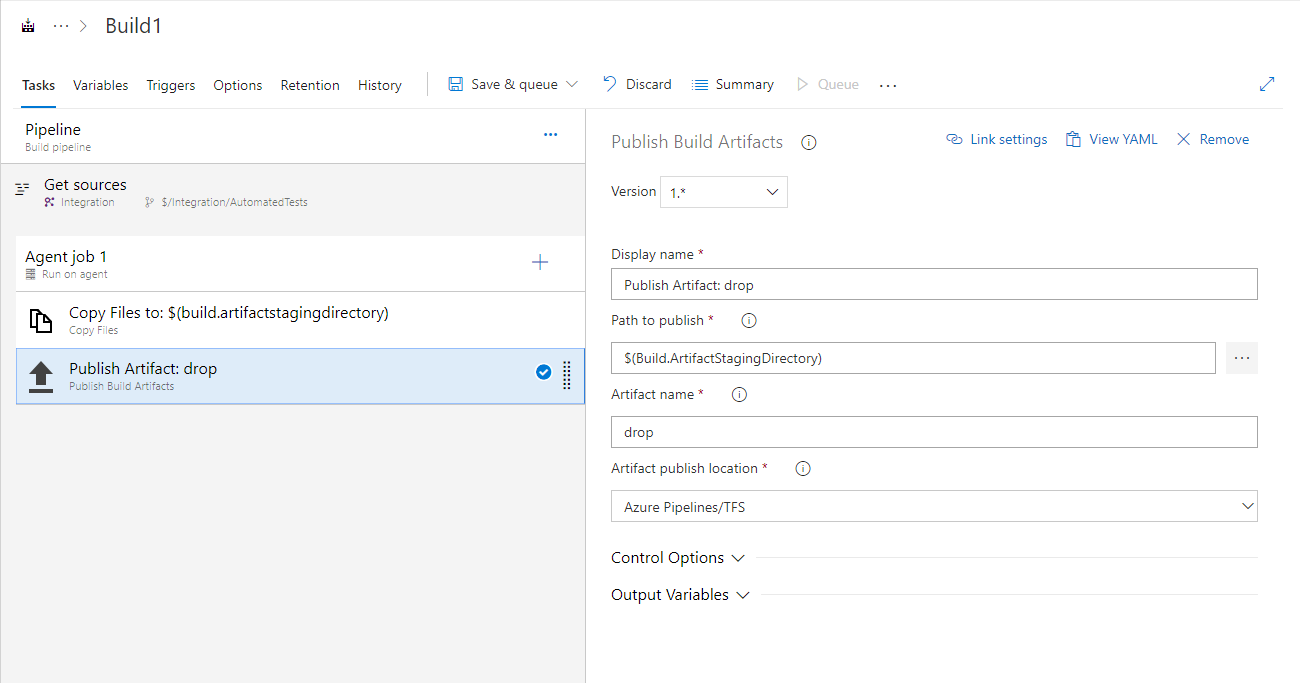
Add a task that will publish your build artifacts to the needed location:
-
If needed, add other tasks to the build. You can learn more at docs.microsoft.com/en-us/azure/devops/pipelines/index.
-
Save the changes.
2. Create a Build Instance
Run the created build definition to create a build that you will release:
-
On the Builds page, click Queue.
-
In the Queue Build dialog, configure the build run and click OK.
3. Configure a Release Definition
-
Navigate to the Pipelines > Releases page of your team project.
-
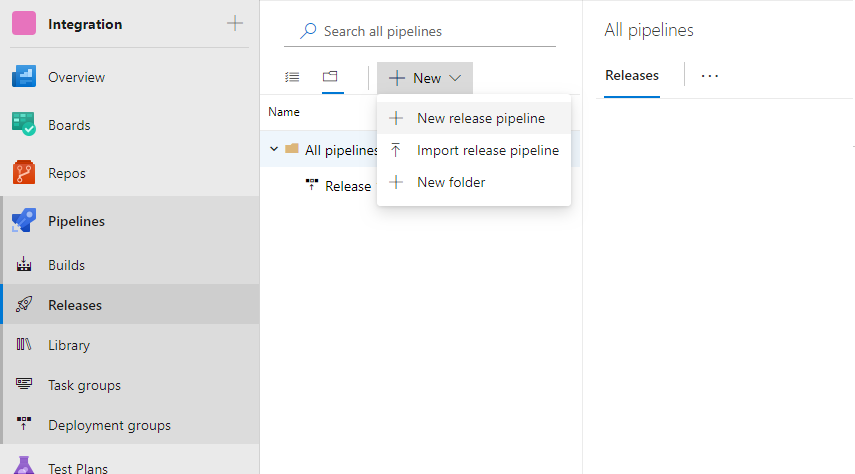
Select an existing release pipeline and open it for editing or create a new pipeline:
-
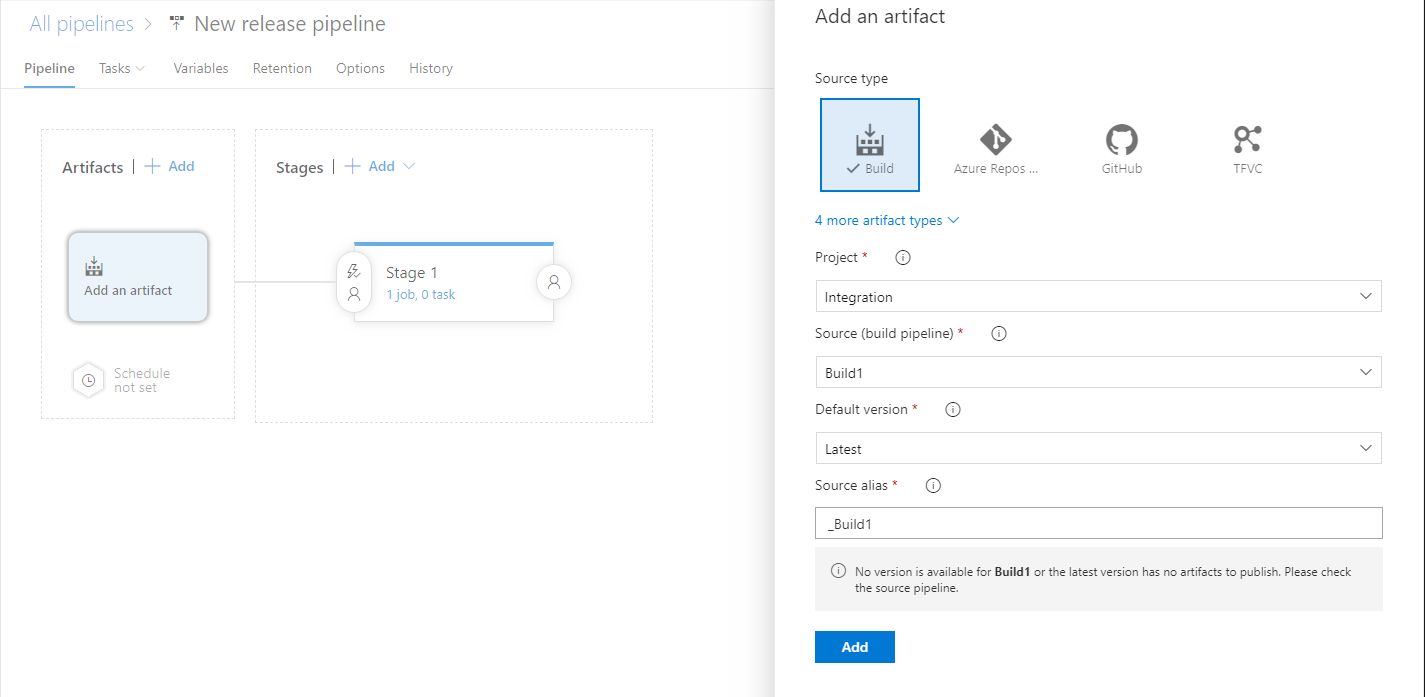
Add an artifact that includes your TestComplete project files to the release:
-
If needed, add an artifact that includes your tested application and other files required for testing. Make sure that your TestComplete tests will be able to access them (see Prepare TestComplete Project for Integration).
-
Select a stage that will run your TestComplete tests or create a new stage.
-
Specify agents on which your tests will run. Make sure that the agents meet all the requirements.
-
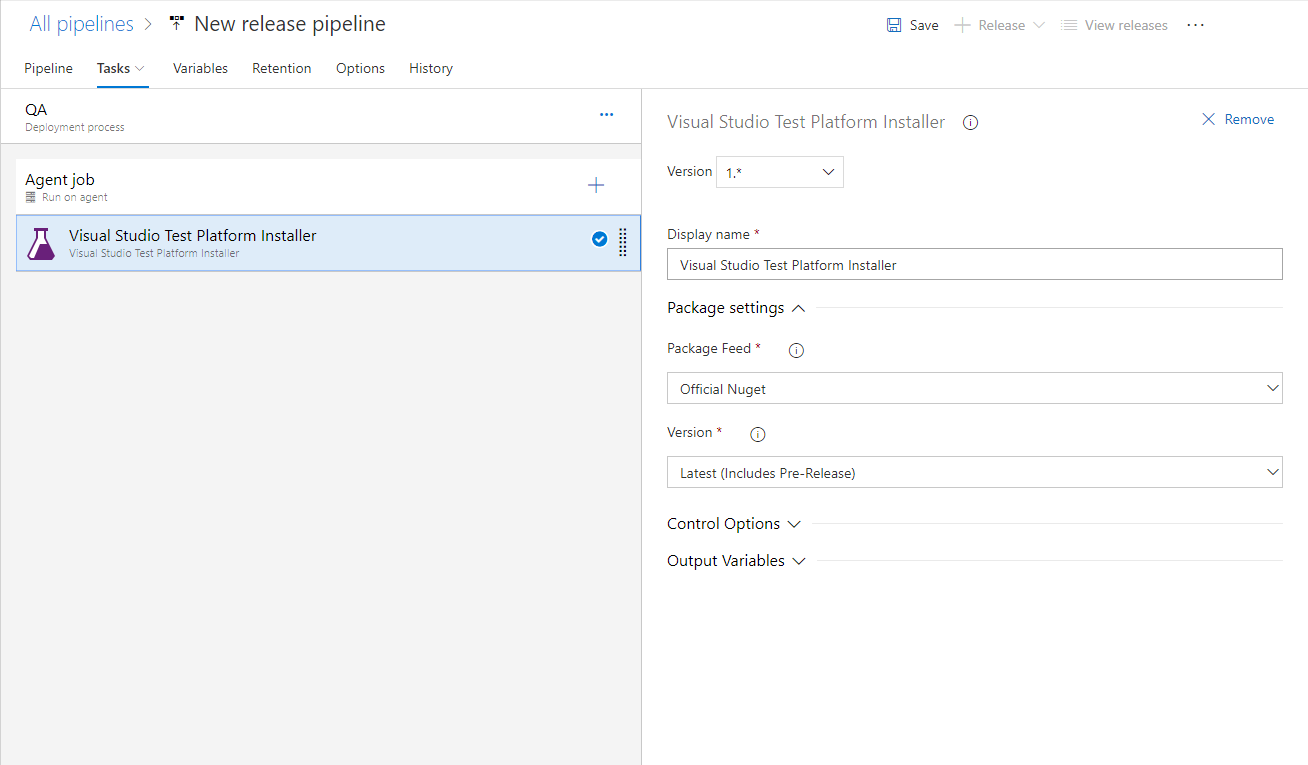
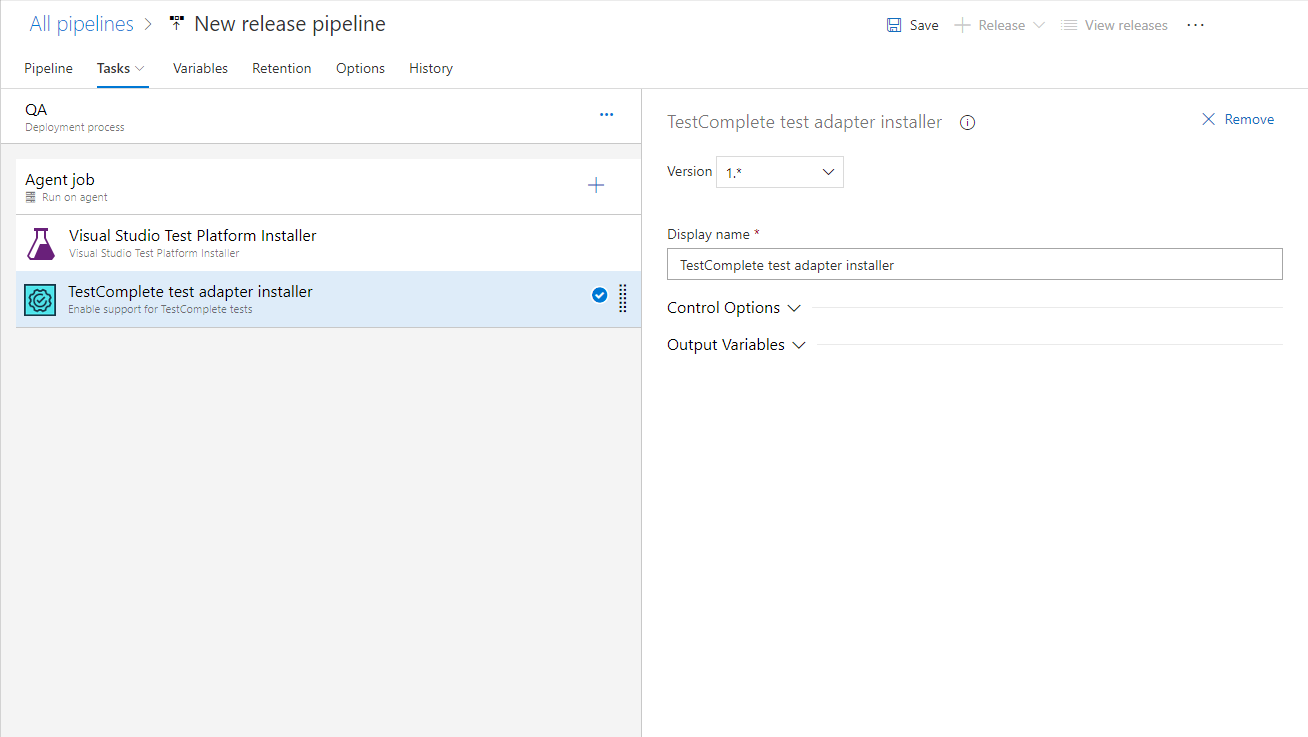
If your test agents do not have Visual Studio installed, you can add the Install Visual Studio Test Platform task to the stage. The task will install a test platform that allows running tests on computers where Visual Studio is not installed. To learn about the task, see the task description:
-
 Add the Enable support for TestComplete tests task. This task installs the TestComplete test adapter to your agent and enables the TestComplete test support:
The task is available only if you have the TestComplete Test Adapter extension installed on your server. To learn how to install it, see Install TestComplete Test Adapter Extension.
-
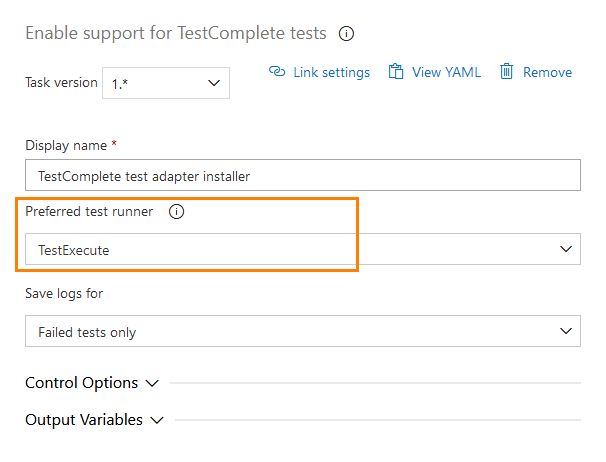
If needed, select an application that you want to use to run tests:
-
To run ordinary desktop and web tests sequentially, select TestComplete or TestExecute.
-
To run cross-platform web tests in parallel, select TestExecute Lite (Device Cloud Parallel). If needed, set the maximum number of tests that can run in parallel.To learn more about running tests in parallel, see About Running Tests in Parallel.
Note: If the selected application is not installed on the agent, the one that is installed will be used instead.
-
-
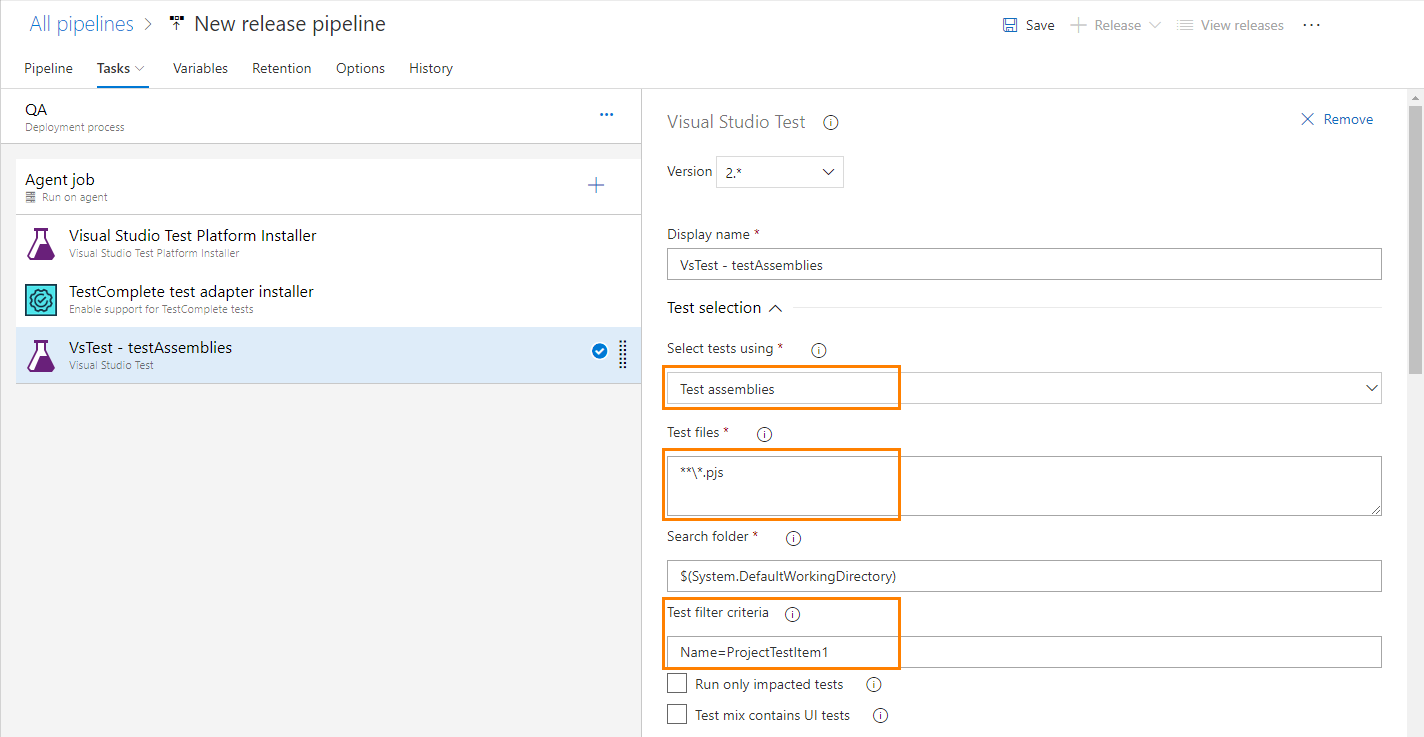
Add the Visual Studio Test task to the stage and configure the task to run your TestComplete tests:
By specifying a TestComplete project suite directly
In the Select tests using drop-down list box, select Test assemblies.
In the Test files text box, specify your TestComplete project suite (a .pjs file) to run.
In the Search folder text box, specify the folder on your agent where the task should search for the specified TestComplete project suite.
Note: If you specify any Search folder other than the default working folder, in the Path to custom test adapters text box, specify the path to the TestComplete test adapter: $(System.DefaultWorkingDirectory)\TestCompleteAdapter.
In the Test filter criteria text box, you can enter a filter expression that will specify one or several test items of your TestComplete project that you want to run.
In the Test run title text box, you can enter the name of the test run to which TestComplete test results will be assigned.
In the Test platform version drop-down list, select the version of your Visual Studio Test Platform.
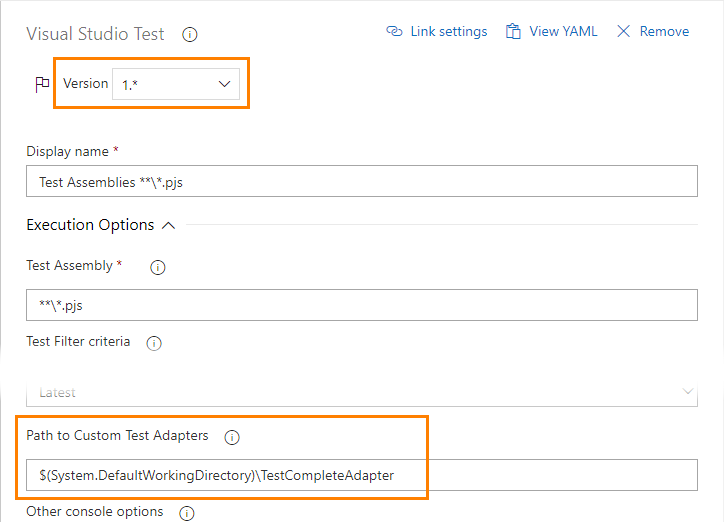
If you are using version 1 of the Visual Studio Test task or if you have set the Search folder value to any value other than the default working folder, in the Path to Custom Test Adapters text box, specify the path to TestComplete test adapter: $(System.DefaultWorkingDirectory)\TestCompleteAdapter:
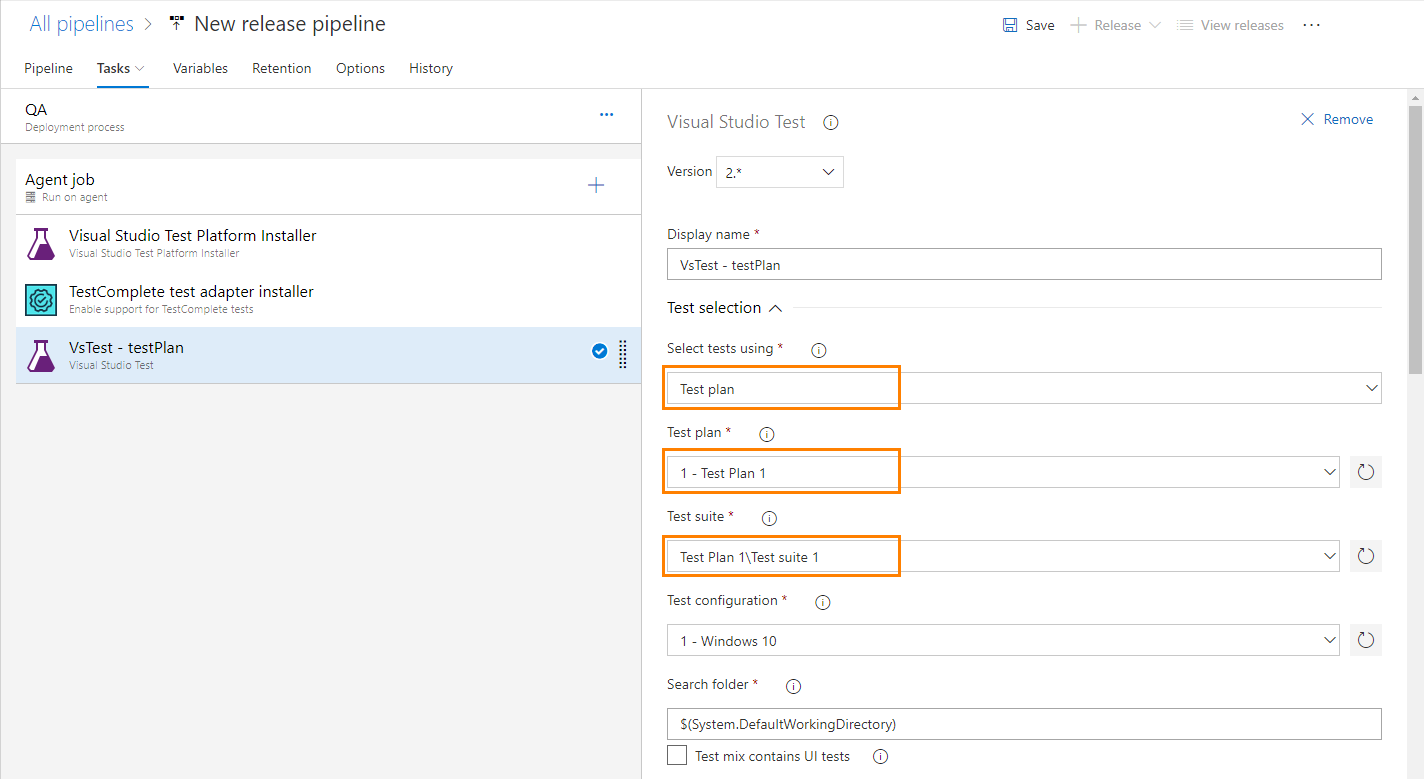
By specifying a test plan
 To run TestComplete tests as part of a test plan, your TestComplete project must be bound to your Azure DevOps team project, and your TestComplete test cases must be linked to the team project’s test cases. See Link TestComplete Test Cases to Azure DevOps Test Cases.
In the Select tests using drop-down list, select Test plan.
In the Test plan drop-down list, select the test plan to which the tests you want to run belong.
In the Test suite drop-down list, select the test suites that include the needed tests.
In the Test configuration drop-down list, select the test environment where your tests will run.
In the Search folder text box, specify the folder on your agent where the task should search for the tests.
Note: If you specify any Search folder other than the default working folder, in the Path to custom test adapters text box, specify the path to the TestComplete test adapter: $(System.DefaultWorkingDirectory)\TestCompleteAdapter.
If needed, in the Test run title text box, you can enter the name of the test run to which TestComplete test results will be assigned.
-
Save the changes.
4. Deploy a Release
After you have configured a release pipeline, you can deploy the release. Your TestComplete tests will be run during the release deployment.
-
On the Pipelines > Releases page of your team project, click Create a release.
-
In the resulting dialog, select the build that you want to deploy. Click Create to create a release.
-
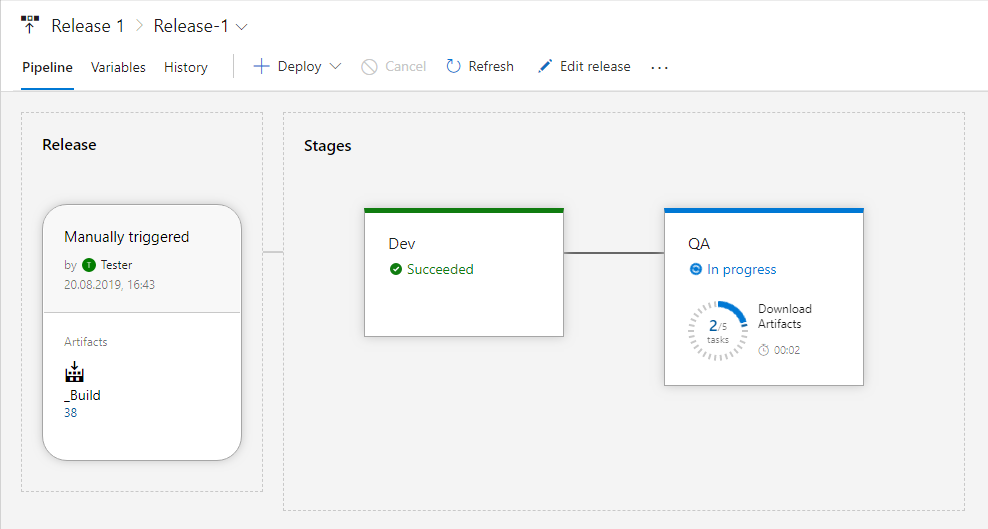
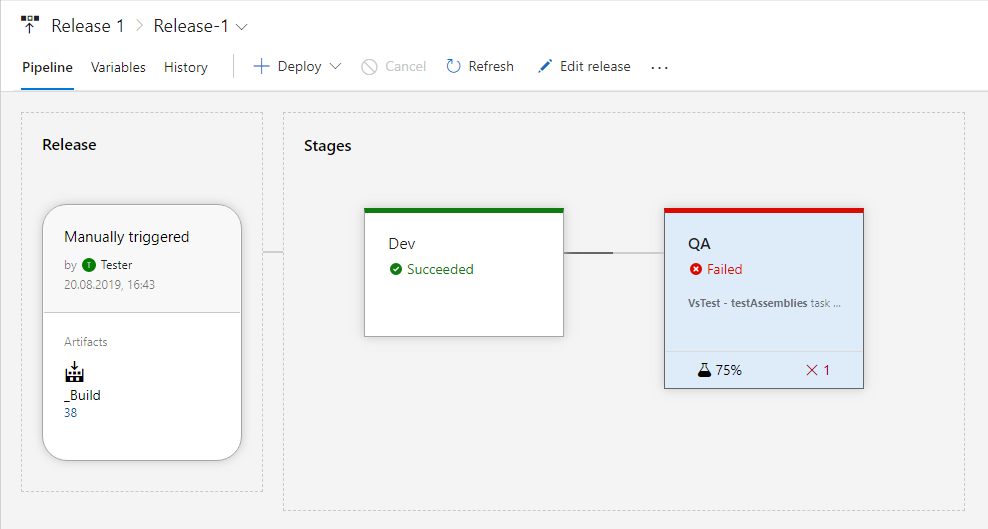
On the Releases page, view the release status. You can click the release to view detailed information on the deployment status of each of its stages:
5. View Test Results
-
After a release is deployed, you can view its results:
-
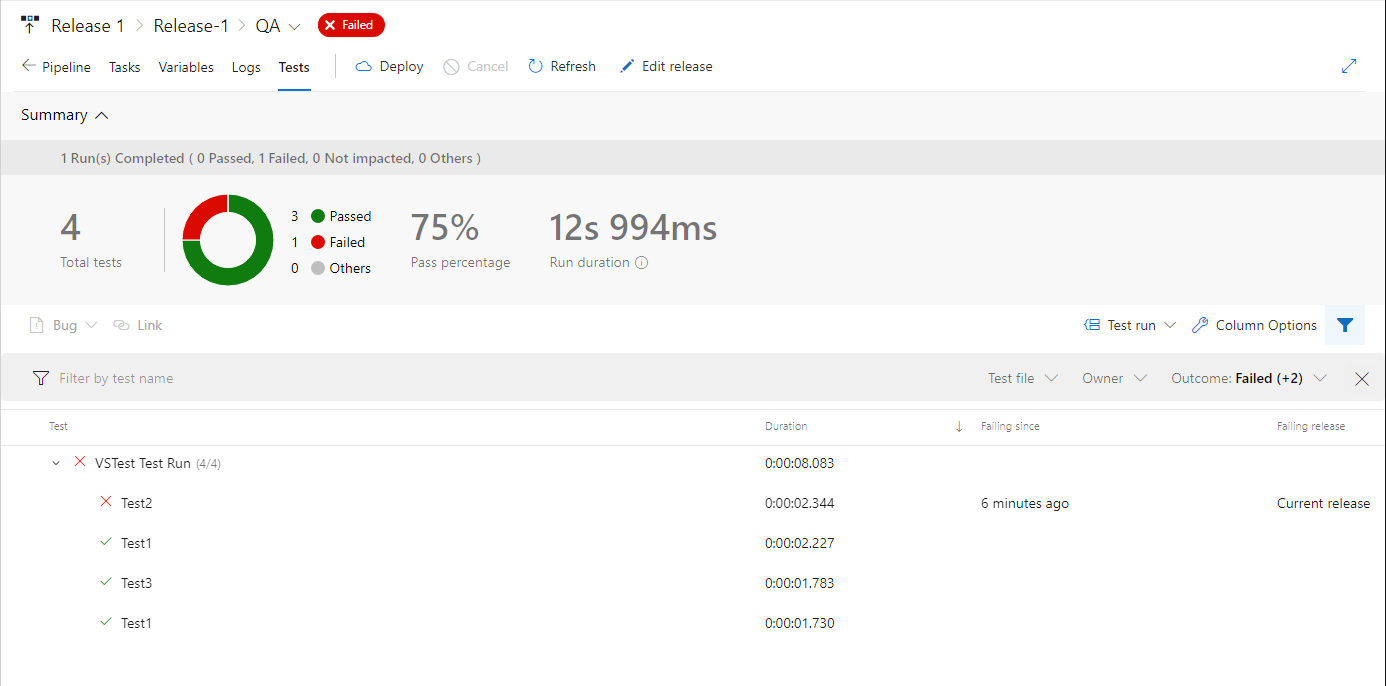
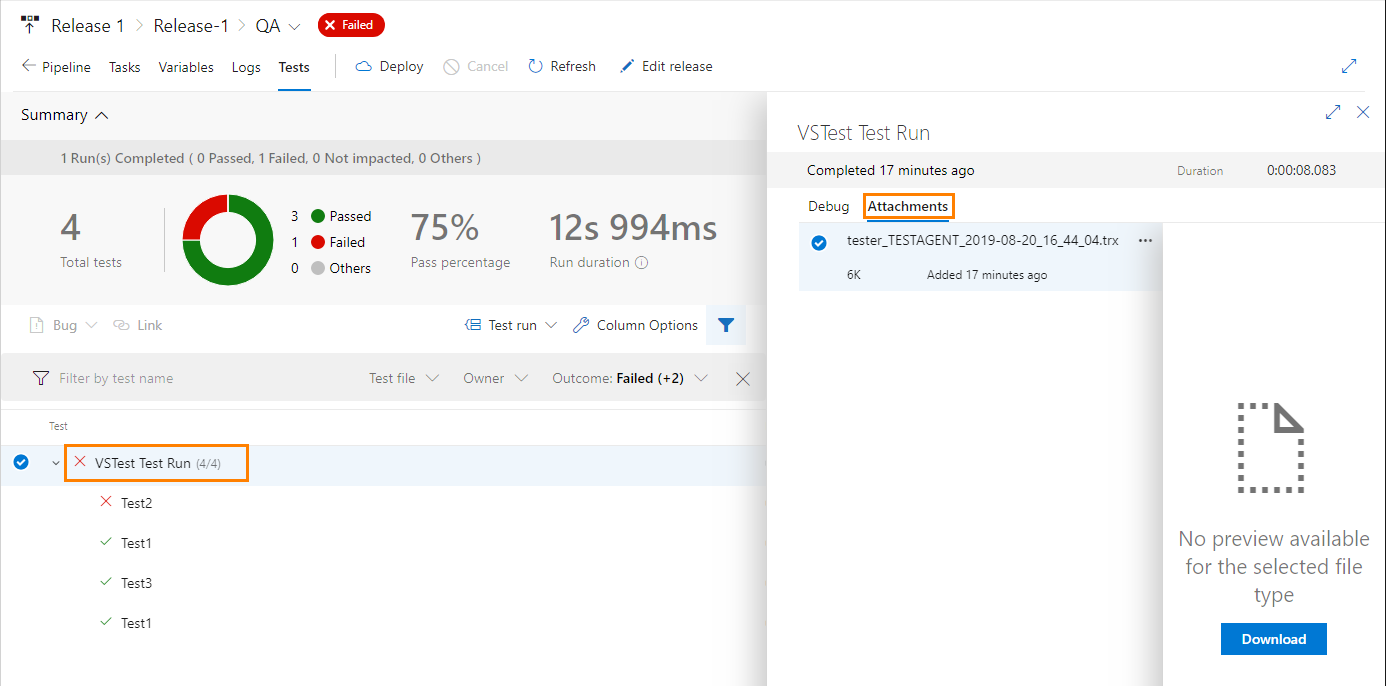
To view test results, click the needed stage, and then switch to the Tests section:
It shows the summary report on the test run: the number of failed and passed tests and the status of each of them.
-
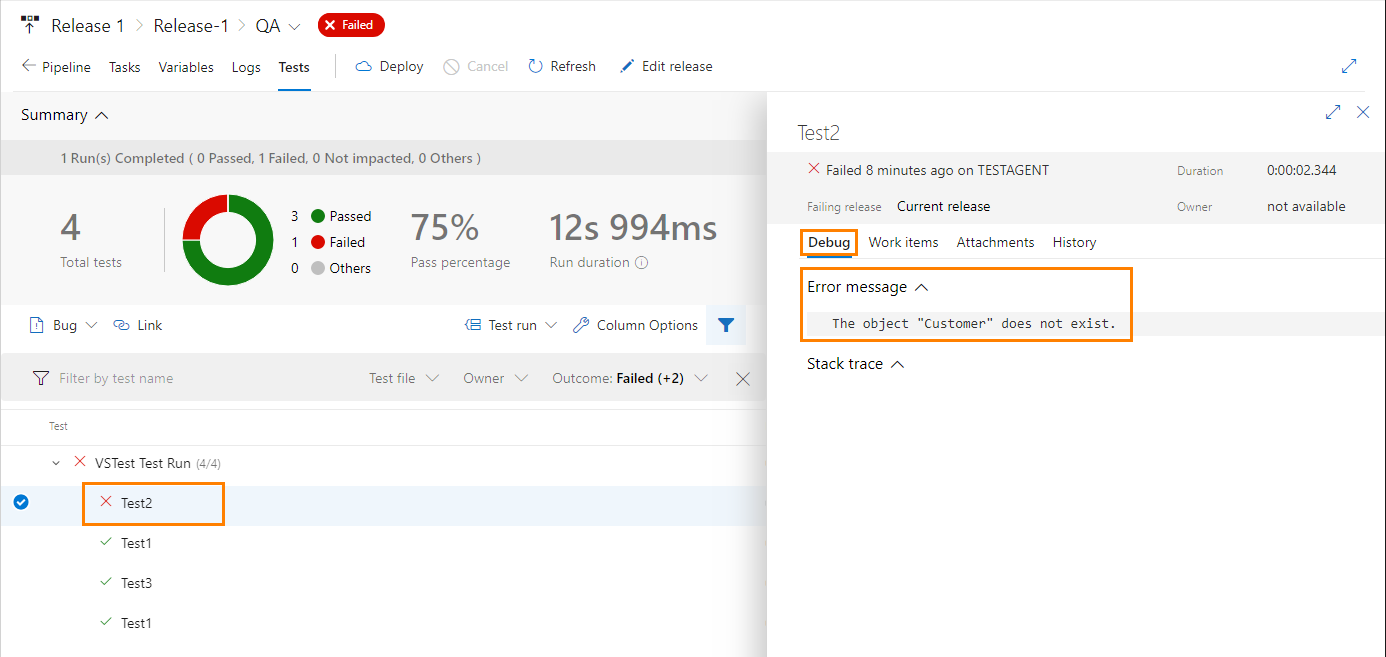
If a test has failed, you can view information on the occurred error in the Debug section:
-
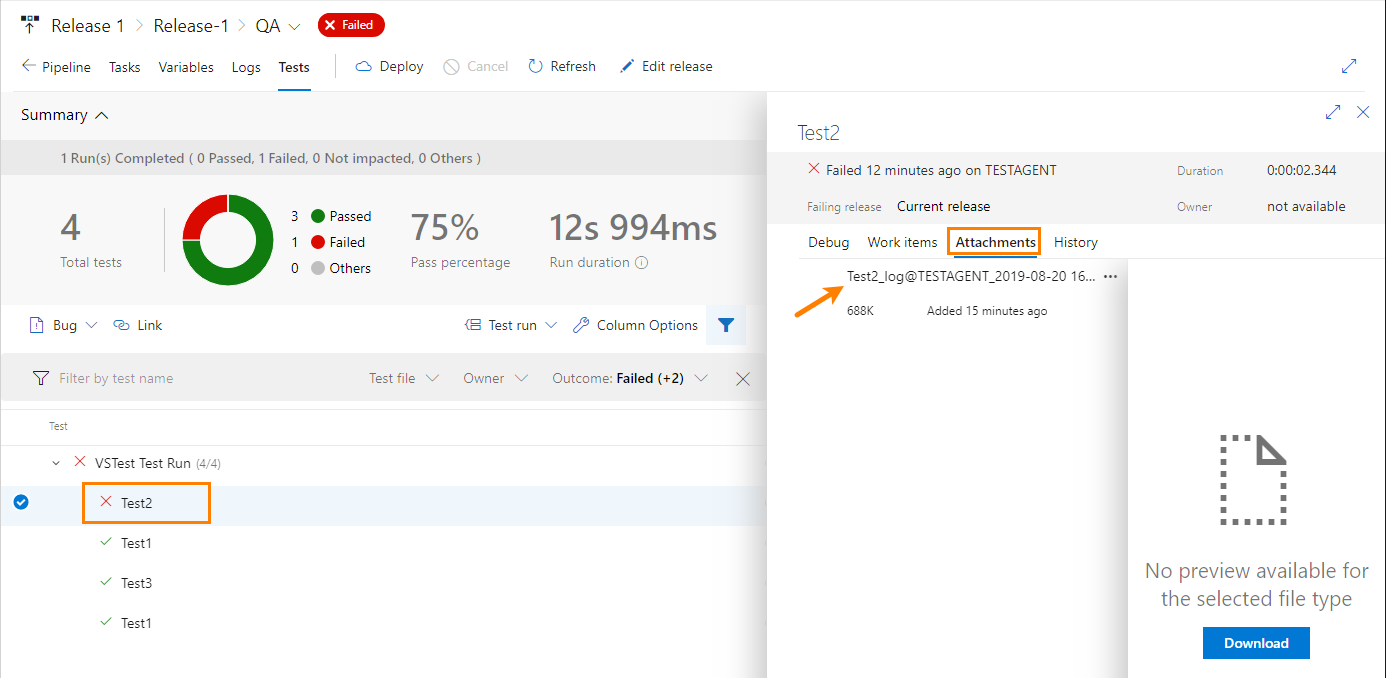
To get the test log, download the log in the .mht format from the Attachments section:
Depending on the Save logs for setting value, logs could be available only for failed tests, for failed tests and for tests with warnings, or for all tests.
-
To get the log generated for the entire test run, click the test run, then switch to the Attachments section and download the .trx file:
See Also
Integration With Azure DevOps and Team Foundation Server via TestComplete Test Adapter
Install TestComplete Test Adapter Extension


 By specifying a TestComplete project suite directly
 Filter syntax