About
Name mapping templates help you map windows and controls faster.
When mapping windows and controls, TestComplete selects identification properties for them automatically. It detects object types and uses properties that will identify these objects in the best way.
It’s possible, however, that this choice is not ideal. In this case, you can specify recognition properties manually. This might be a tedious task, especially, if your application has lots of such controls. And, this is where name mapping templates come into play and help you automate and streamline the mapping.
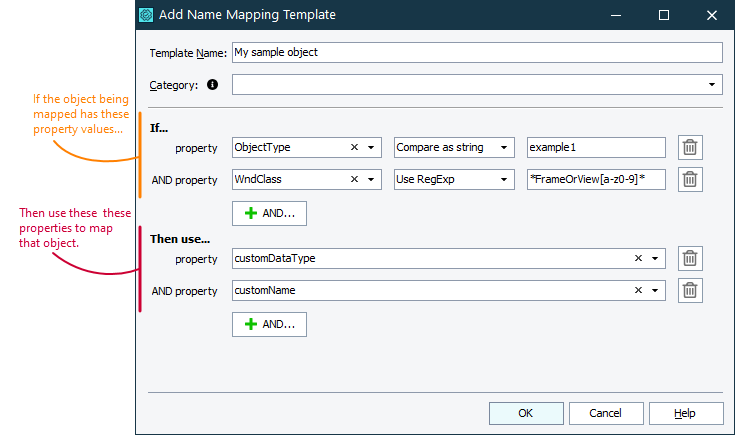
A template is a custom mapping rule. It has two sets of properties that work in the following way:
To specify values of the If… group, you can use either strings or regular expressions.
Note: Name Mapping templates cannot use XPath expressions or CSS selectors. In addition, you cannot create Name Mapping templates for web objects while mapping web objects by using XPath expressions and CSS selectors is enabled.
How TestComplete uses templates
TestComplete uses templates automatically during name mapping. If it finds some template that matches the object that is being mapped, then it maps this object using the template’s settings rather than the settings it would use by default. If an object matches two or more templates, TestComplete will use the first found template.
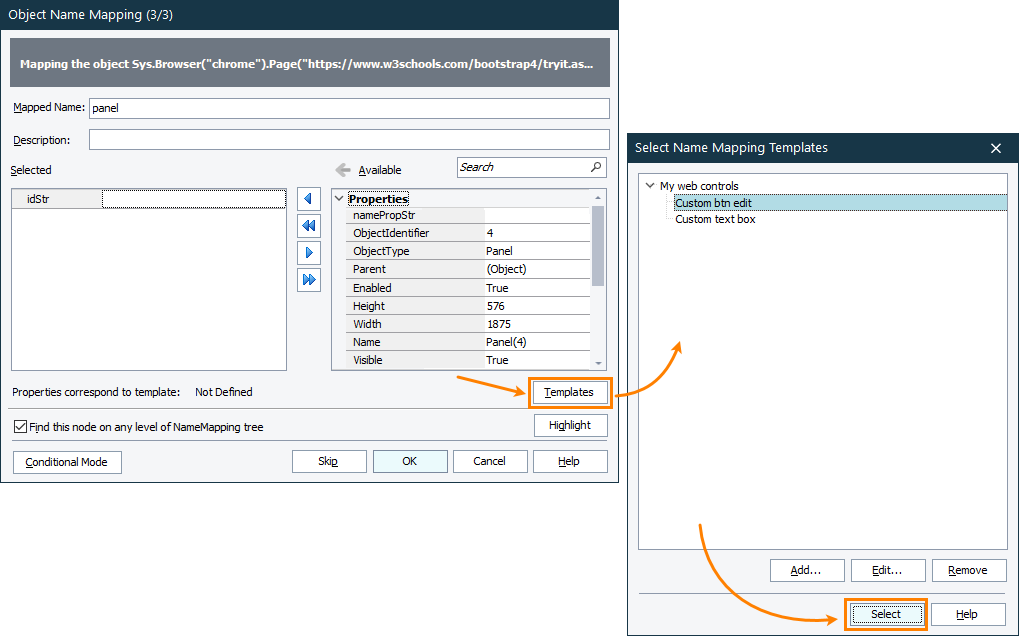
If you are mapping windows and controls manually, you can select the needed template in the mapping dialog box:
Name mapping templates work for all the projects that you open in your TestComplete instance, they are not project-specific.
View, create, edit, and delete templates
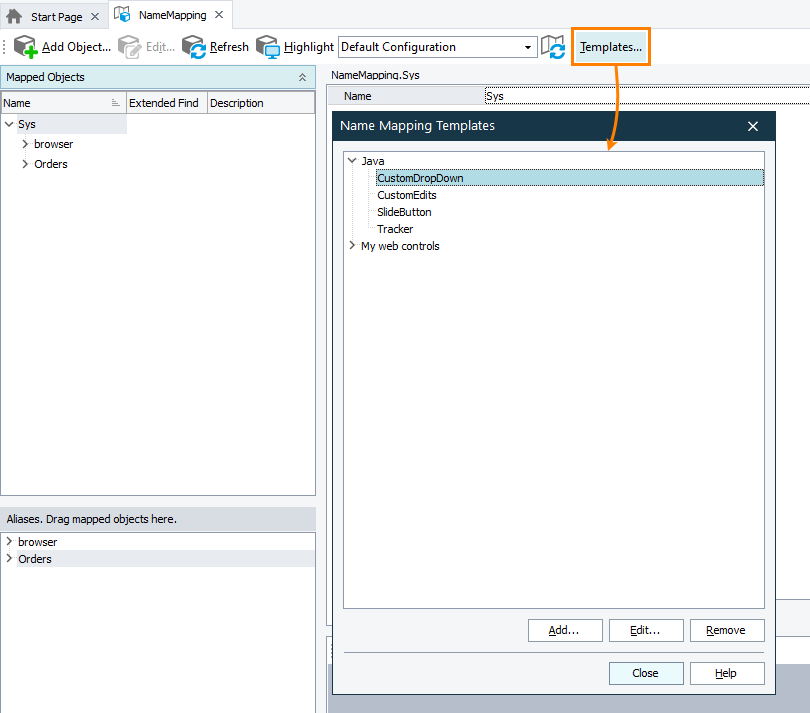
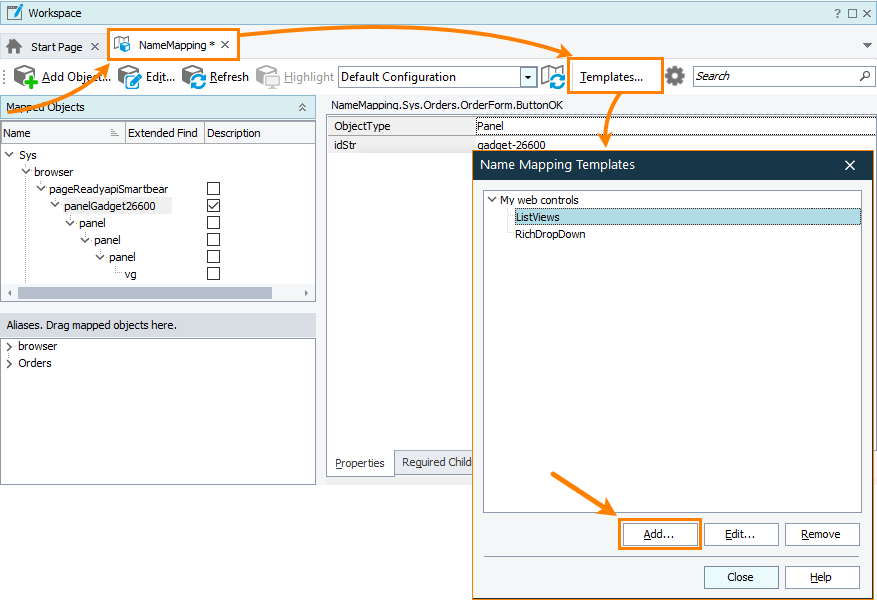
You create, edit, and delete templates in the Name Mapping Templates dialog. To open it, click Templates on the toolbar of the Name Mapping editor. See the image above.
Create templates
By default, TestComplete projects don’t have predefined name mapping templates. You can create them manually –
- in the Name Mapping editor, or
- from the mapping dialogs.
 Warning: Do not create templates for the
 Sys and Mobile objects.
In Name Mapping editor
-
Start your tested application or open the tested web page and make sure the needed window or control is open.
Mobile testing: The device and application must be prepared for testing. -
In TestComplete, open the Name Mapping editor and click Templates on the toolbar. Then, click Add:
-
Select the desired window or control in the subsequent dialog box:
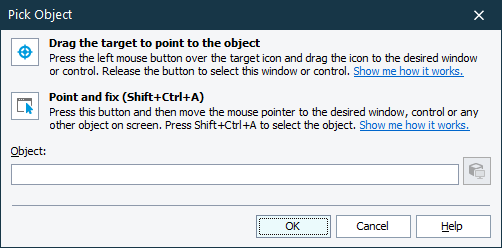
The Object box displays the mapping name of the control you selected. To check if you selected the correct control, click Highlight. You will see a flashing red frame around the control on screen.
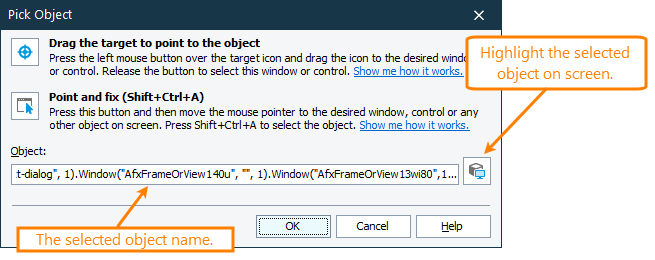
Click OK to proceed.
-
In the subsequent dialog, specify the template properties:
-
Enter the template name.
-
(Optionally) Enter the template category or select it from the drop-down list. Categories help you group, find, and manage templates easier. See below.
-
Specify properties and values in the If section. TestComplete will use the template if the window or control being mapped has these properties, and the property values match the values set in the dialog.
Notes:
-
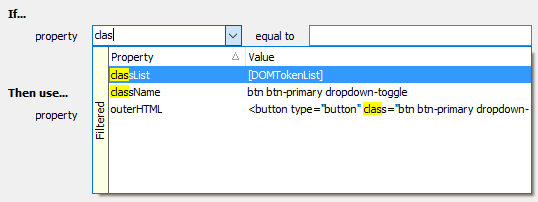
To find a property quickly, start typing its name or value:
-
You can configure the template to check either if the property equals to a value strictly (select Compare as string) or if the property matches a regular expression (select Use RegExp).
-
-
Specify properties in the Then section. TestComplete will use these property values to map a window or control.
-
-
Click OK to save the changes and to create the template.
When mapping objects manually
-
Start mapping an object in some way. For example, you can do this by clicking
 Add Object on the toolbar at the top of the TestComplete window.
 -
Select the desired window or control on the screen:
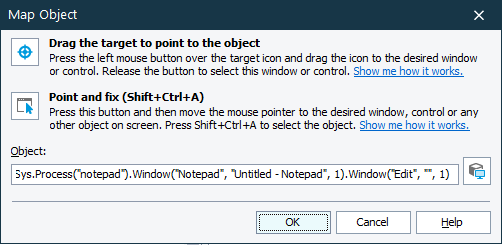
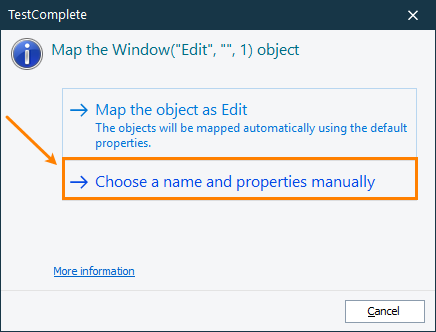
TestComplete will ask if you would like to map the object automatically or manually. Select manual mapping:
-
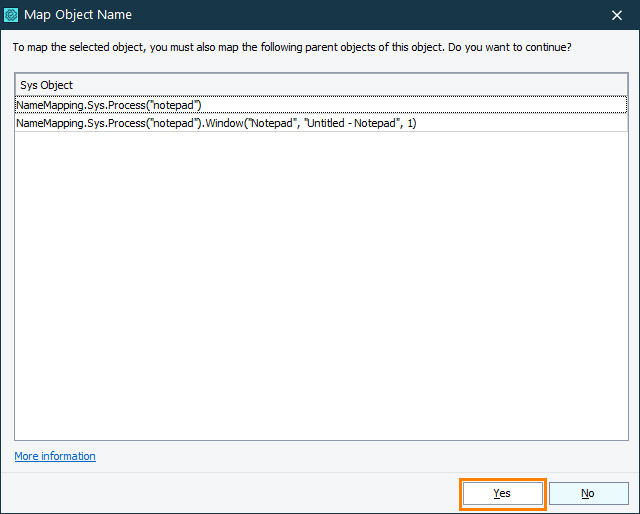
TestComplete will ask you to map parent objects of the selected object. Click Yes:
-
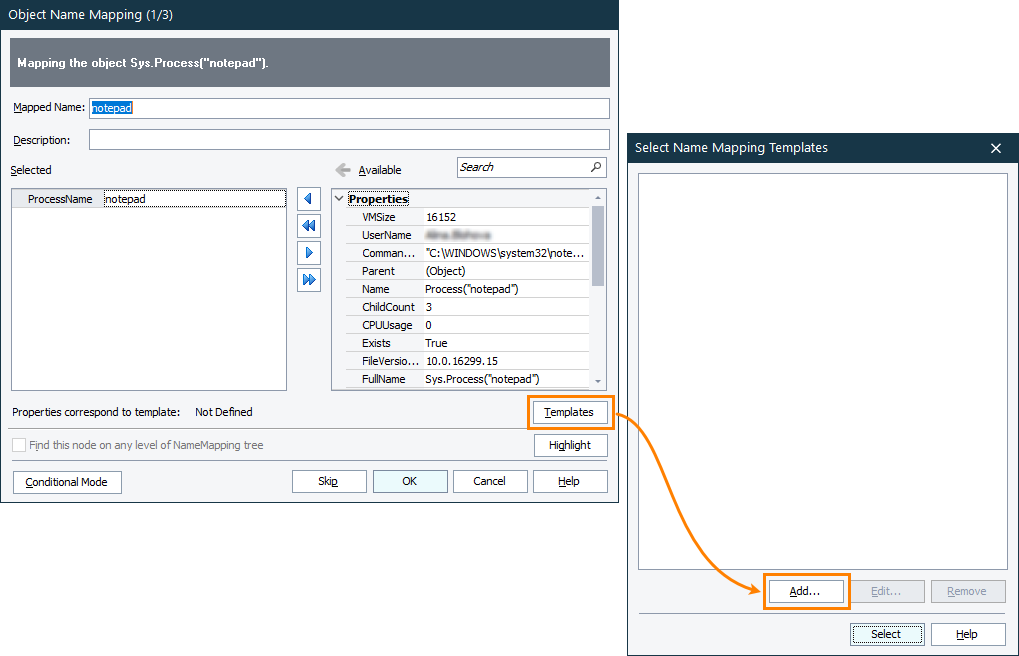
TestComplete will then show the Object Name Mapping dialog for each object to be mapped. Click Templates in this dialog to view the list of available templates:
This list can be empty as in the image above if your project has no templates that match the object currently being mapped.
To create a new template using properties of this object, click Add and use the subsequent dialog.
Use regular expressions in properties
To set more flexible conditions in your template, use regular expressions to specify property values in the If section. To do this, select Use RegExp from the drop-down list and enter the needed regular expression:

Categories
You can organize related templates into categories to view and manage them easier. Imagine that your tested app uses some library of controls for which you would like to create templates. In this case, you can create templates for control types (list boxes, list views, and so on), and then group these templates for easier management and selection. You can then find the templates faster:

To create a category, simply type the desired name into the Category box when you are creating a template or editing its properties:

To add a template to a category, select the category name when you are editing a template:

TestComplete automatically deletes categories that have no templates in them.
Save and load templates
Name mapping templates are not project-specific. They work for all the projects that you open in TestComplete on your computer.
You can save and load template settings from a file along with other TestComplete settings. See Exporting and Importing Custom User Settings for details.
See Also
Name Mapping
Name Mapping
Adding Objects to the Name Mapping Repository

 See instructions
 target glyph to the desired window or control on screen and drop it once a red frame appears around that window or control.
  button, and then move the mouse pointer to the desired object on screen. When a red frame appears around this object, press the