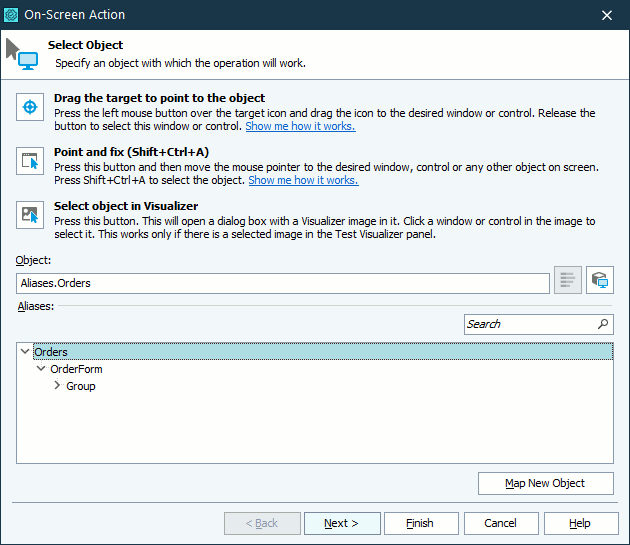
Keyword test operations that simulate user actions or call methods and properties have a parameter that specifies the object the operation will work with. The Select Object dialog is used to specify this object.

You can specify the object in one of the following ways:
-
Pick the object with the target glyph
Drag the target glyph (
 ) to the desired onscreen object and drop it once a red frame appears around the object.
To select an object in a mobile application, drag the target glyph to the desired object on the Mobile Screen (see Select an Object on the Mobile Screen).
-
Point to the object and fix
Click the
 button, activate the desired object in the application and position the mouse pointer over it. When a red frame appears around the object, press the Select object shortcut, Shift+Ctrl+A. (The shortcut can be changed in the Global Shortcuts options.)
To select an object in a mobile application, move the mouse pointer over the desired object on the Mobile Screen (see Select an Object on the Mobile Screen).
-
Enter the object name manually
Enter the full name, full mapped name or alias of the desired object in the Object box and press Enter.
For web objects: If cross-platform web testing is enabled in your project, the dialog will show the list of available locators (if any) for the specified web object. You can select the needed locator from the drop-down list.
For detailed instructions on specifying the object name, see Selecting Objects for Keyword Test Operations.
After specifying the object name, click OK to close the Select Object dialog and to apply the changes. Cancel will close the dialog without making any changes.
See Also
Selecting Objects for Keyword Test Operations
About Keyword Test Editor
Keyword Tests
