TestComplete integrates with both cloud and Enterprise editions of HipTest.
If you are using HipTest Enterprise, you have to configure the following settings to start working:
-
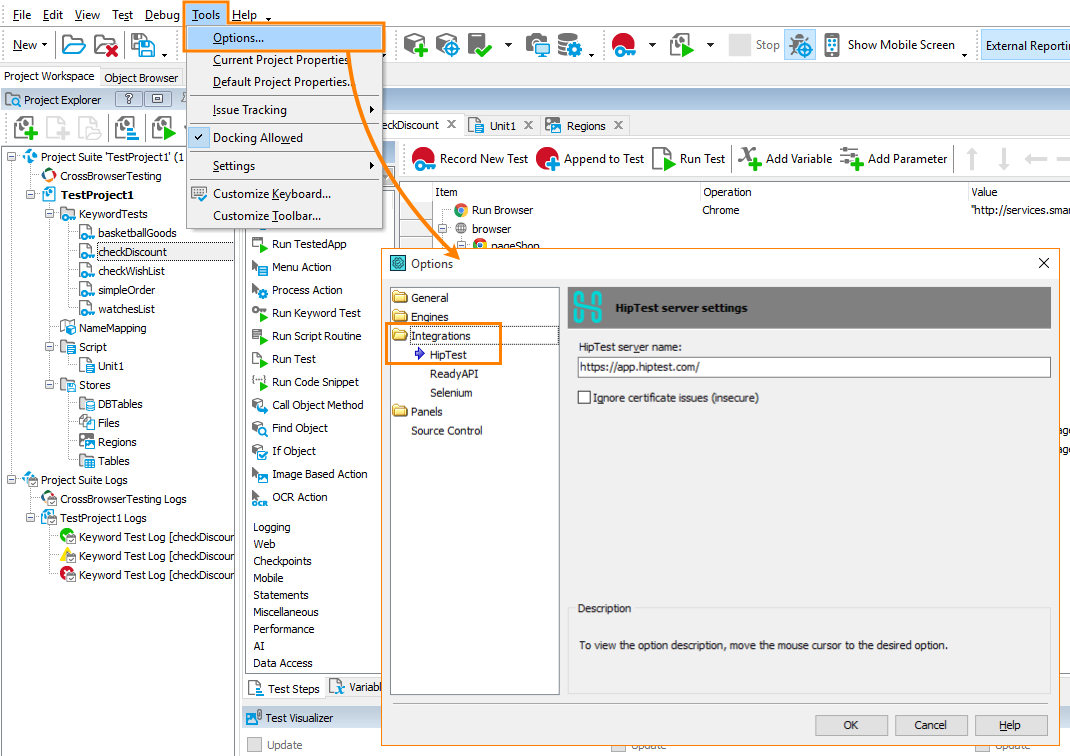
Open TestComplete’s HipTest options. To do this, select Tools > Options from the main menu and then choose Integrations > HipTest from the list of option groups on the left.
Note: You need to open the Tools > Options dialog, not HipTest properties of your project. -
In the dialog, in the HipTest server name box, enter the URL of your HipTest server. By default, it’s https://app.hiptest.com the URL of the cloud HipTest. You need to specify the address of your Enterprise HipTest instance.
-
(Optional) Some companies use self-signed SSL certificates. HipTest exchanges data with clients through HTTPS, and such certificates might cause connection errors. You can get such errors when TestComplete tries to connect to HipTest.
We’d recommend that you update your SSL certificate to one signed by respective Certificate Authority. As a workaround, you can also select the Ignore certificate issues check box in HipTest option. This way, TestComplete will ignore the errors, but your connection to HipTest will be unsecure.
After you set the options, click OK to save the changes and to close the dialog.
After that you can start working with HipTest:
- by importing HipTest scenarios at the time your create a TestComplete project, or
- by binding your project to HipTest.

