To run TestComplete tests during the release deployment, create a build that will include your test project and place your TestComplete test files to the needed output folder.
Requirements
You must have access to your team project:
-
To access the project from Visual Studio Team Explorer, you must have Microsoft Visual Studio 2015–2019 (Community, Enterprise or Professional) with the Team Explorer component.
– or –
-
To access the project directly from your web browser by using Web Portal:
-
For Azure DevOps Services (formerly known as Visual Studio Team Services or VSTS):
https://dev.azure.com/<Your_Azure_Account_Name>/<Project_Name>– or –
https://<Your_VSO_Account_Name>.visualstudio.com/<Project_Name>(if your organization has not moved to thedev.azure.comdomain yet) -
For On-Premises Azure DevOps Server and Team Foundation Server:
http://<Your_Server_Name>:8080/tfs/<Collection_Name>/<Project_Name>
You can find information on Web Portal at docs.microsoft.com/en-us/azure/devops/project/navigation/.
-
Configure a Build Definition
-
Open the web portal of your team project. You can navigate to it directly in your web browser, or you can open it from Team Explorer in Visual Studio.
-
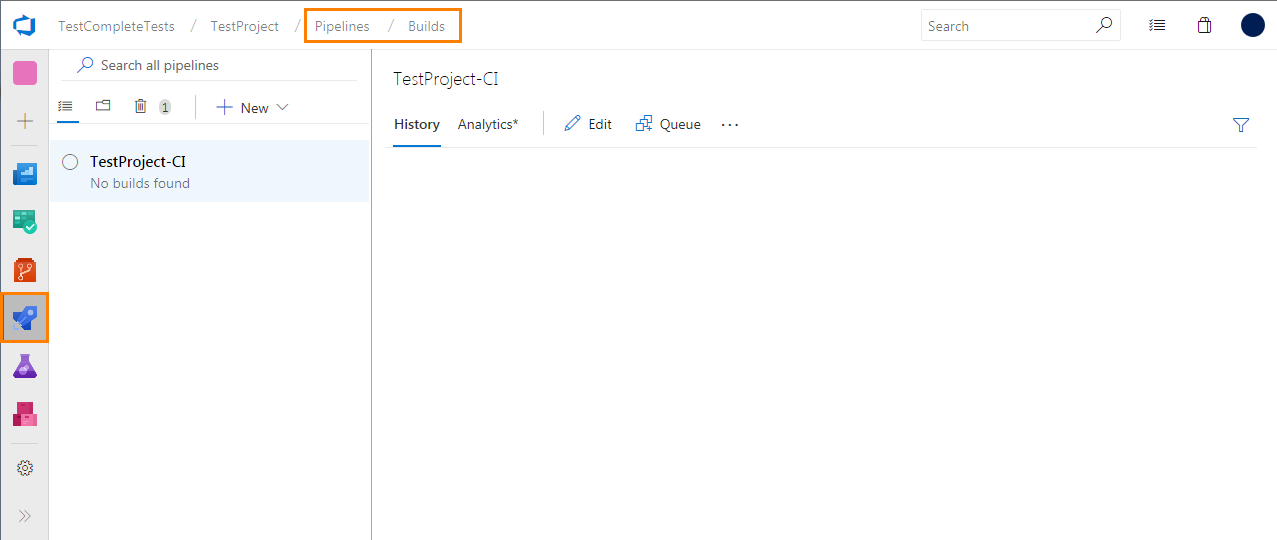
If you use Azure DevOps or Team Foundation Server 2018, navigate to the Pipelines > Builds page.
If you use Team Foundation Server 2015 Update 2–2017, navigate to the Build & Release > Builds page.
-
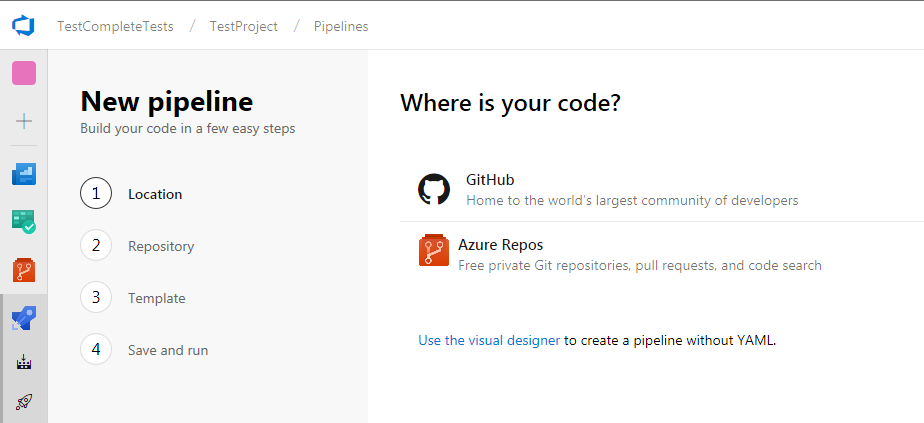
Open an existing build definition or click New to create a new build definition.
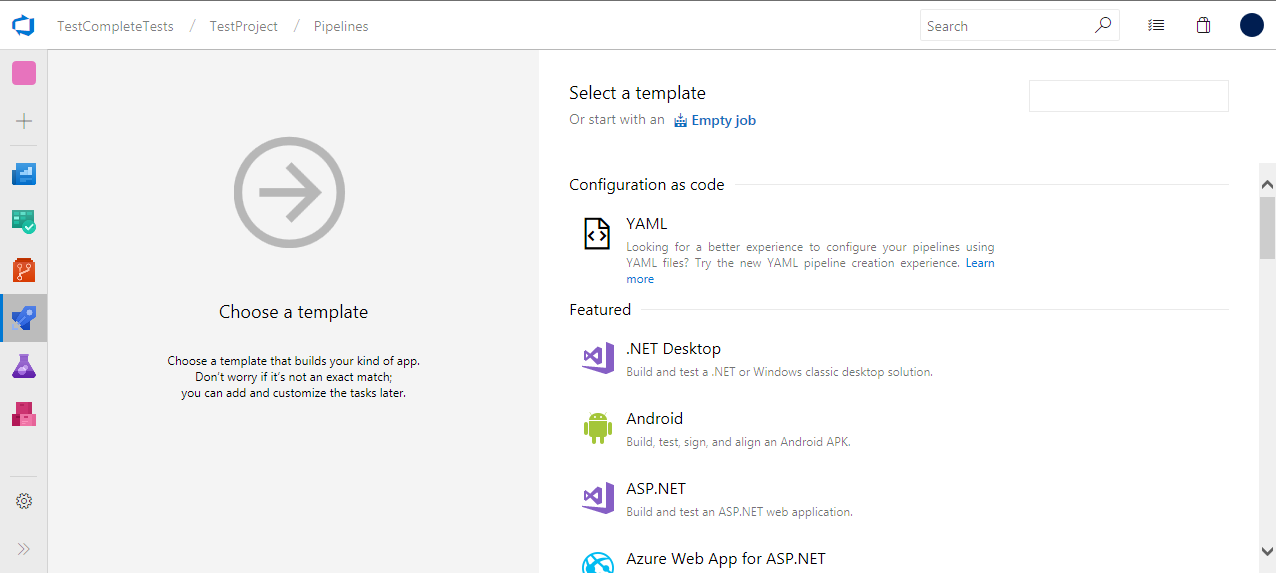
If you use Azure DevOps or Team Foundation Server 2018, you can create a YAML script that describes your pipeline, or you can click Use the visual designer to create a pipeline via a wizard.
In the wizard, configure the build process (the way the wizard looks depends on whether you use Azure DevOps Services, Azure DevOps Server 2019 or one of the supported Team Foundation Server versions):
-
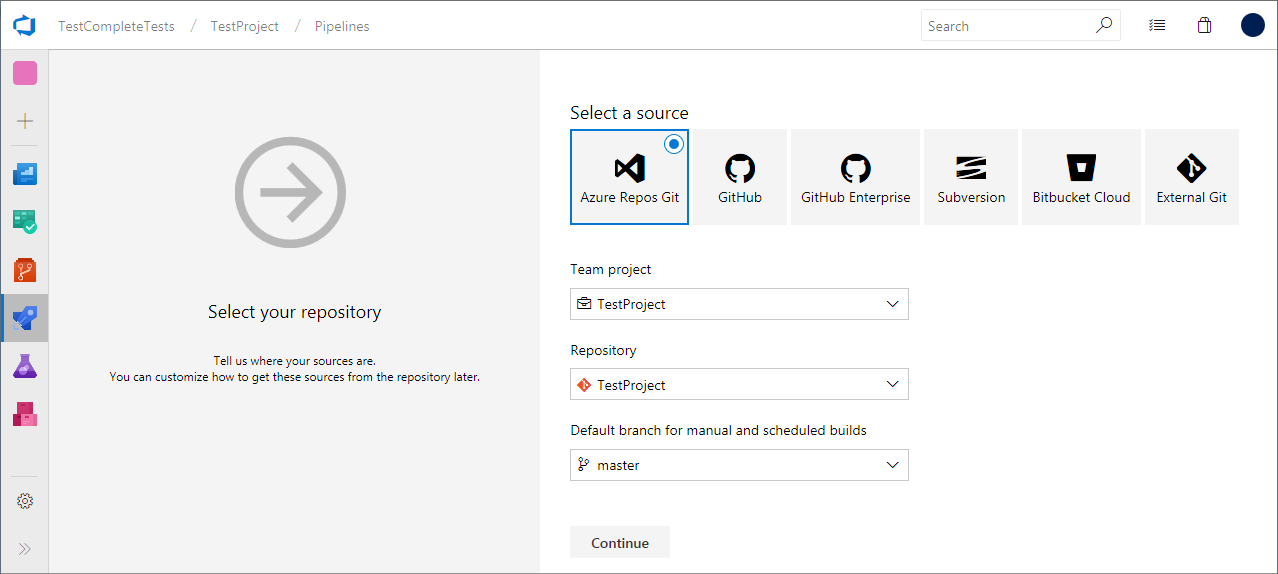
Configure your build process to get the needed files from your source control.
For example, if you use Git, specify the repository and branches that store your team project files:

Keep in mind that the Visual Studio test project stores the relative path to TestComplete tests. When mapping the TestComplete source control path, make sure to select a local folder to keep the relative path specified in the test project valid. -
Specify the details of the build process (what functions the team build will perform):
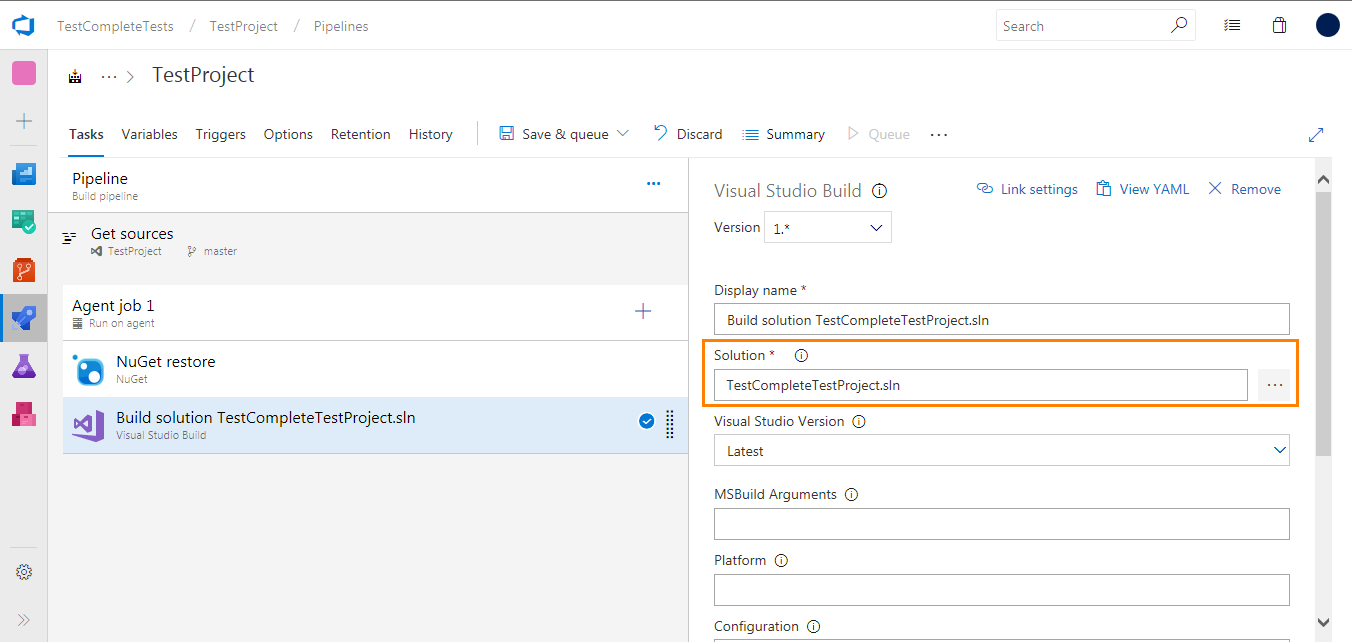
Add a task that will build your Visual Studio test project containing TestComplete tests:
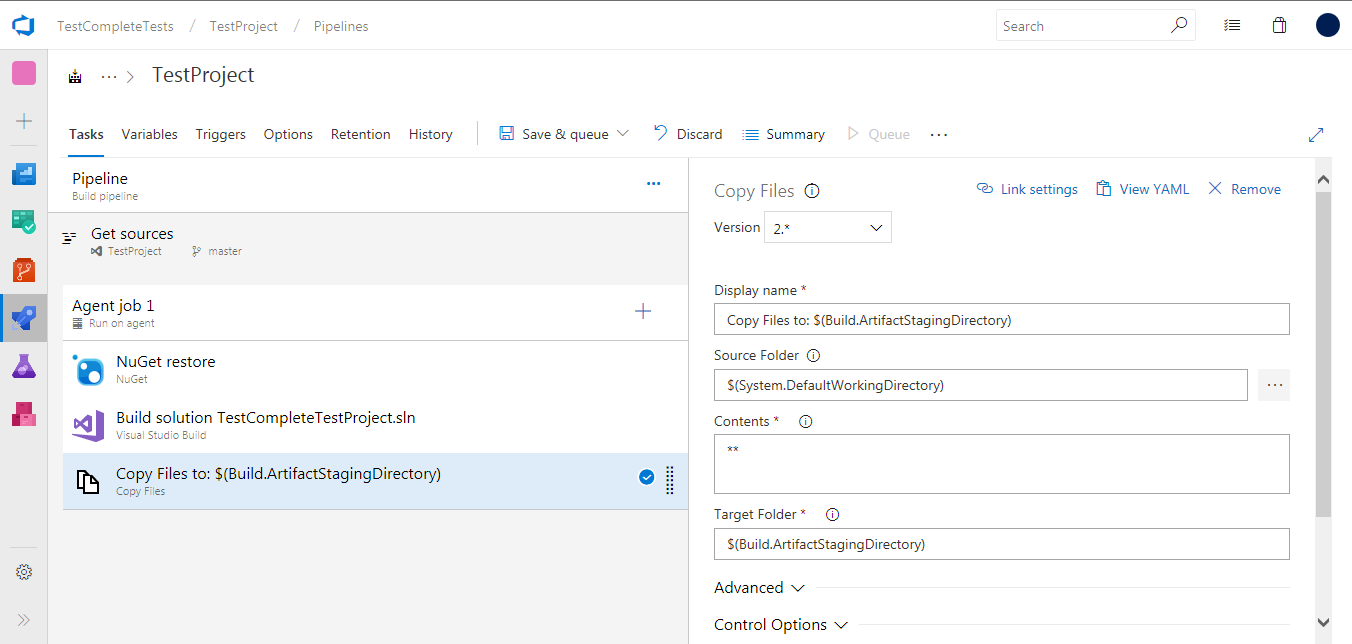
Add a task that will copy test files to an artifact staging folder on your build computer:
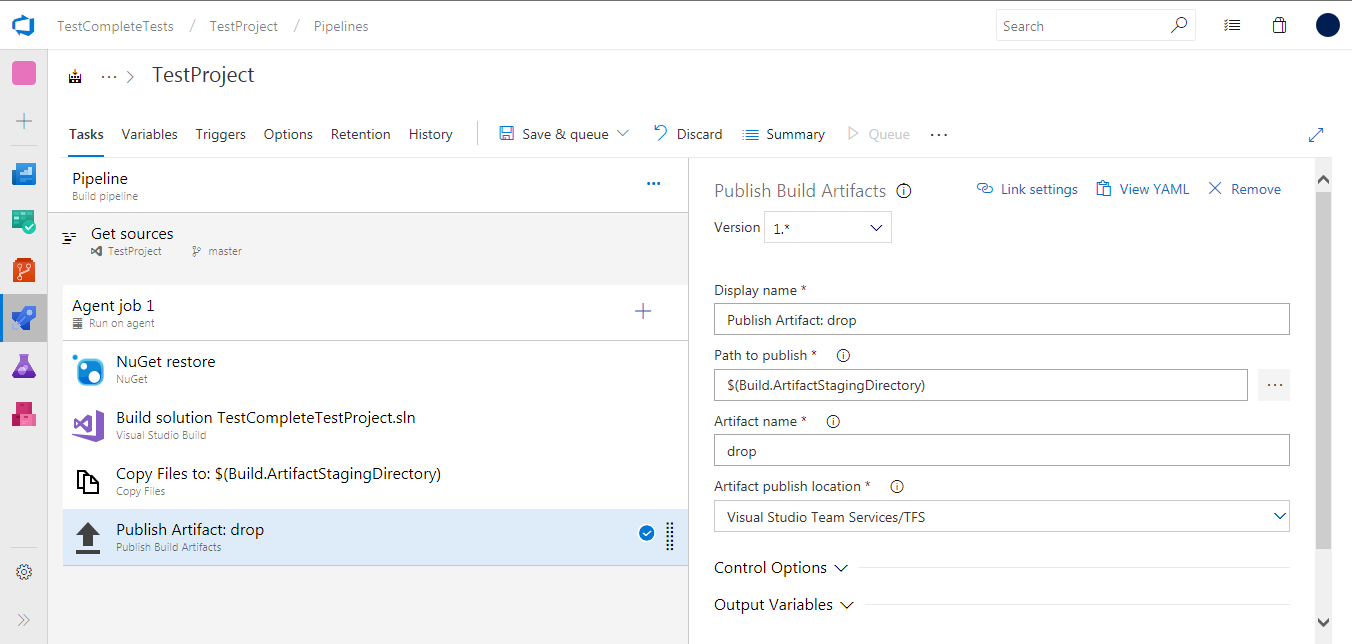
Add a task that will publish your artifacts to a needed location:
You can find information about tasks at docs.microsoft.com/en-us/azure/devops/pipelines/tasks/index.
-
If needed, specify other build properties. You can learn more at docs.microsoft.com/en-us/azure/devops/pipelines/index.
-
Save the changes.
Create a Build Instance
Run the created build definition to create a build that you will release:
-
On the Builds page, click Queue.
-
In the Queue Build dialog, configure the build run and click OK.
After the build is complete, create a release for it.
See Also
Creating a Build Containing TestComplete Tests
Defining a Release Process

 Requirements
 Prev
Prev