-
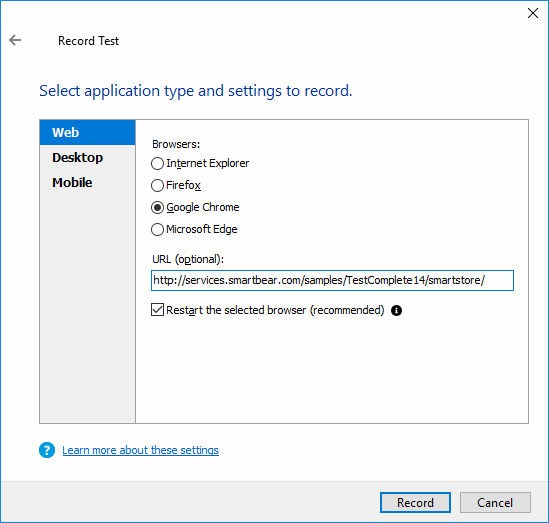
The wizard shows the second page where you can choose your tested application:

-
As we are going to test the SmartStore application located on a web page, click Web.
-
Select one of the supported web browsers:
-
Internet Explorer
-
Firefox
-
Google Chrome
-
Microsoft Edge
In this tutorial, we will use Google Chrome. You can use any other supported web browser.
-
-
In the URL text box, enter the following URL:
http://services.smartbear.com/samples/TestComplete14/smartstore/
-
In order for the test to run successfully, the state of the tested application must be the same at the beginning of the test run and at the beginning of test recording. If your tested application is running when you start test recording, its state may differ from its state during subsequent test runs (for example, some data may be loaded or dialogs may be open). That is why we recommend that you close all the running instances of your web browsers before starting test recording.
If any of the supported web browsers is running, the wizard will show the Restart the selected browser check box. Select the check box to command the wizard to close the web browser you have selected and to restart it automatically when recording starts.
(If any other web browser is running in your system, it will continue running.)
-
Click Record to complete the project creation and start recording.
See Also
About Tested Web Page
About Tested Applications
Adding Tested Applications

 Prev
Prev